Goal
Build your own wireless door security!
Setting up alerts for any intruders or unlocked doors!

Build your own wireless door security!
Setting up alerts for any intruders or unlocked doors!
2 x Microbit
1 x Breakout Board
1 x Crash Sensor
1 x Buzzer
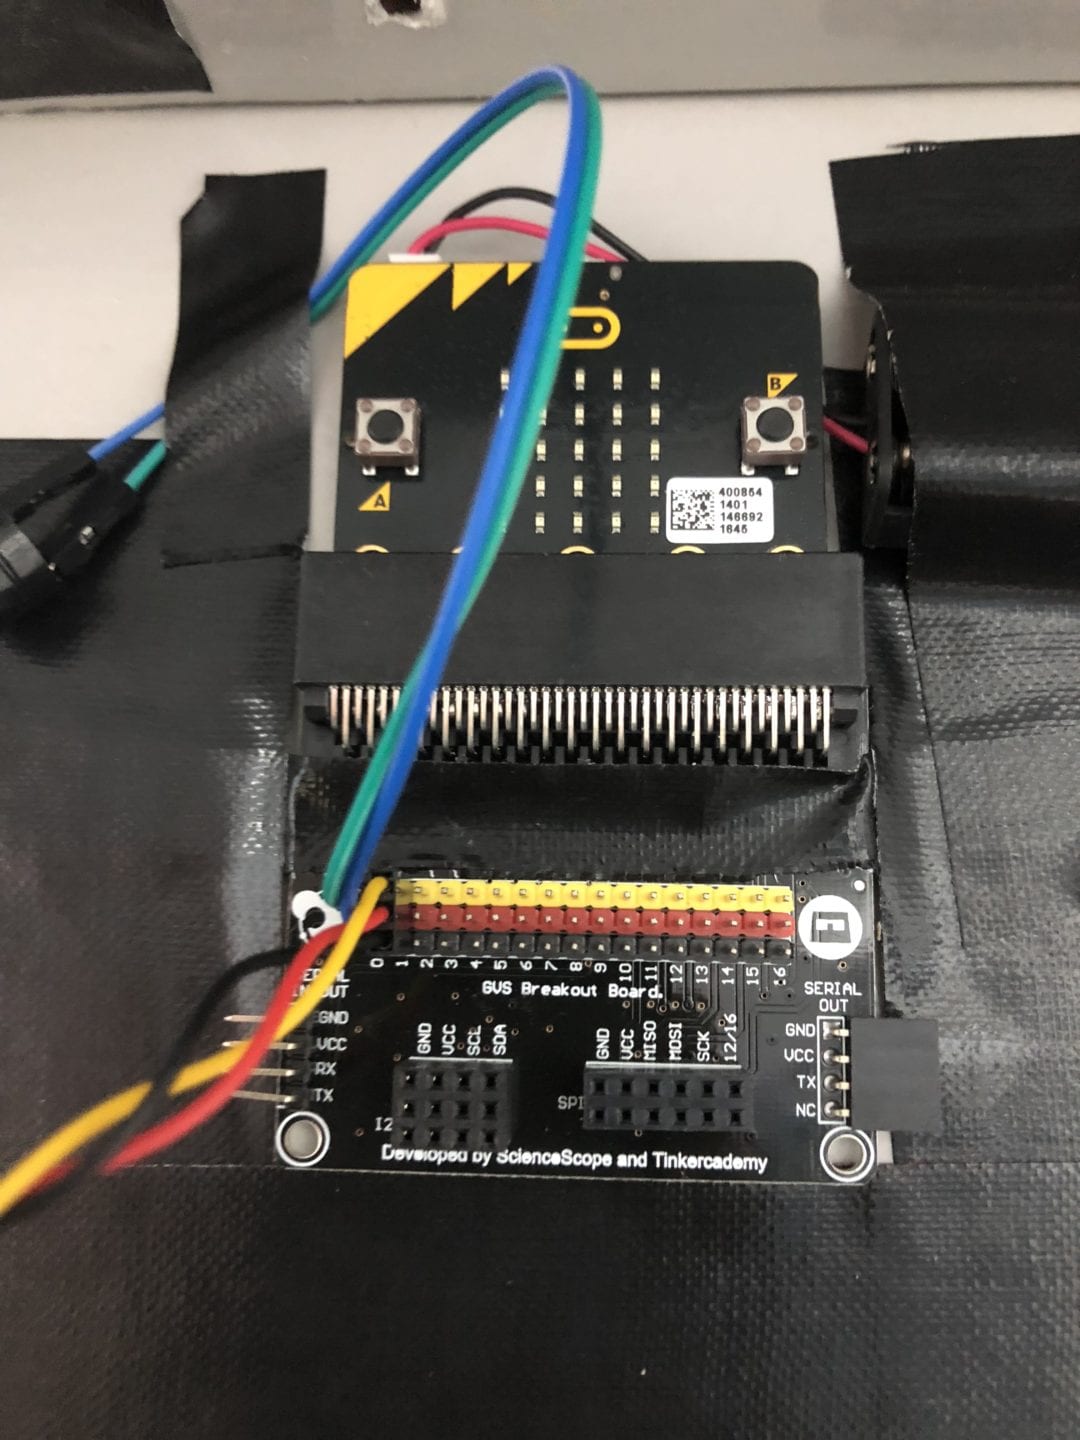
Slot one of the micro:bit into the breakout board.
Connect the Buzzer to Pin 0 of the breakout board and the crash sensor to Pin 1.
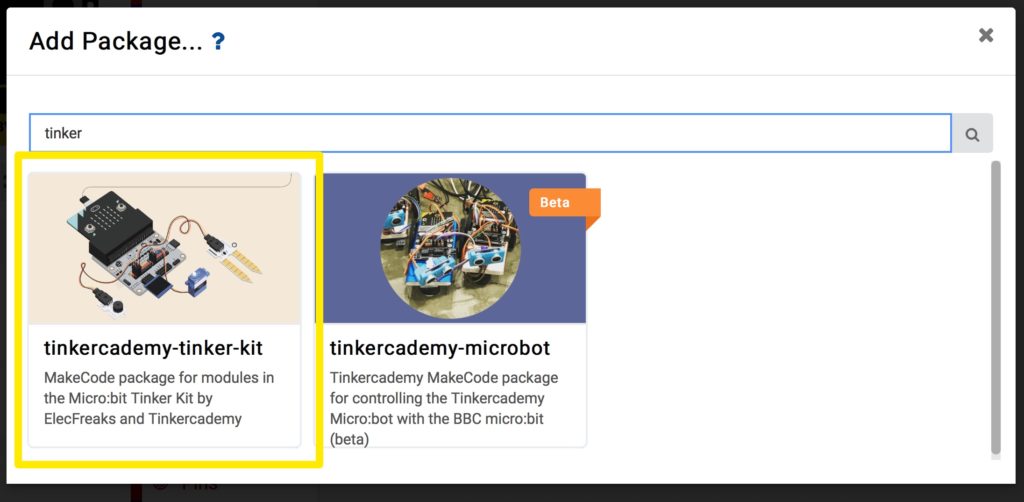
Before moving on to Step 2, make sure you download the “tinkercademy-tinker-kit” package.
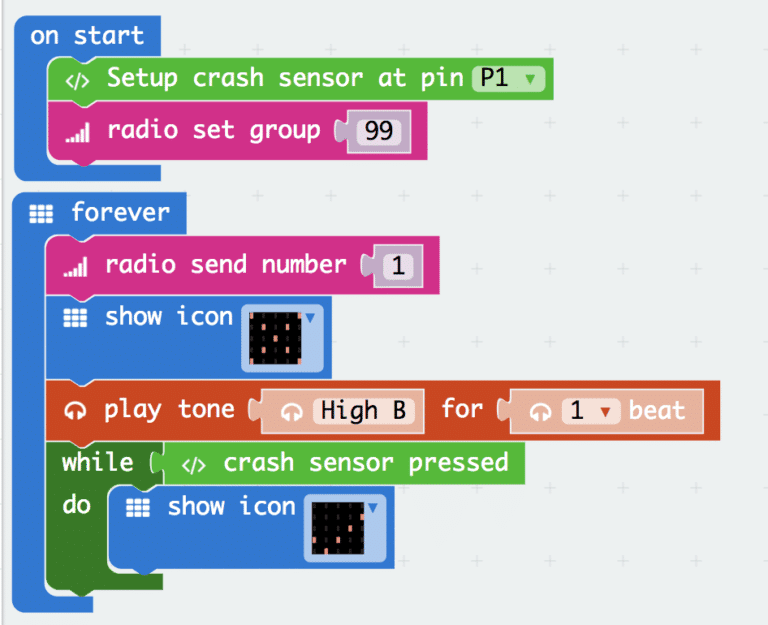
Drag these set of codes into your makecode platform and download it into the micro:bit connected to your breakout board.
Give the crash sensor a few press to see if your code is working correctly!
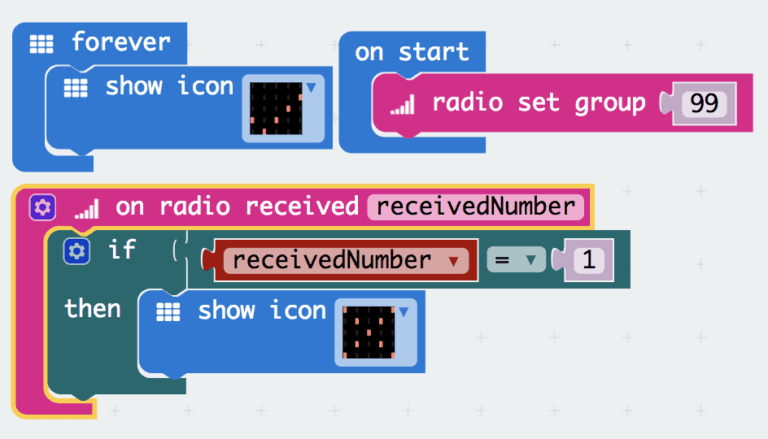
Download this set of codes for the second micro:bit (receiver).
Now give test out the crash sensor to see if the receiving micro:bit is working correctly!
Now that you have set up your very first wireless door security, you can try it with more than just 1 door!
Feel free to also add add other form of alerts on the receiving micro:bit to enhance your own security.