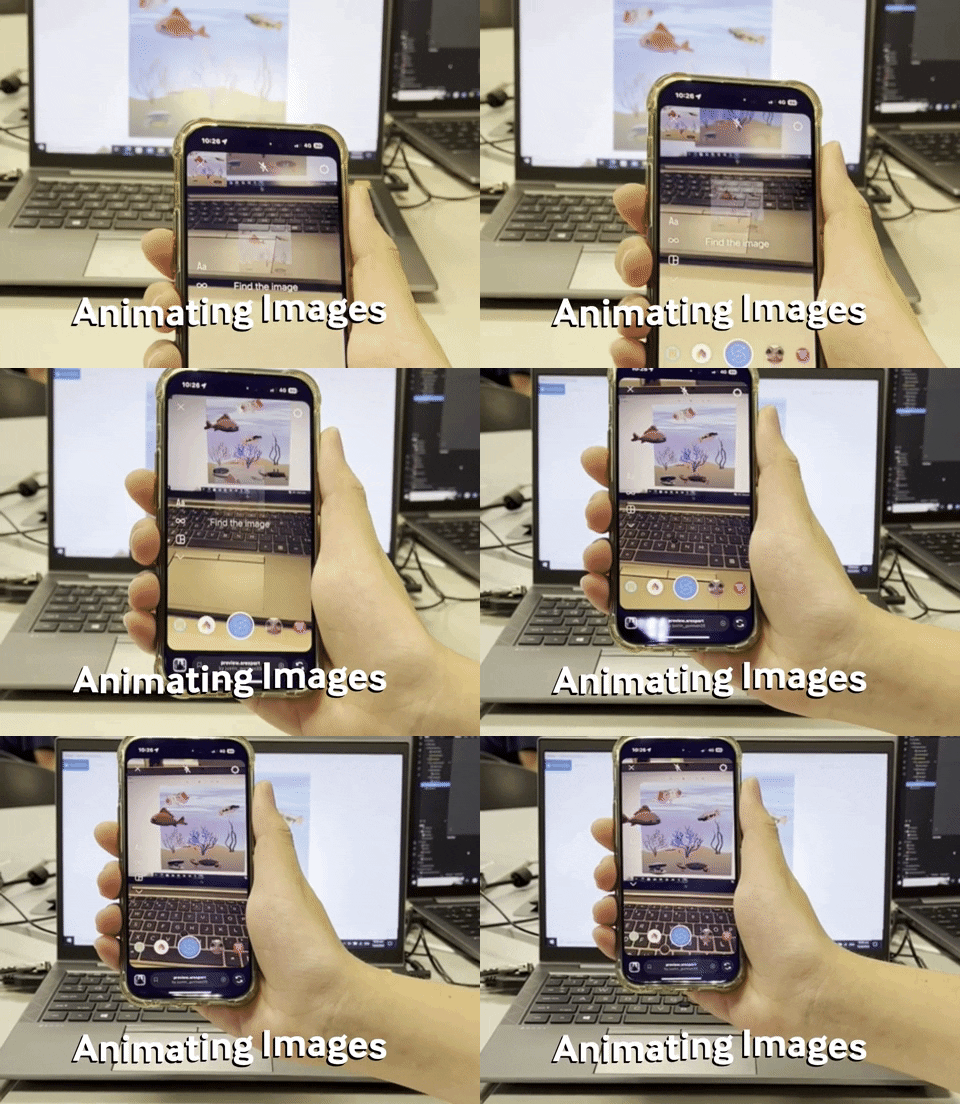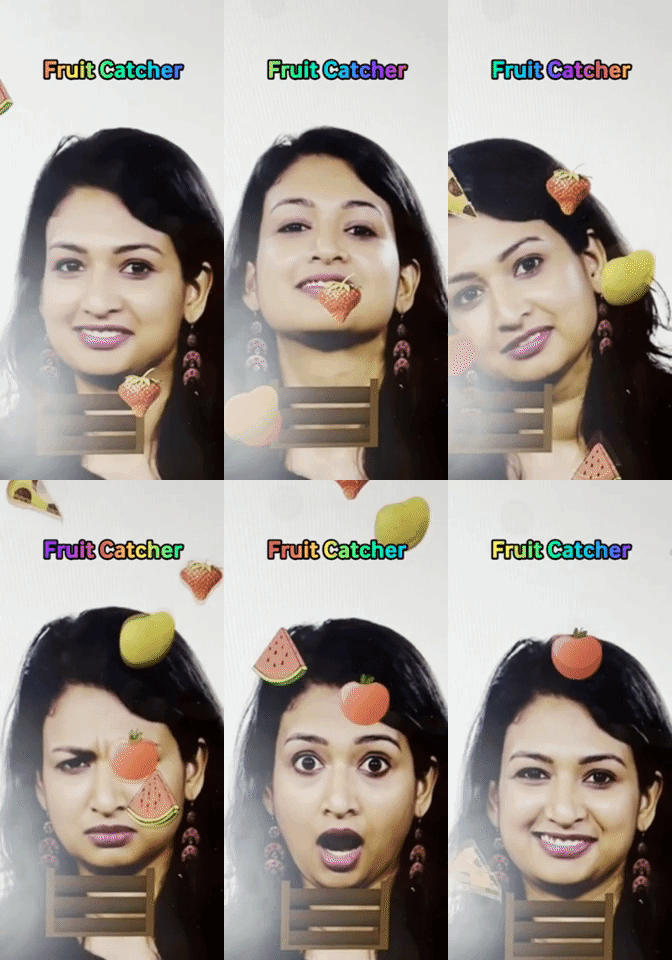
Step aside, ChatGPT, there’s a new player in town, and it’s about to propel us light-years ahead, blurring the lines between the real and virtual. If you haven’t already heard about it, the “era of spatial computing is here”.
Yes, we’re talking about Augmented Reality (AR) and Apple’s latest and greatest innovation — the Vision Pro. As mind-bending as it seems, Apple Vision Pro takes us one step closer to elevating our human potential and experiences.
No more 2D videos, or flat apps on a screen. We can soon create 3D videos and have our apps hang out with us in our living rooms. We also won’t be limited by our screens anymore. Want to watch a movie stretching across your bedroom wall, you can with Vision Pro. We’re closer than ever to a profound new way of work, play and life.
But how is this relevant to you? Of course, creating 3D videos or watching movies on a larger-than-life screen sounds fabulous, but how will these affect you if you can’t afford to cough up $3,499 for a Vision Pro?
AR experiences don’t necessarily have to be costly. You can create completely personalised AR experiences using just your laptop and a freely available tool — Meta Spark Studio.
Here’s how!
THINGS YOU’LL NEED
First off, you’ll need a few assets to get started:
- An image* you want to superimpose on your face (e.g. a hat, sunglasses, etc.)
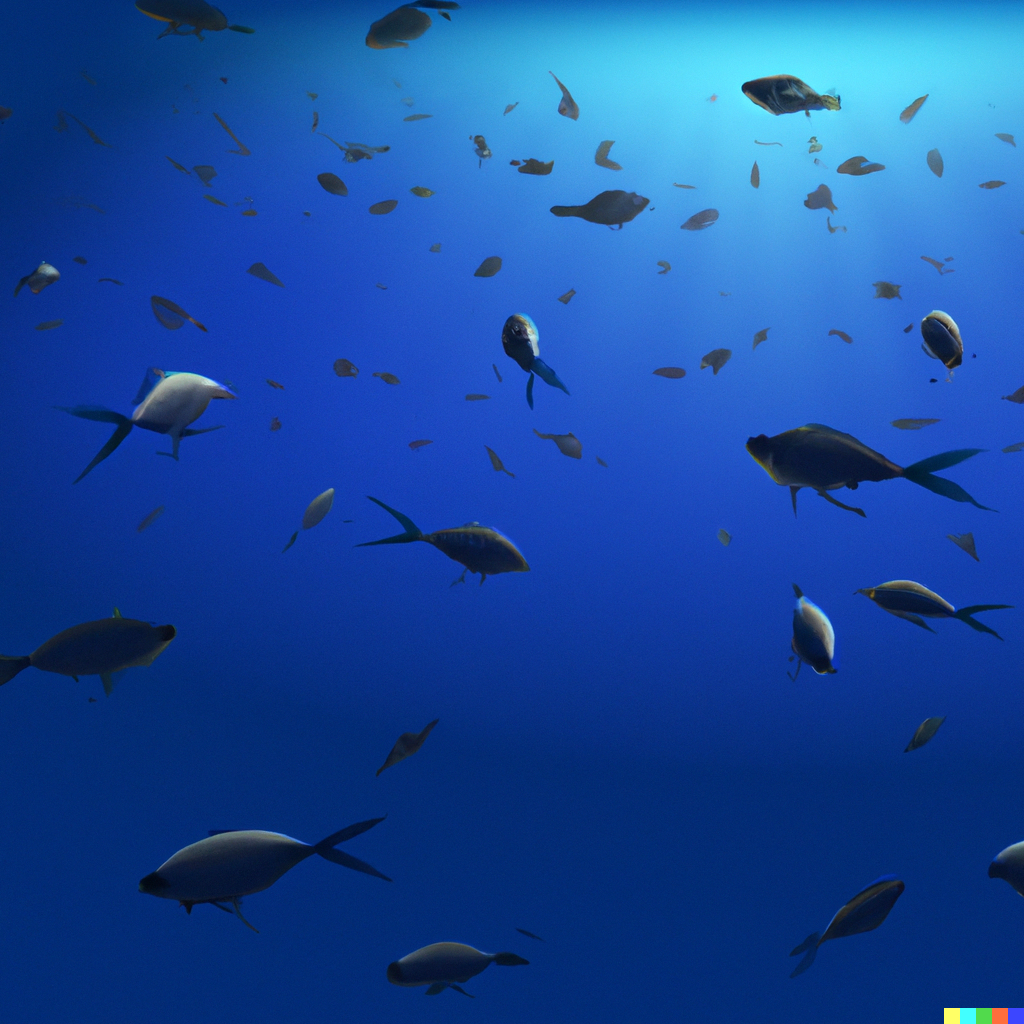
- A background image that will display behind you, and
- Images* of any foreground objects you want to appear in your scene
*Note: Images apart from the background image should have transparent backgrounds!
Next, you’ll need to download Meta Spark Studio. Now you’re ready to get started!
STEP 1: FACE TRACKING
Face tracking is really easy!
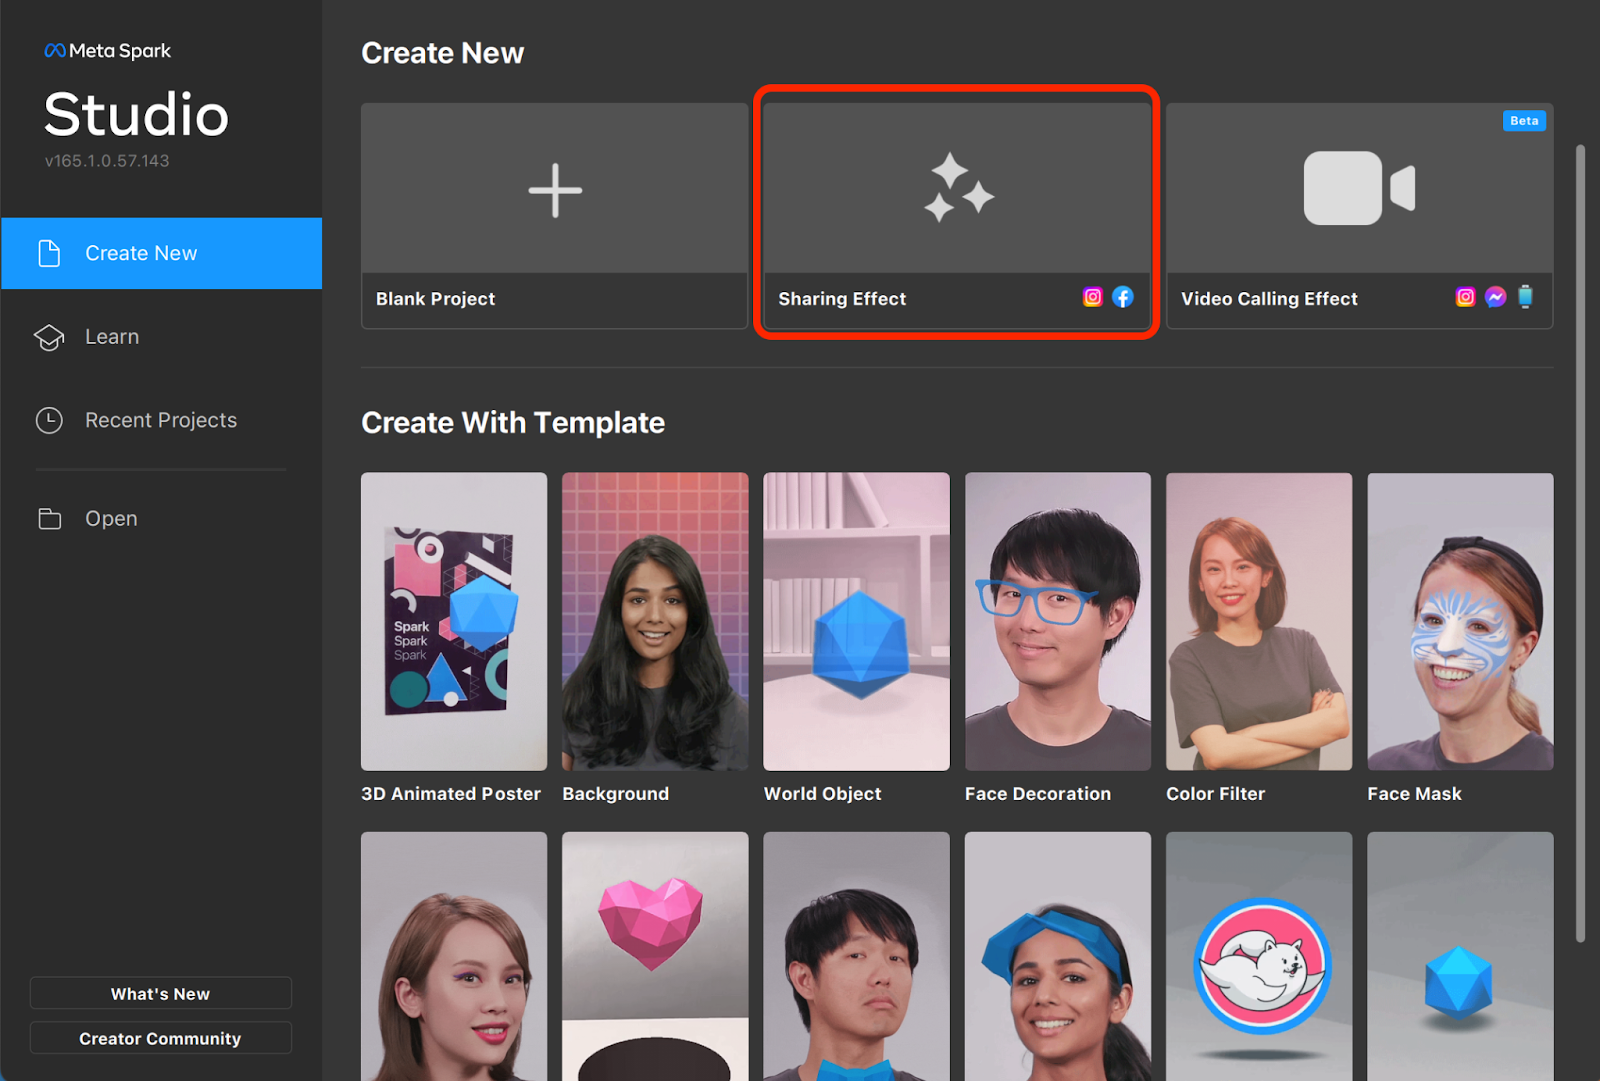
Begin by creating a Sharing Effect and add your image to the project. If you don’t have an image, you could search for a free downloadable image in the AR library.
Then create a Face Tracker in your scene. This will automatically detect a face in your scene.
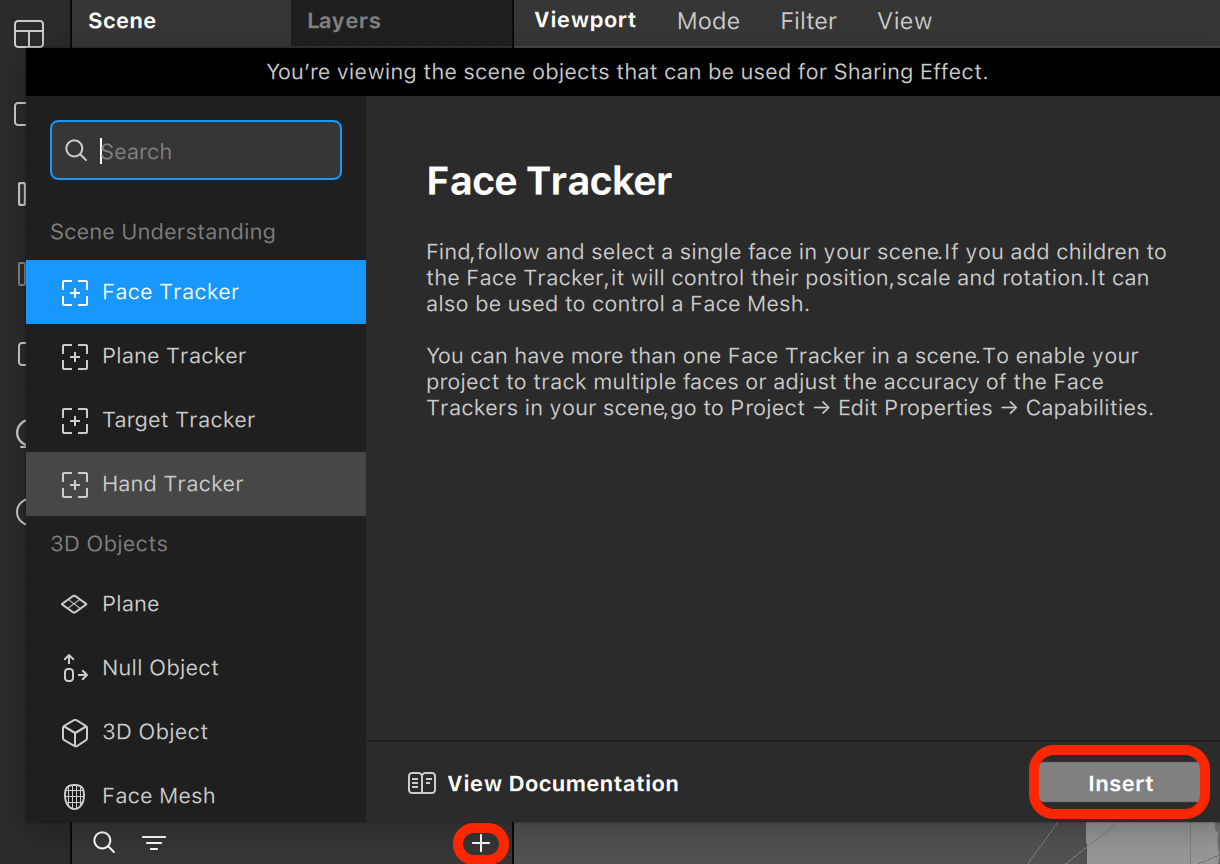
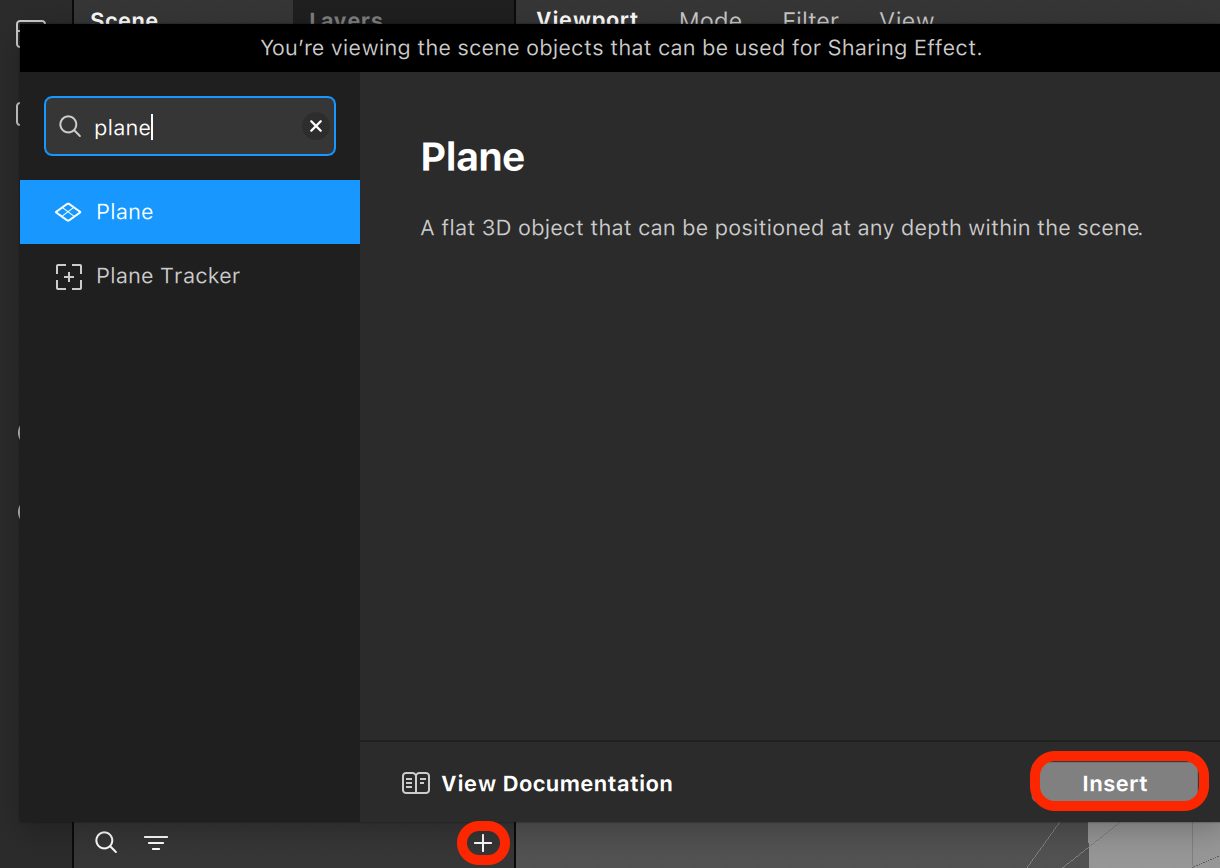
Thirdly, create a Plane object as a child object of your faceTracker and create a new material in your Assets window.
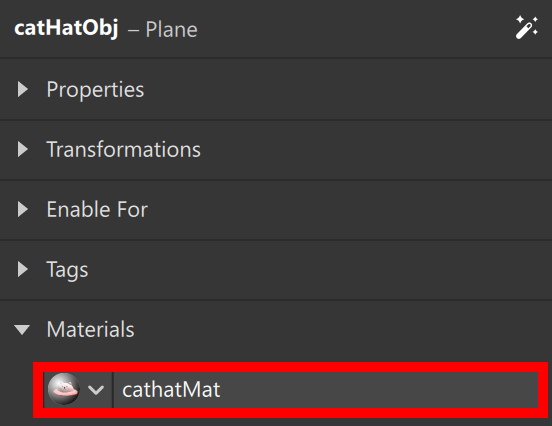
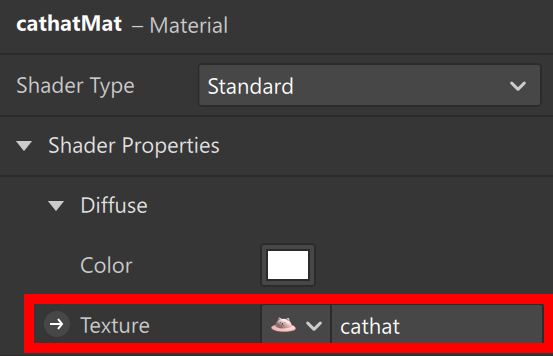
Assign the image you uploaded as the texture of the material; then assign the material to your Plane object. You should now see your image appearing in your scene! In the below example, my image is called catHat, my material is called catHatMat, and my scene object is called catHatObj:
You’ll most likely need to edit the basic transformations of the Plane object too — these include the scale (making it bigger or smaller), the position (along the x, y, and z, axes), and the rotation (to change which direction it’s facing.) There’s no single correct way to position these — feel free to try it out and figure out what looks best for your scene!
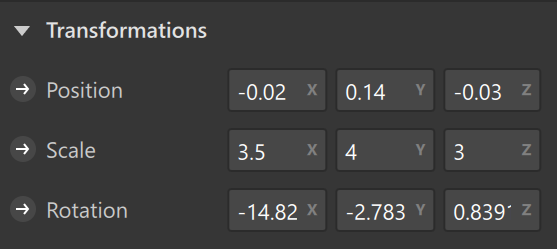
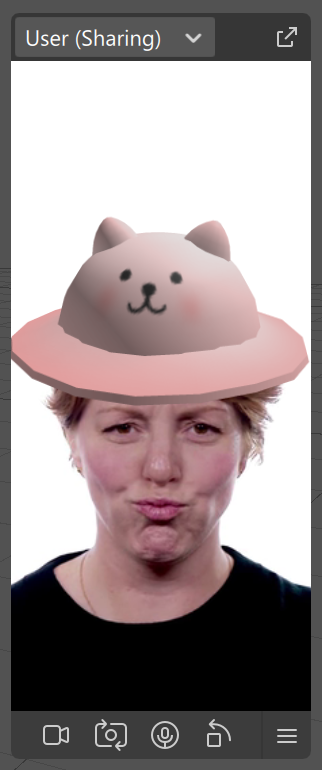
STEP 2: BACKGROUND AND FOREGROUND DETAILS
To get a background to appear behind the user, we need to apply background segmentation to separate the user from the camera shot.
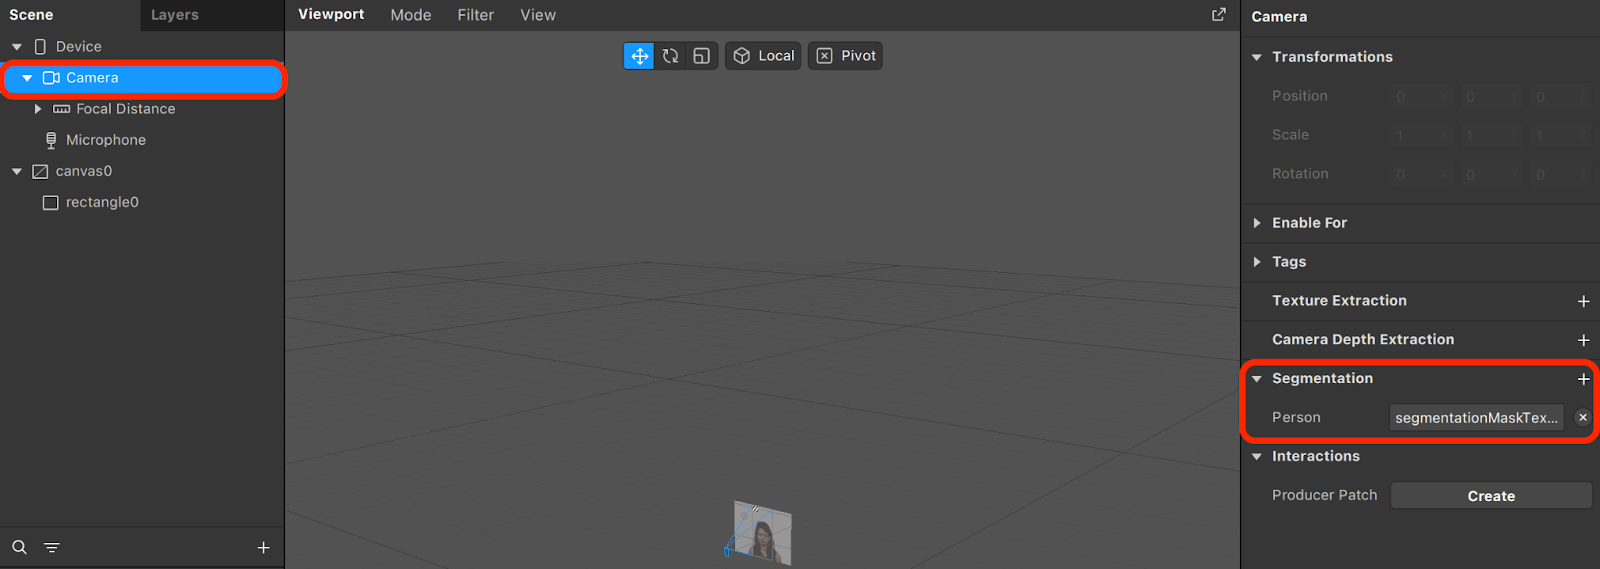
We also add a canvas, on which we will place our person segmentation and the background (using rectangle objects).
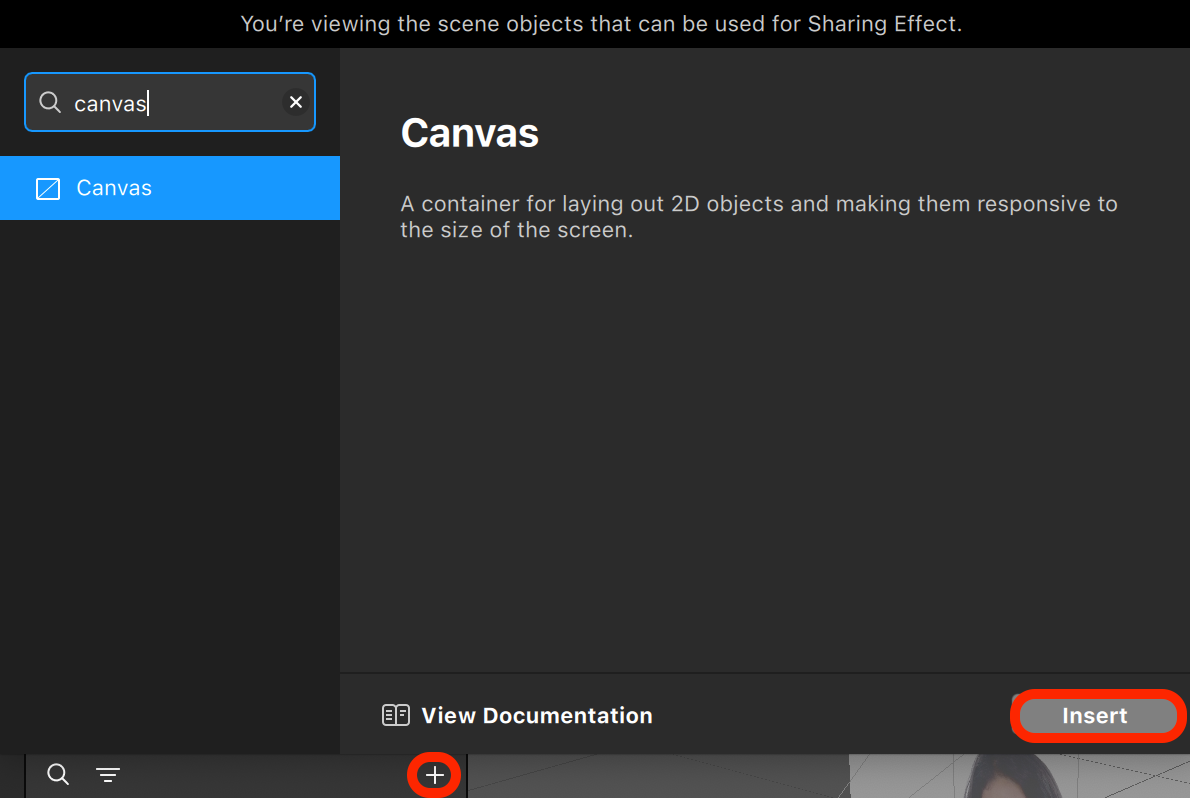
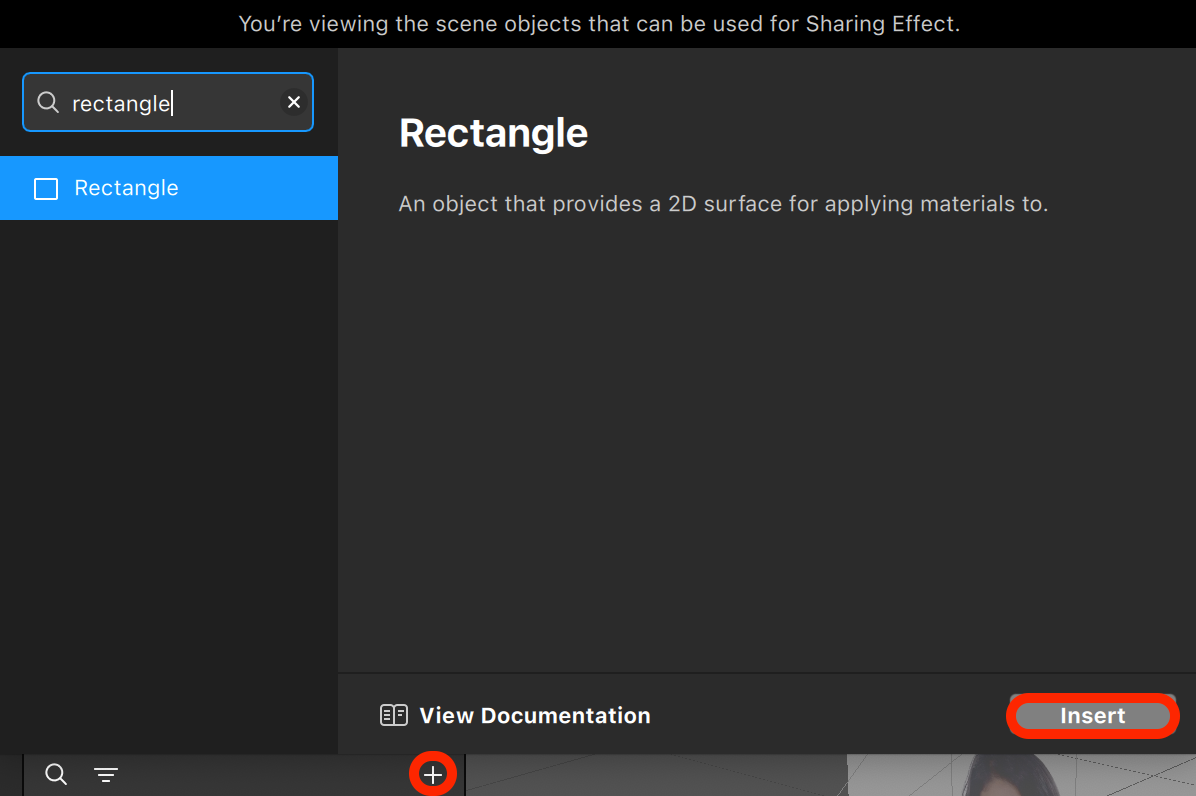
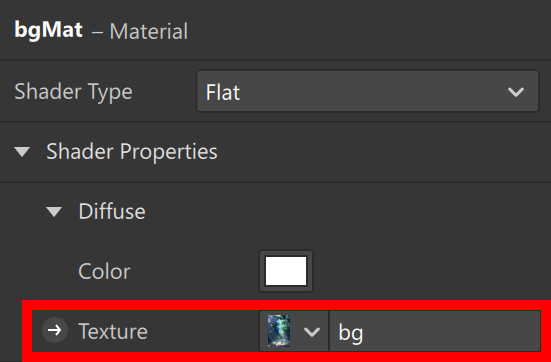
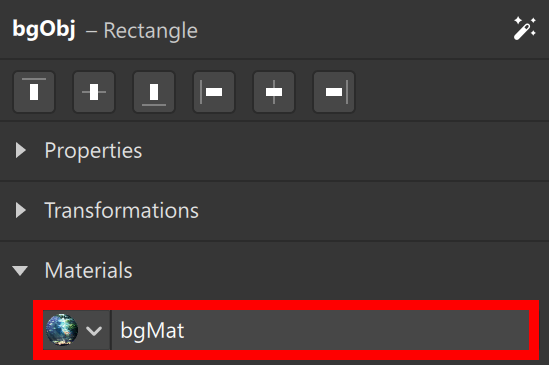
We need to do the usual process of adding the background image to our project, then assigning it to a material, and finally assigning the material to a rectangle object. In the example below, my background image is named bg while my material is named bgMat, and my scene object is named bgObj.
With a little customisation of the scene hierarchy, we now have a background appearing behind the user!
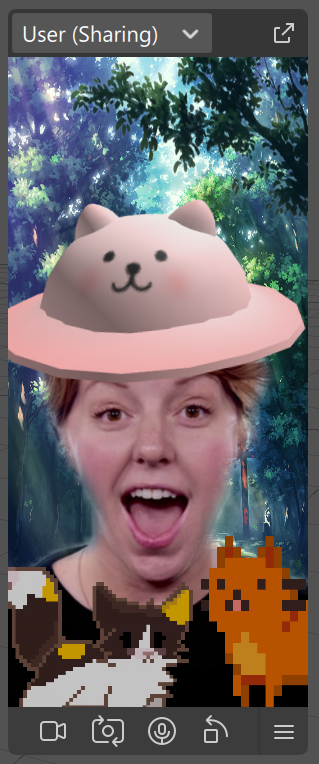
Finally, adding foreground objects is easy — just follow the same steps again: add your images, assign them as textures to two new materials, and then assign the materials to two new rectangle objects in your scene! As always, you can customise the scale and position as needed.
STEP 3: ANIMATING ASSETS
You can also add animation to your scene by extracting the frames of an animated gif (or drawing them yourself!).
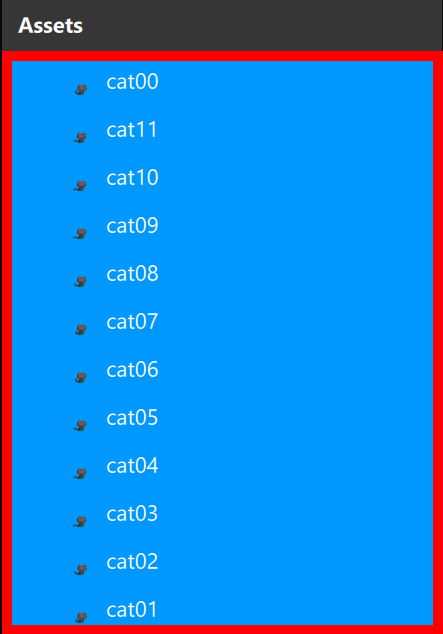
Here, we’ve taken a gif of a cat sprite, extracted the frames using a free website, and then added them to our project.
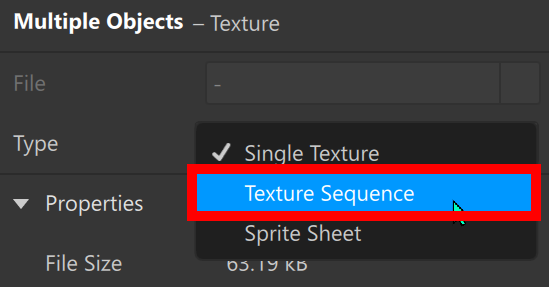
Once in your assets window, make sure you select ALL the image frames. Once selected, in the properties window, change the Type to Texture Sequence.
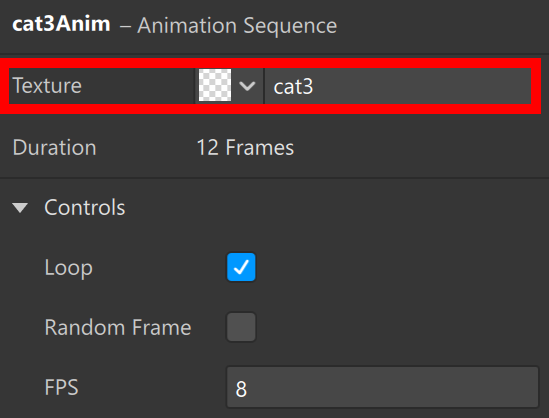
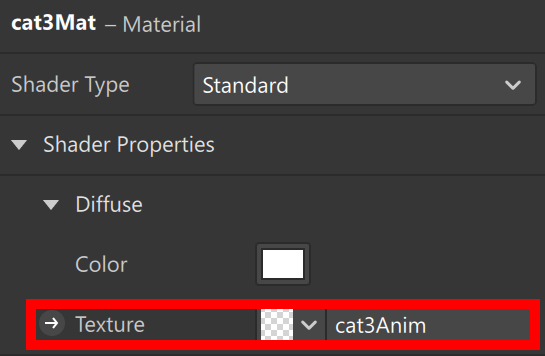
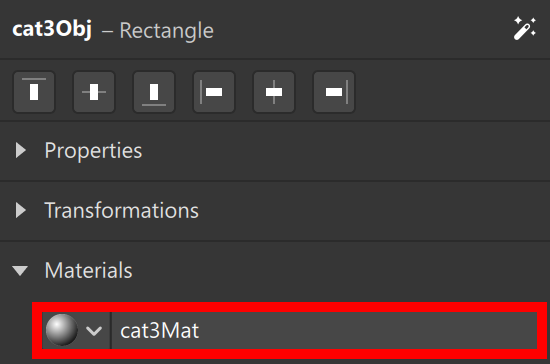
Now we do the usual process, but with one extra step at the start: create a new Animation Sequence in your Asset window and assign your animated texture. Then assign your animation sequence to a new material, and assign your material to a rectangle object in your scene. Then we’re all done! Note in the Animation Sequence properties you can also change the FPS property depending on how fast you want your animation to run.
In our project below, the animated image is named cat3, the animation sequence is named cat3Anim, the material is named cat3Mat, and the scene object is named cat3Obj.
STEP 4: PUTTING IT ALL TOGETHER
Finally, we’ve created a full scene!
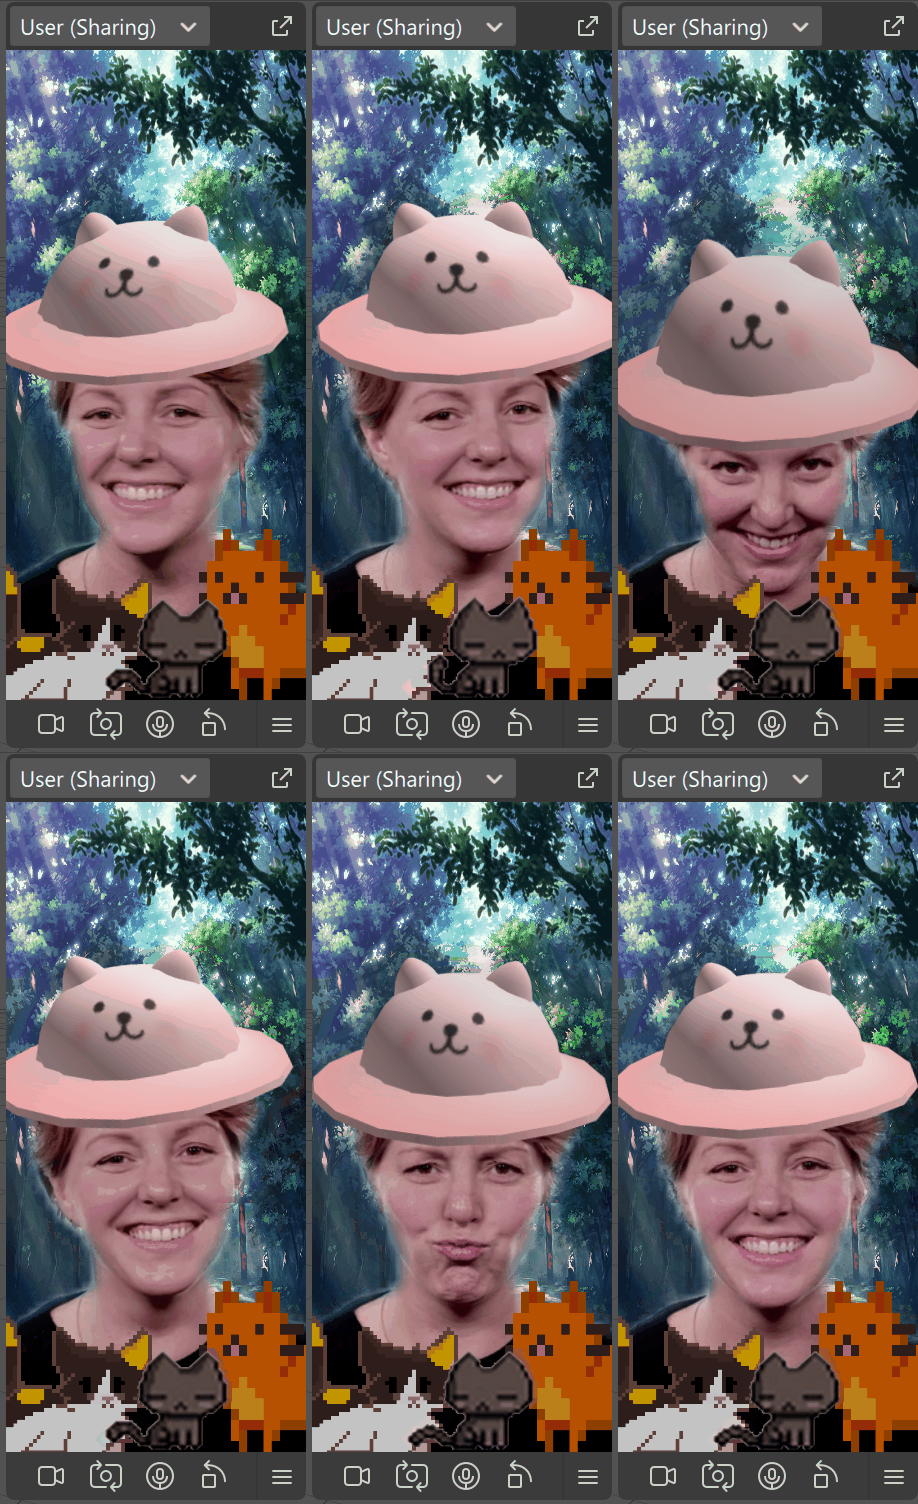
We’ve focused on using 2D images for this project, but you can also do the same with 3D objects — just download free .fbx 3D model files online and import them into Meta Spark.
Common Pitfalls
Don’t forget to uncheck “Use Depth Test” in the Advanced Render Options for any materials that you want to always appear in front of other objects. We do this with our 3 cats in the scene so that they always appear in front of the user.
Tips and Tricks
Once you get familiar with the basic process, adding new images and displaying them in your scene is easy! To recap, the basic process is:
- Add an image asset
- Create a new material and assign the image as a texture
- Create an object in your scene and assign the material
And that’s all it takes to display the object! Afterwards, you can customise the object properties such as position, scale, etc. to perfect your scene.
WANT TO LEARN MORE?
Our team runs a Meta Spark Studio Bootcamp for all ages. If you or your organisation is interested in learning how to create immersive and engaging AR experiences, reach out to us at hello@tk.sg and we’ll be glad to design a comprehensive bootcamp that fits your specific needs!
SAMPLE PROJECTS YOU’LL MAKE