

Yixue is a multi-talented intern, who came to us as a third year undergraduate from the School of Arts, Design, and Media at the Nanyang Technological University. Apart from sharing all kinds of experience from having worked in the media industry, he’s been an amazing help in helping to bring our book kit—on the Tinkerer’s Guide to the micro:bit Galaxy — to life using electronics, maker tools, and cardboard.
As a third year undergrad over at NTU ADM, I have enrolled in a 10 week internship over at Tinkertanker, and very gladly so. With an interest in electronics and woodworking, my foray into cardboard design has been interesting during this short stint, and have most definitely become part of my arsenal of tools in future projects..
Technology-focused classes using modern micro-controllers like Arduino and Microbit are common place and essential in today’s STEAM-focused curriculums, but the supporting ‘construction’ around such projects require a decent level amount of basic engineering and building skills.
Thus, my main focus during this 10-week stint is to help kickstart and develop a set of cardboard designs. Hopefully this alleviates time spent on crafting, thus dedicating more focus and time to the technology aspect.
Cardboard is chosen as the main medium due to low cost, flexibility and availability.
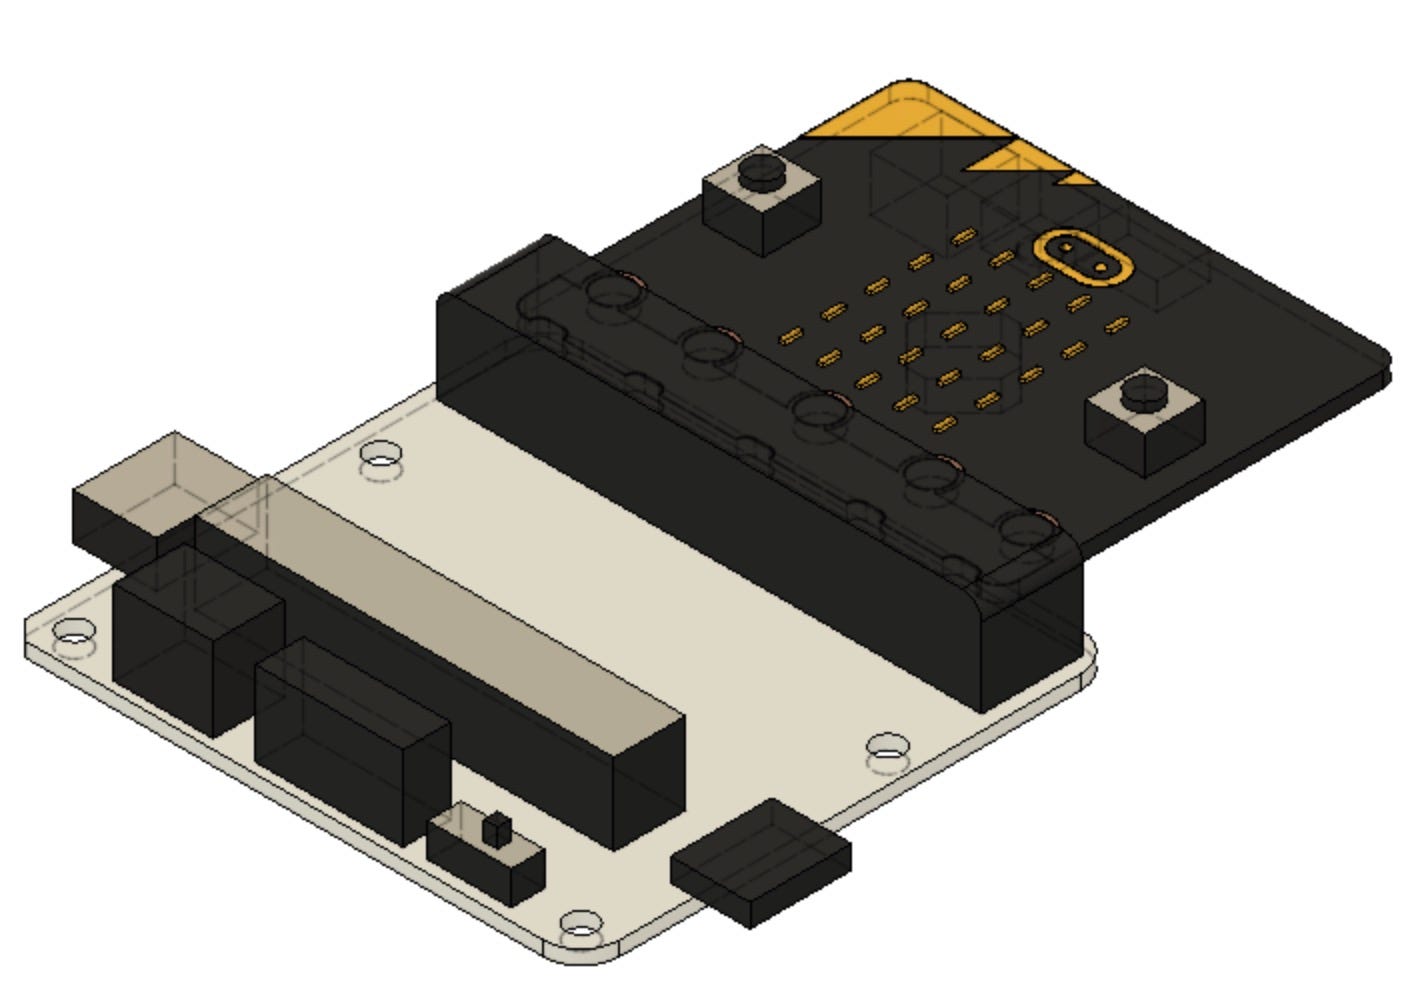
Dimensionally accurate(enough for cardboard) model of Microbit + GVS board assembly
While familiarising myself with the in-house laser-cutter and other power tools, I also spent considerable time modelling (in CAD) 3D representations of electronic components. This was an integral part of the process as it allows me to position everything accurately in 3d space and create corresponding cardboard models that can integrate well with the electronic components. The software’s sheet metal module was utilised in designing 3d cardboard models, before unfolding and converting them into flat vectors.
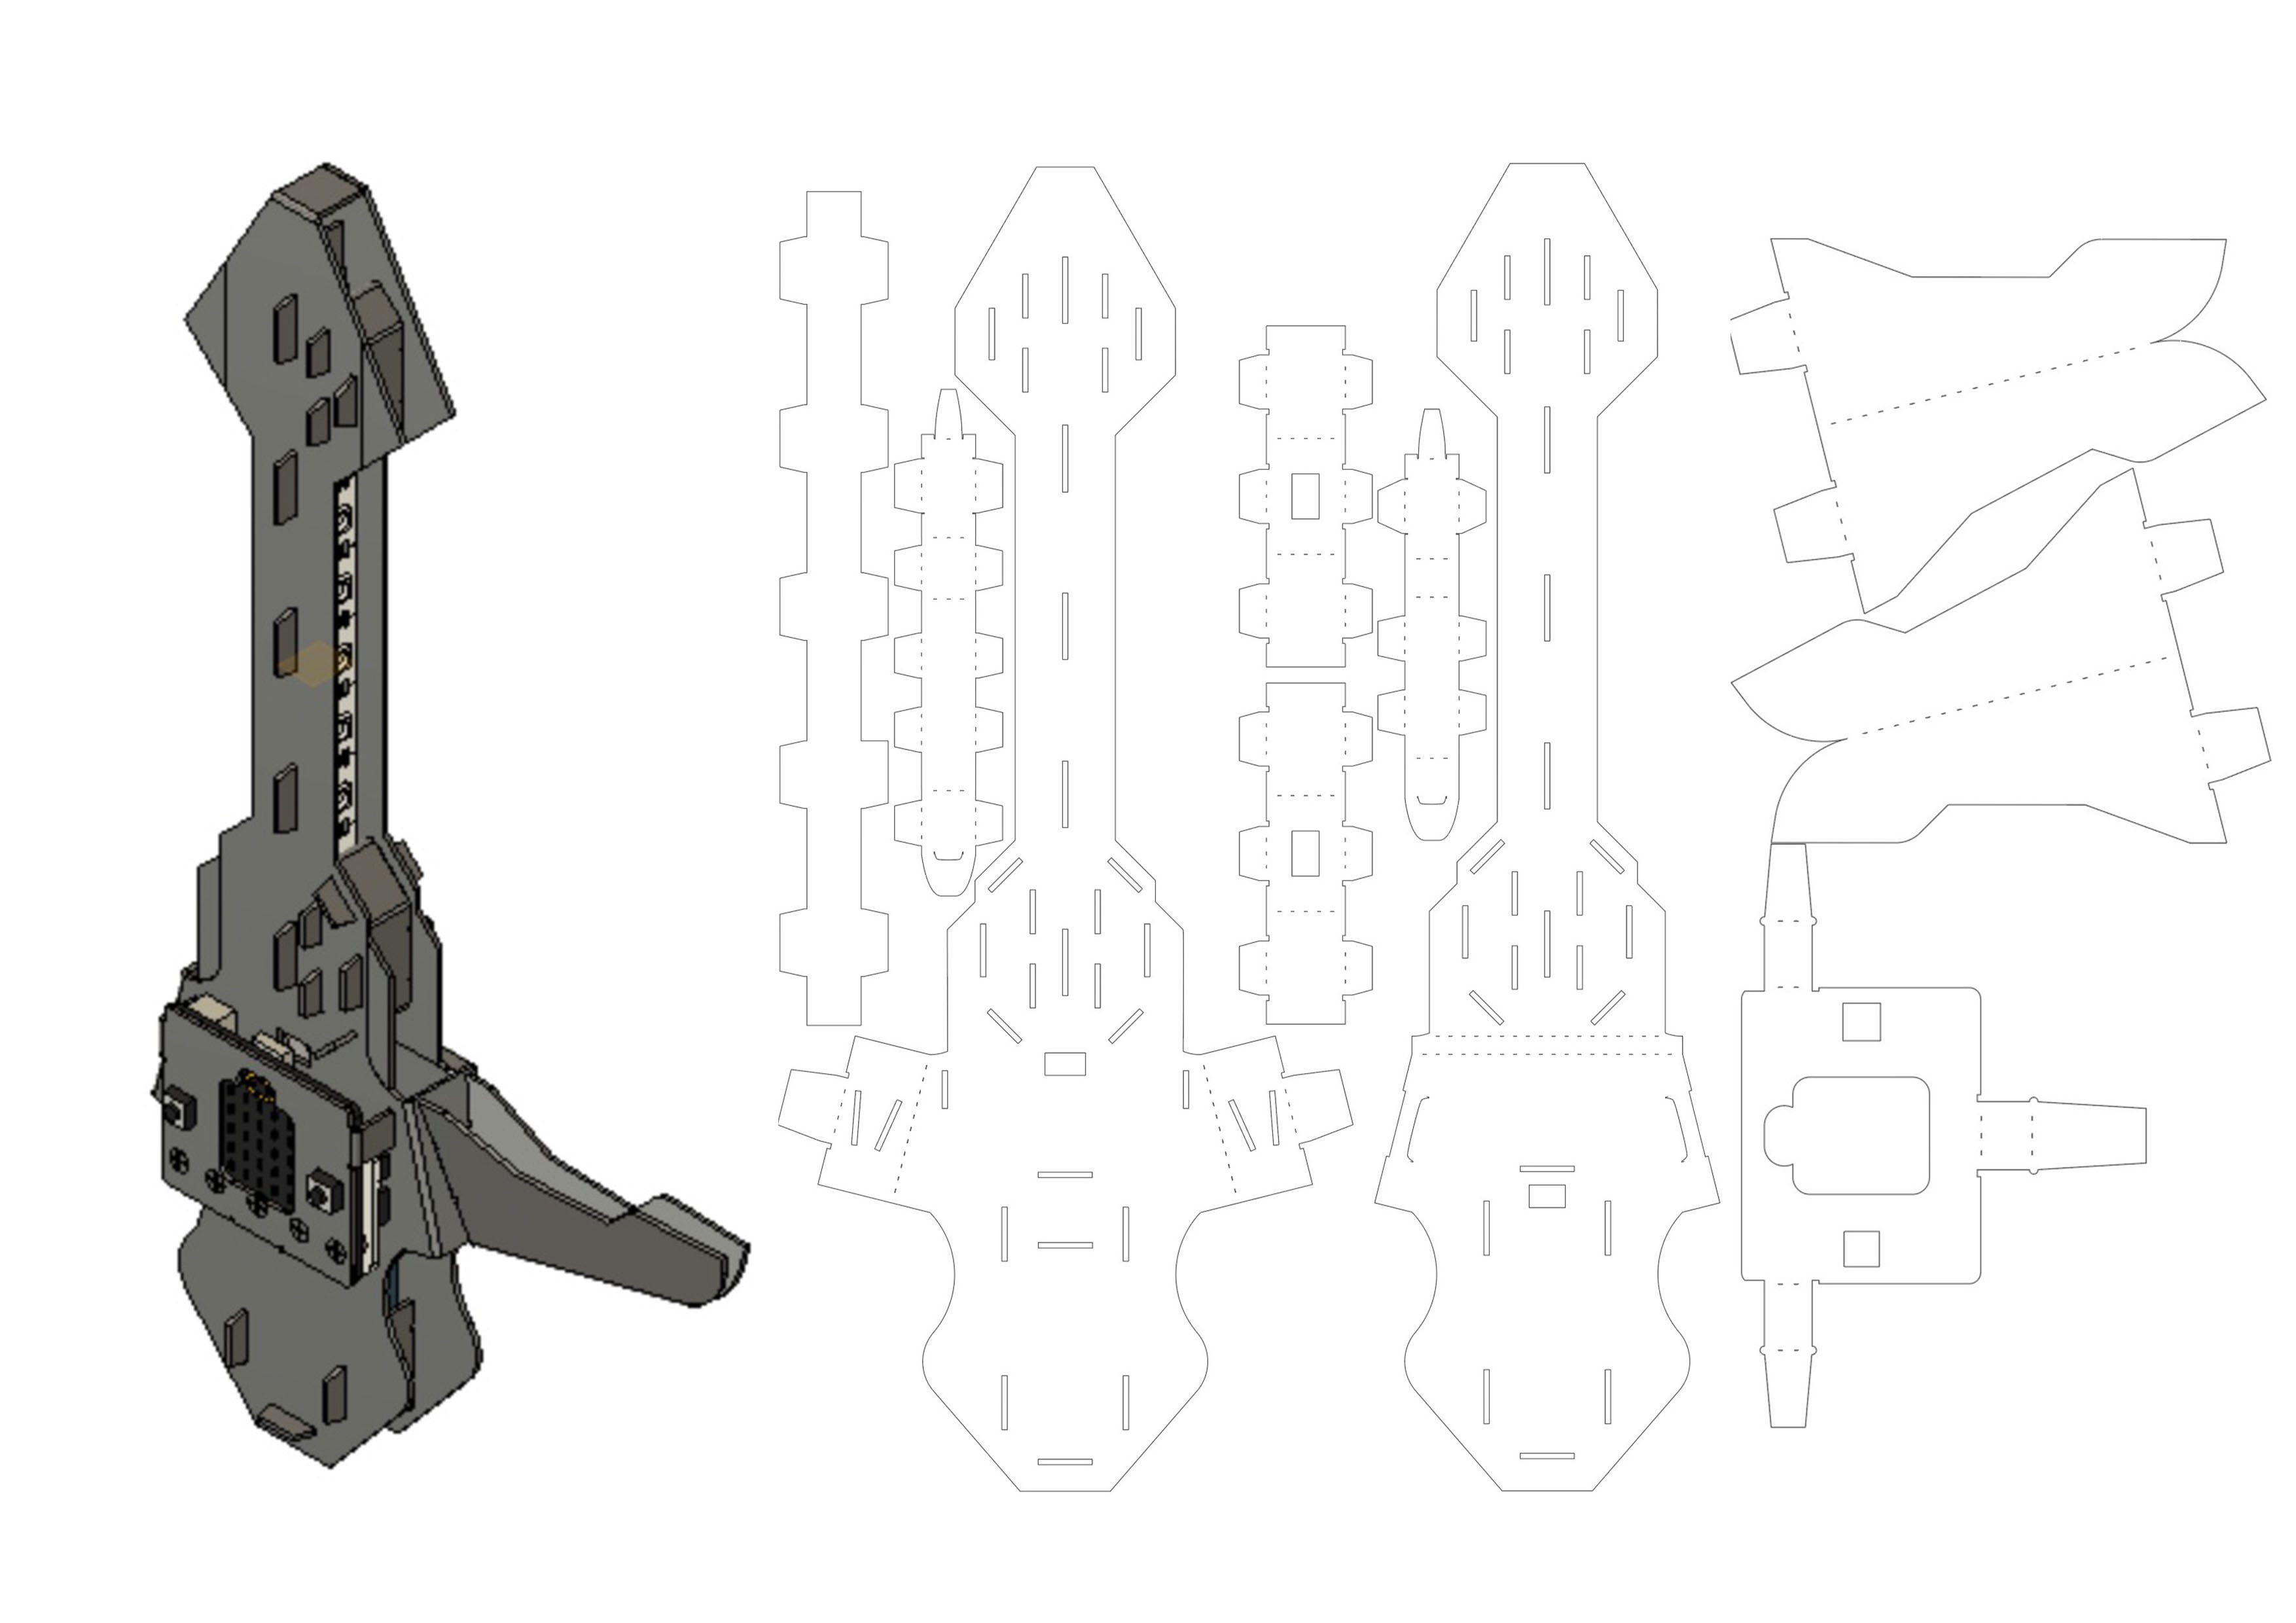
Early design of lightsaber project; the 3d model can be unfolded into flat vectors
The cardboard designs were a great exercise in how to create mechanisms and structures from a 2d surface, which is actually a great skill to have, especially for my future work as an interactive artist. I was also lucky enough to work with a local cardboard specialist, Bartholomew Ting, who has been very helpful in terms of sharing knowledge, ideas and resources.
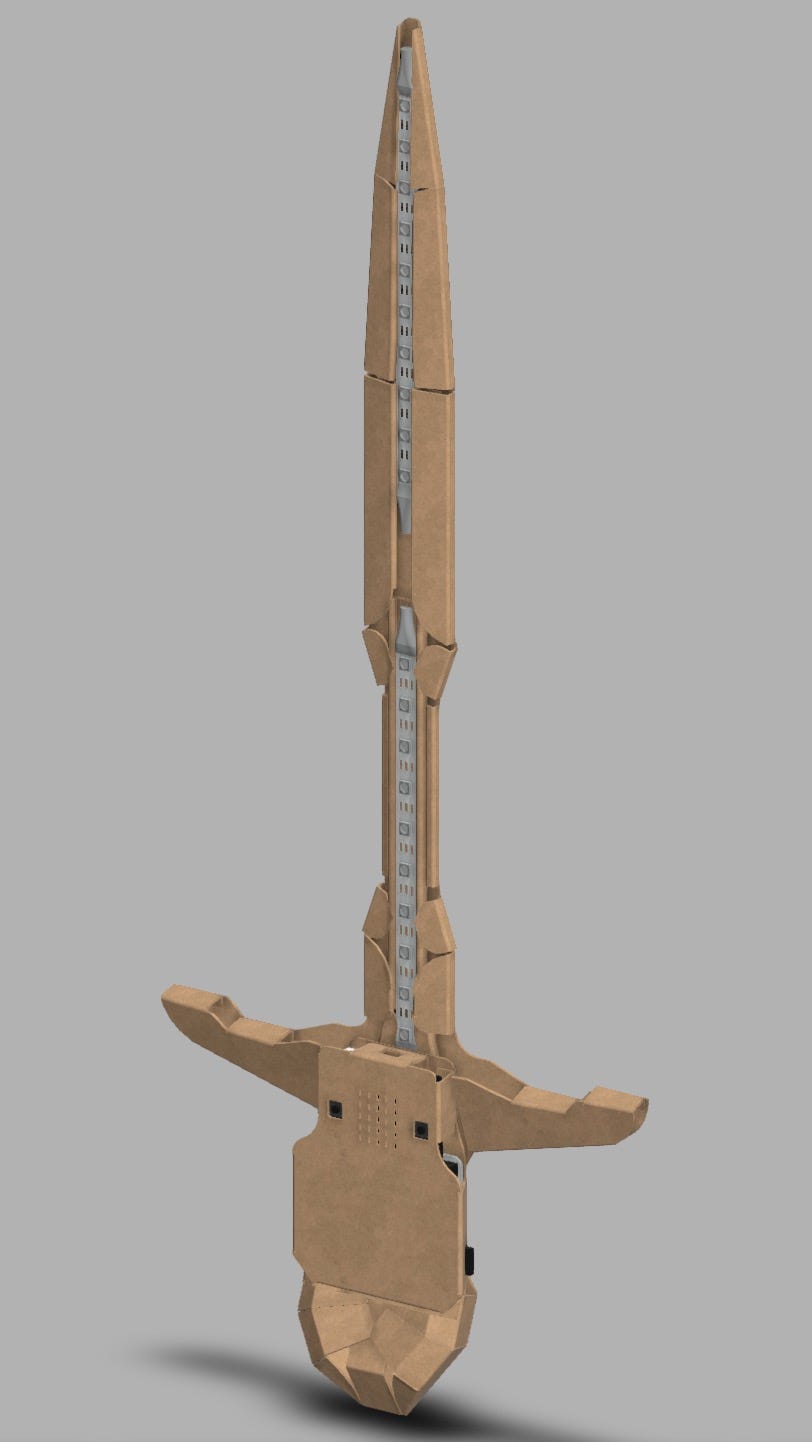
Very first lightsaber design that was way too big, hard to fold and many other things…
Cardboard designs possess its own set of language and expression, as well as subtleties in engineering terms, like the way it folds, how much tolerance to allocate, how much does the die stamping process affect the final product and how to account for that etc.
The first few weeks were mostly me getting comfortable in working with cardboard. That said, I am still learning new aspects of the medium through every week/iteration. Having access to a laser-cutter was definitely a godsend in this highly iterative process .
There were also quite a few real-world restrictions when it comes to designing for mass production, and that was something I did not realise until Bart went through my initial designs and gave much welcomed feedback. There are well-established, time-tested ways of designing hinges, connectors etc. So it would be prudent for me to consult and use these as starting points, rather than trying to ‘innovate’, ‘experiment’, or ‘re-invent the wheel’.
On hindsight, I think I should have probably anticipated this and asked the relevant questions to give myself better working parameters, to save time and effort.
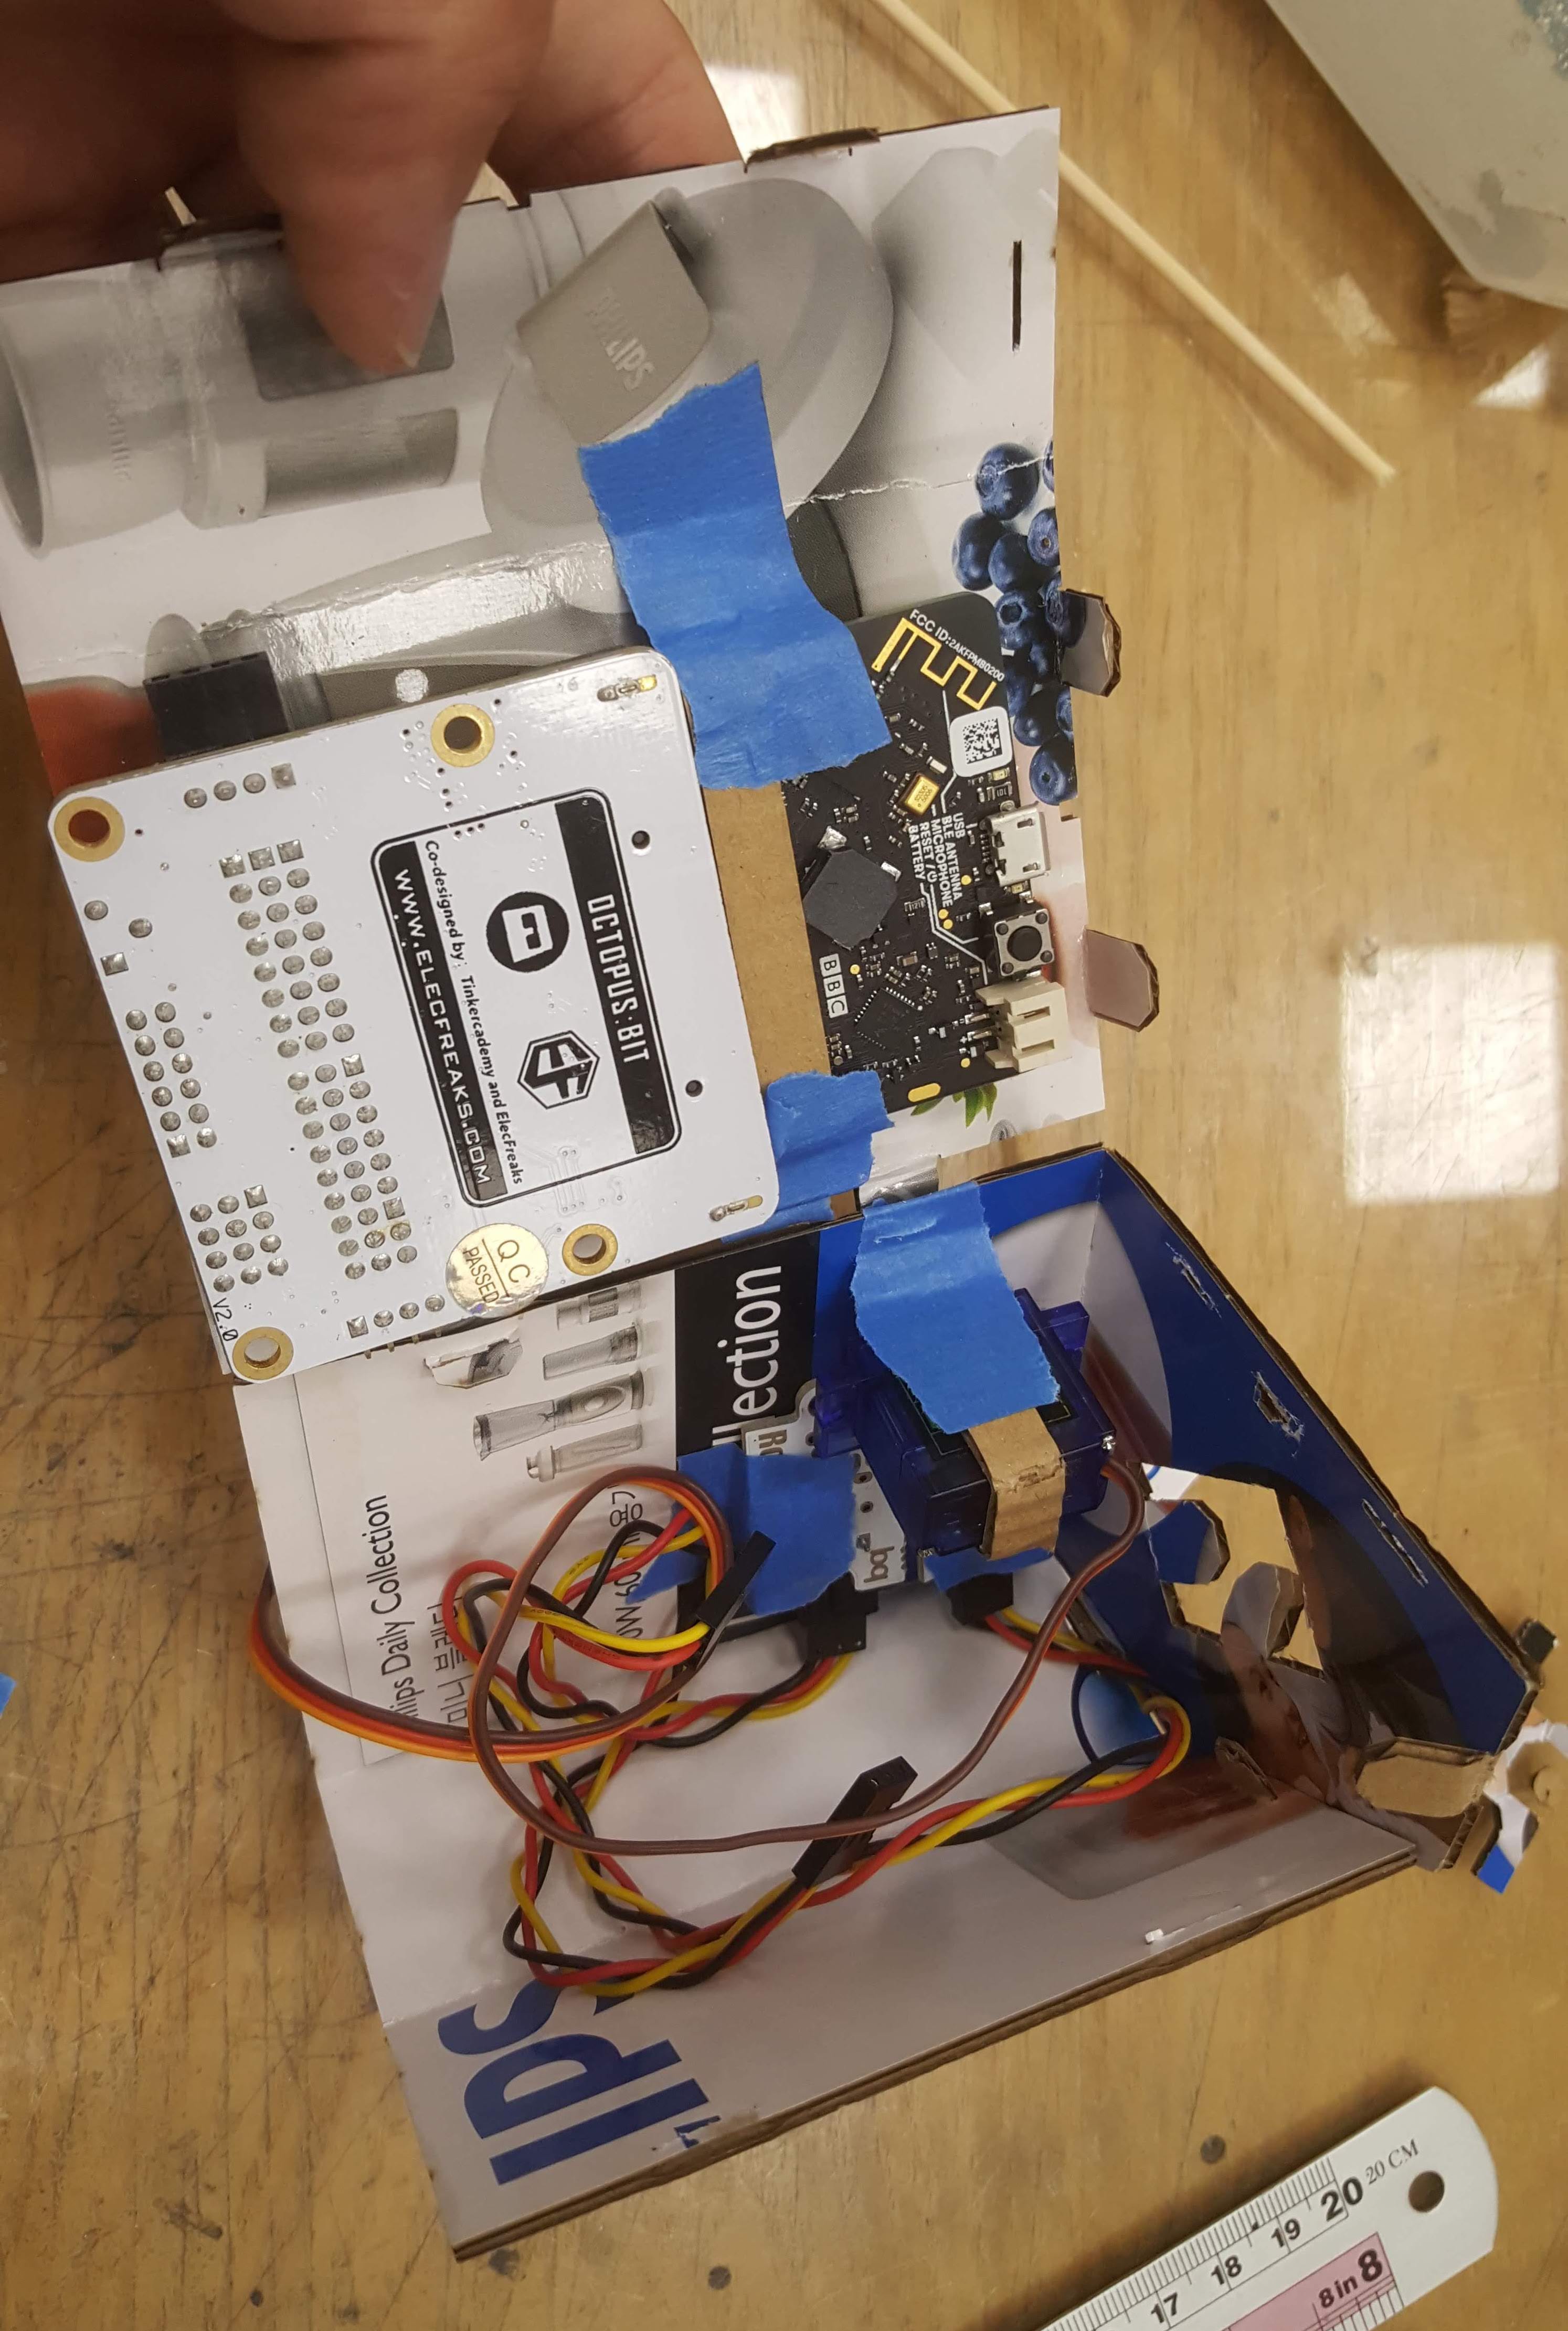
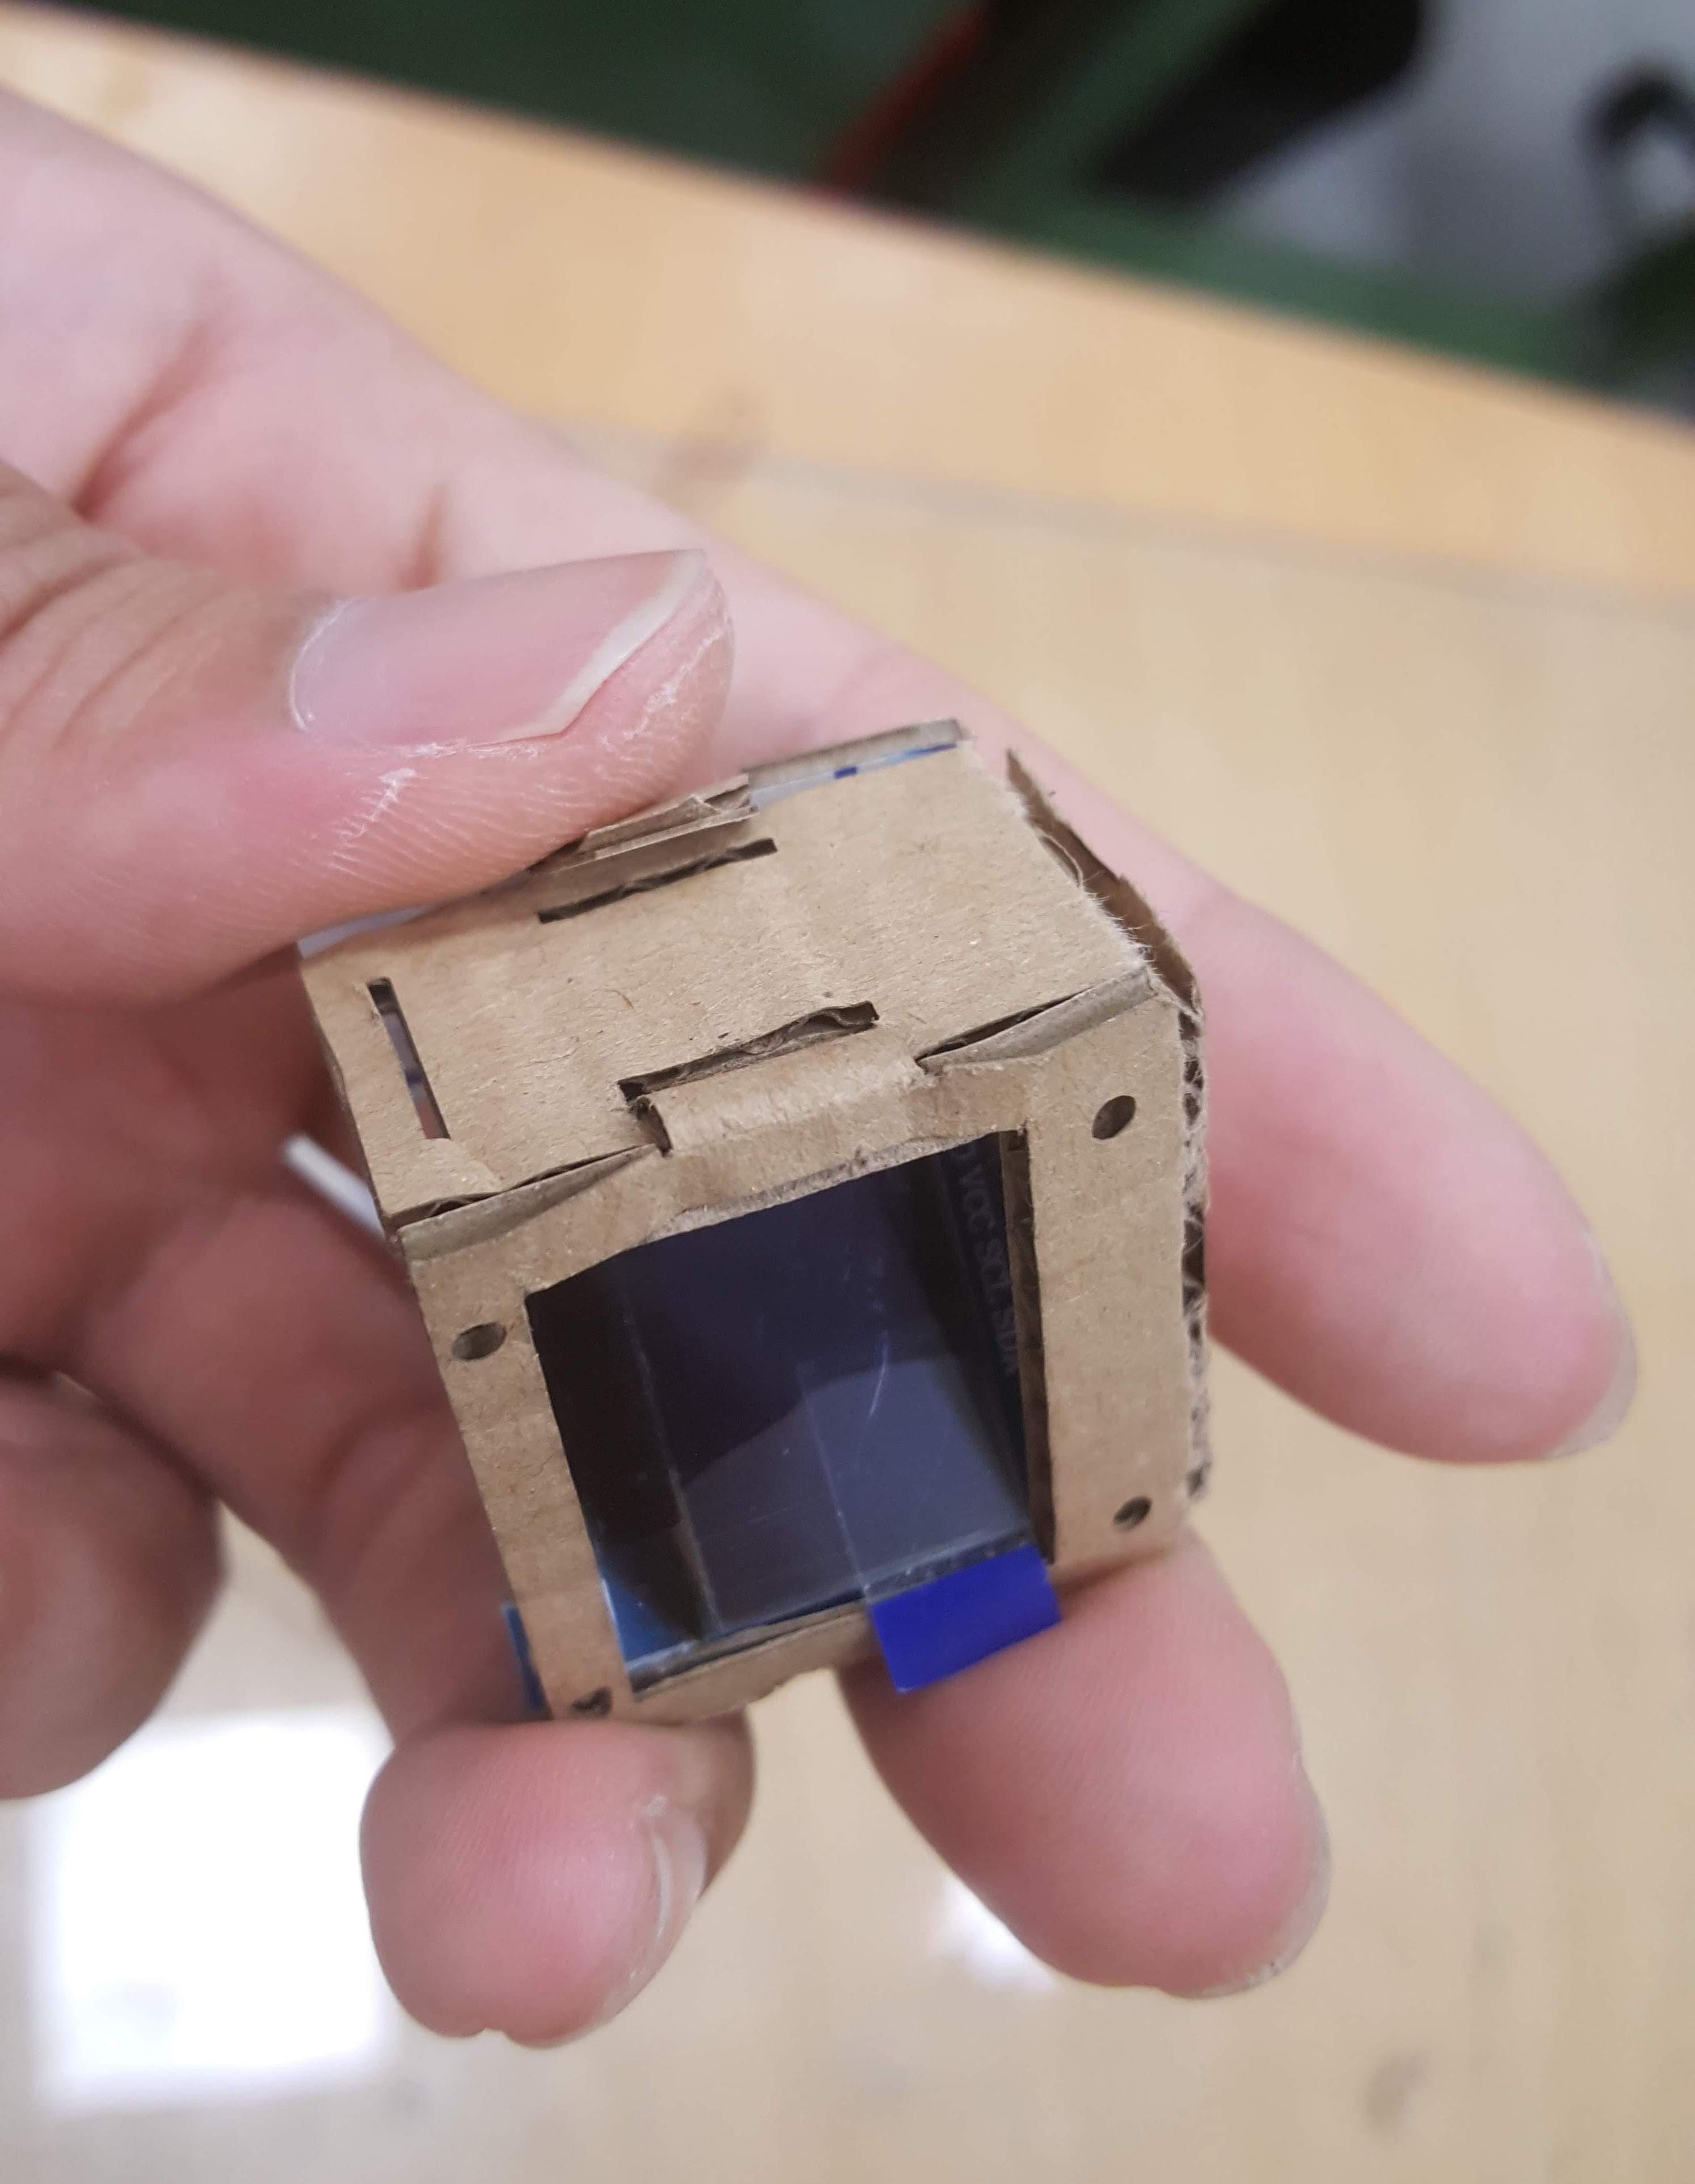
Left: Blue tape is not the answer. Right: Impossible-to-connect tiny joints.
I have also since refined my process of coming up with designs; the rough shapes, dimensions and how the folds work are all detailed out in CAD, and vector software is used for locking in the fairly intricate and repetitive fold designs. It didn’t make sense to apply absolutely everything in CAD as vector software was more well-suited for 2d-centric manipulations.
There were also a few simple techniques I picked up along the way, like the idea of designing slightly smaller holes to allow for press fit applications, eliminating all-together the need for additional design of straps or supports, which is crucial if designing for everything to fit into an A4 form factor.
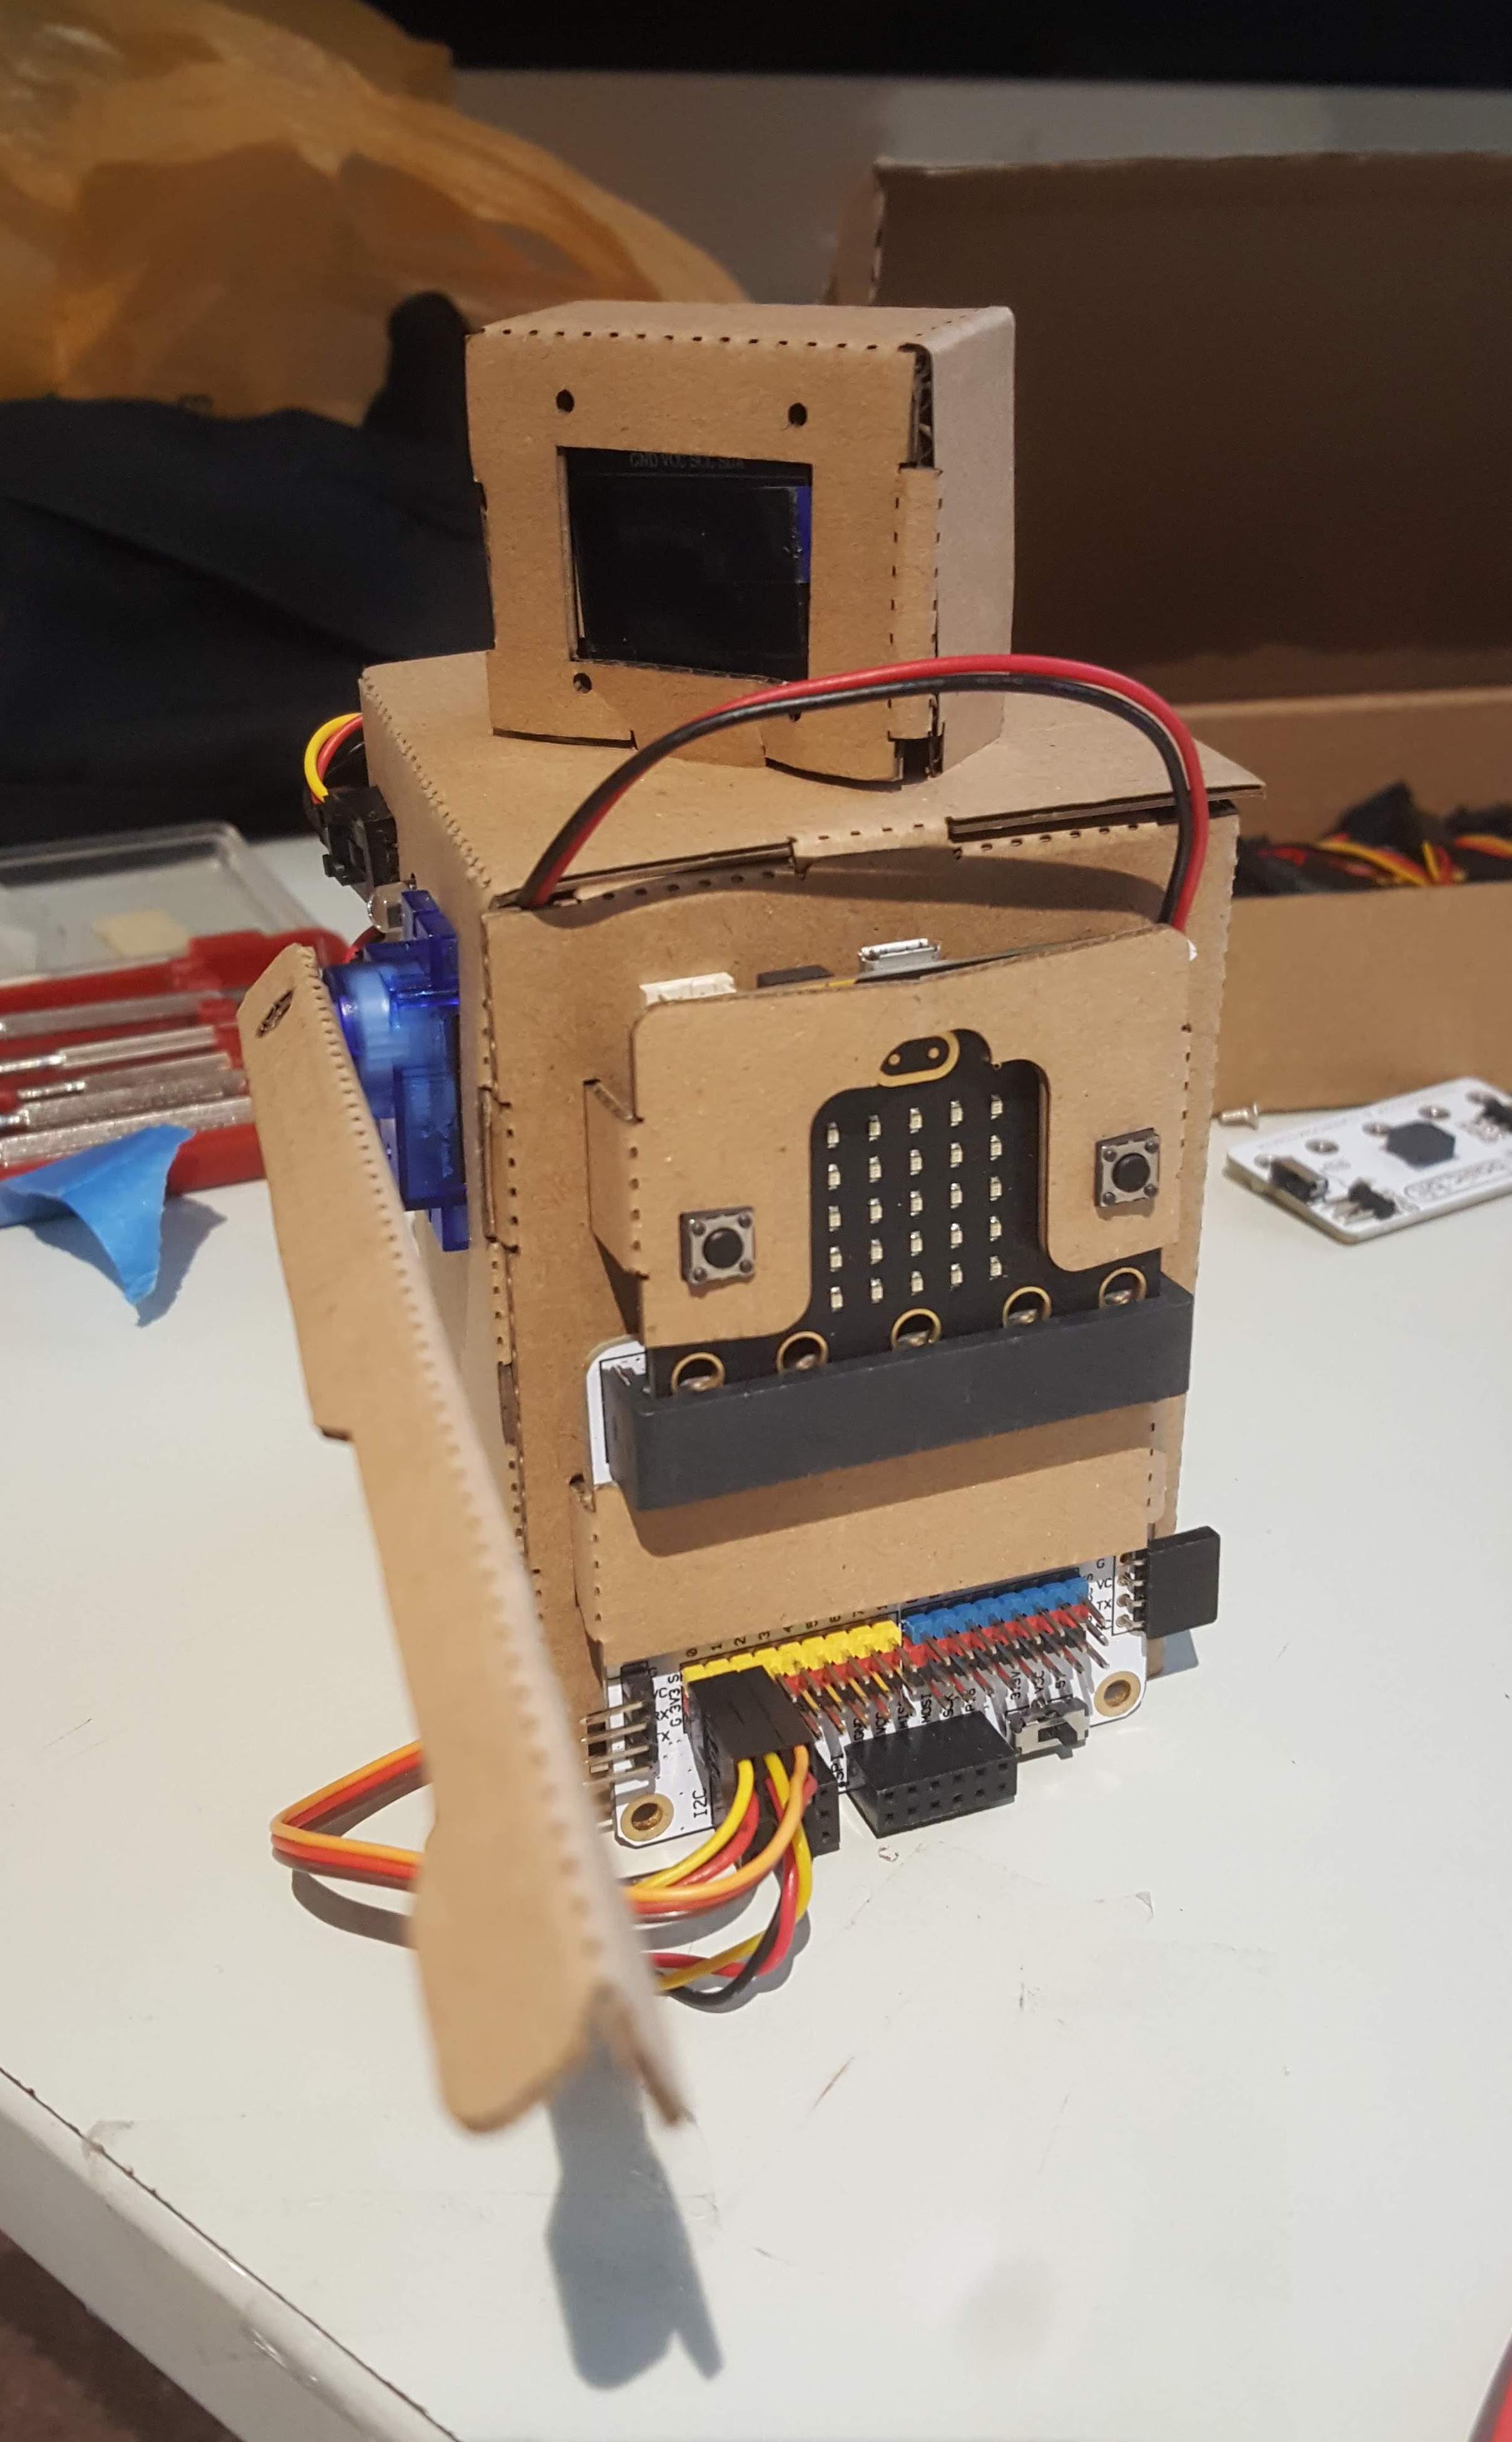
press fit, straps and wire connector-based interlocking
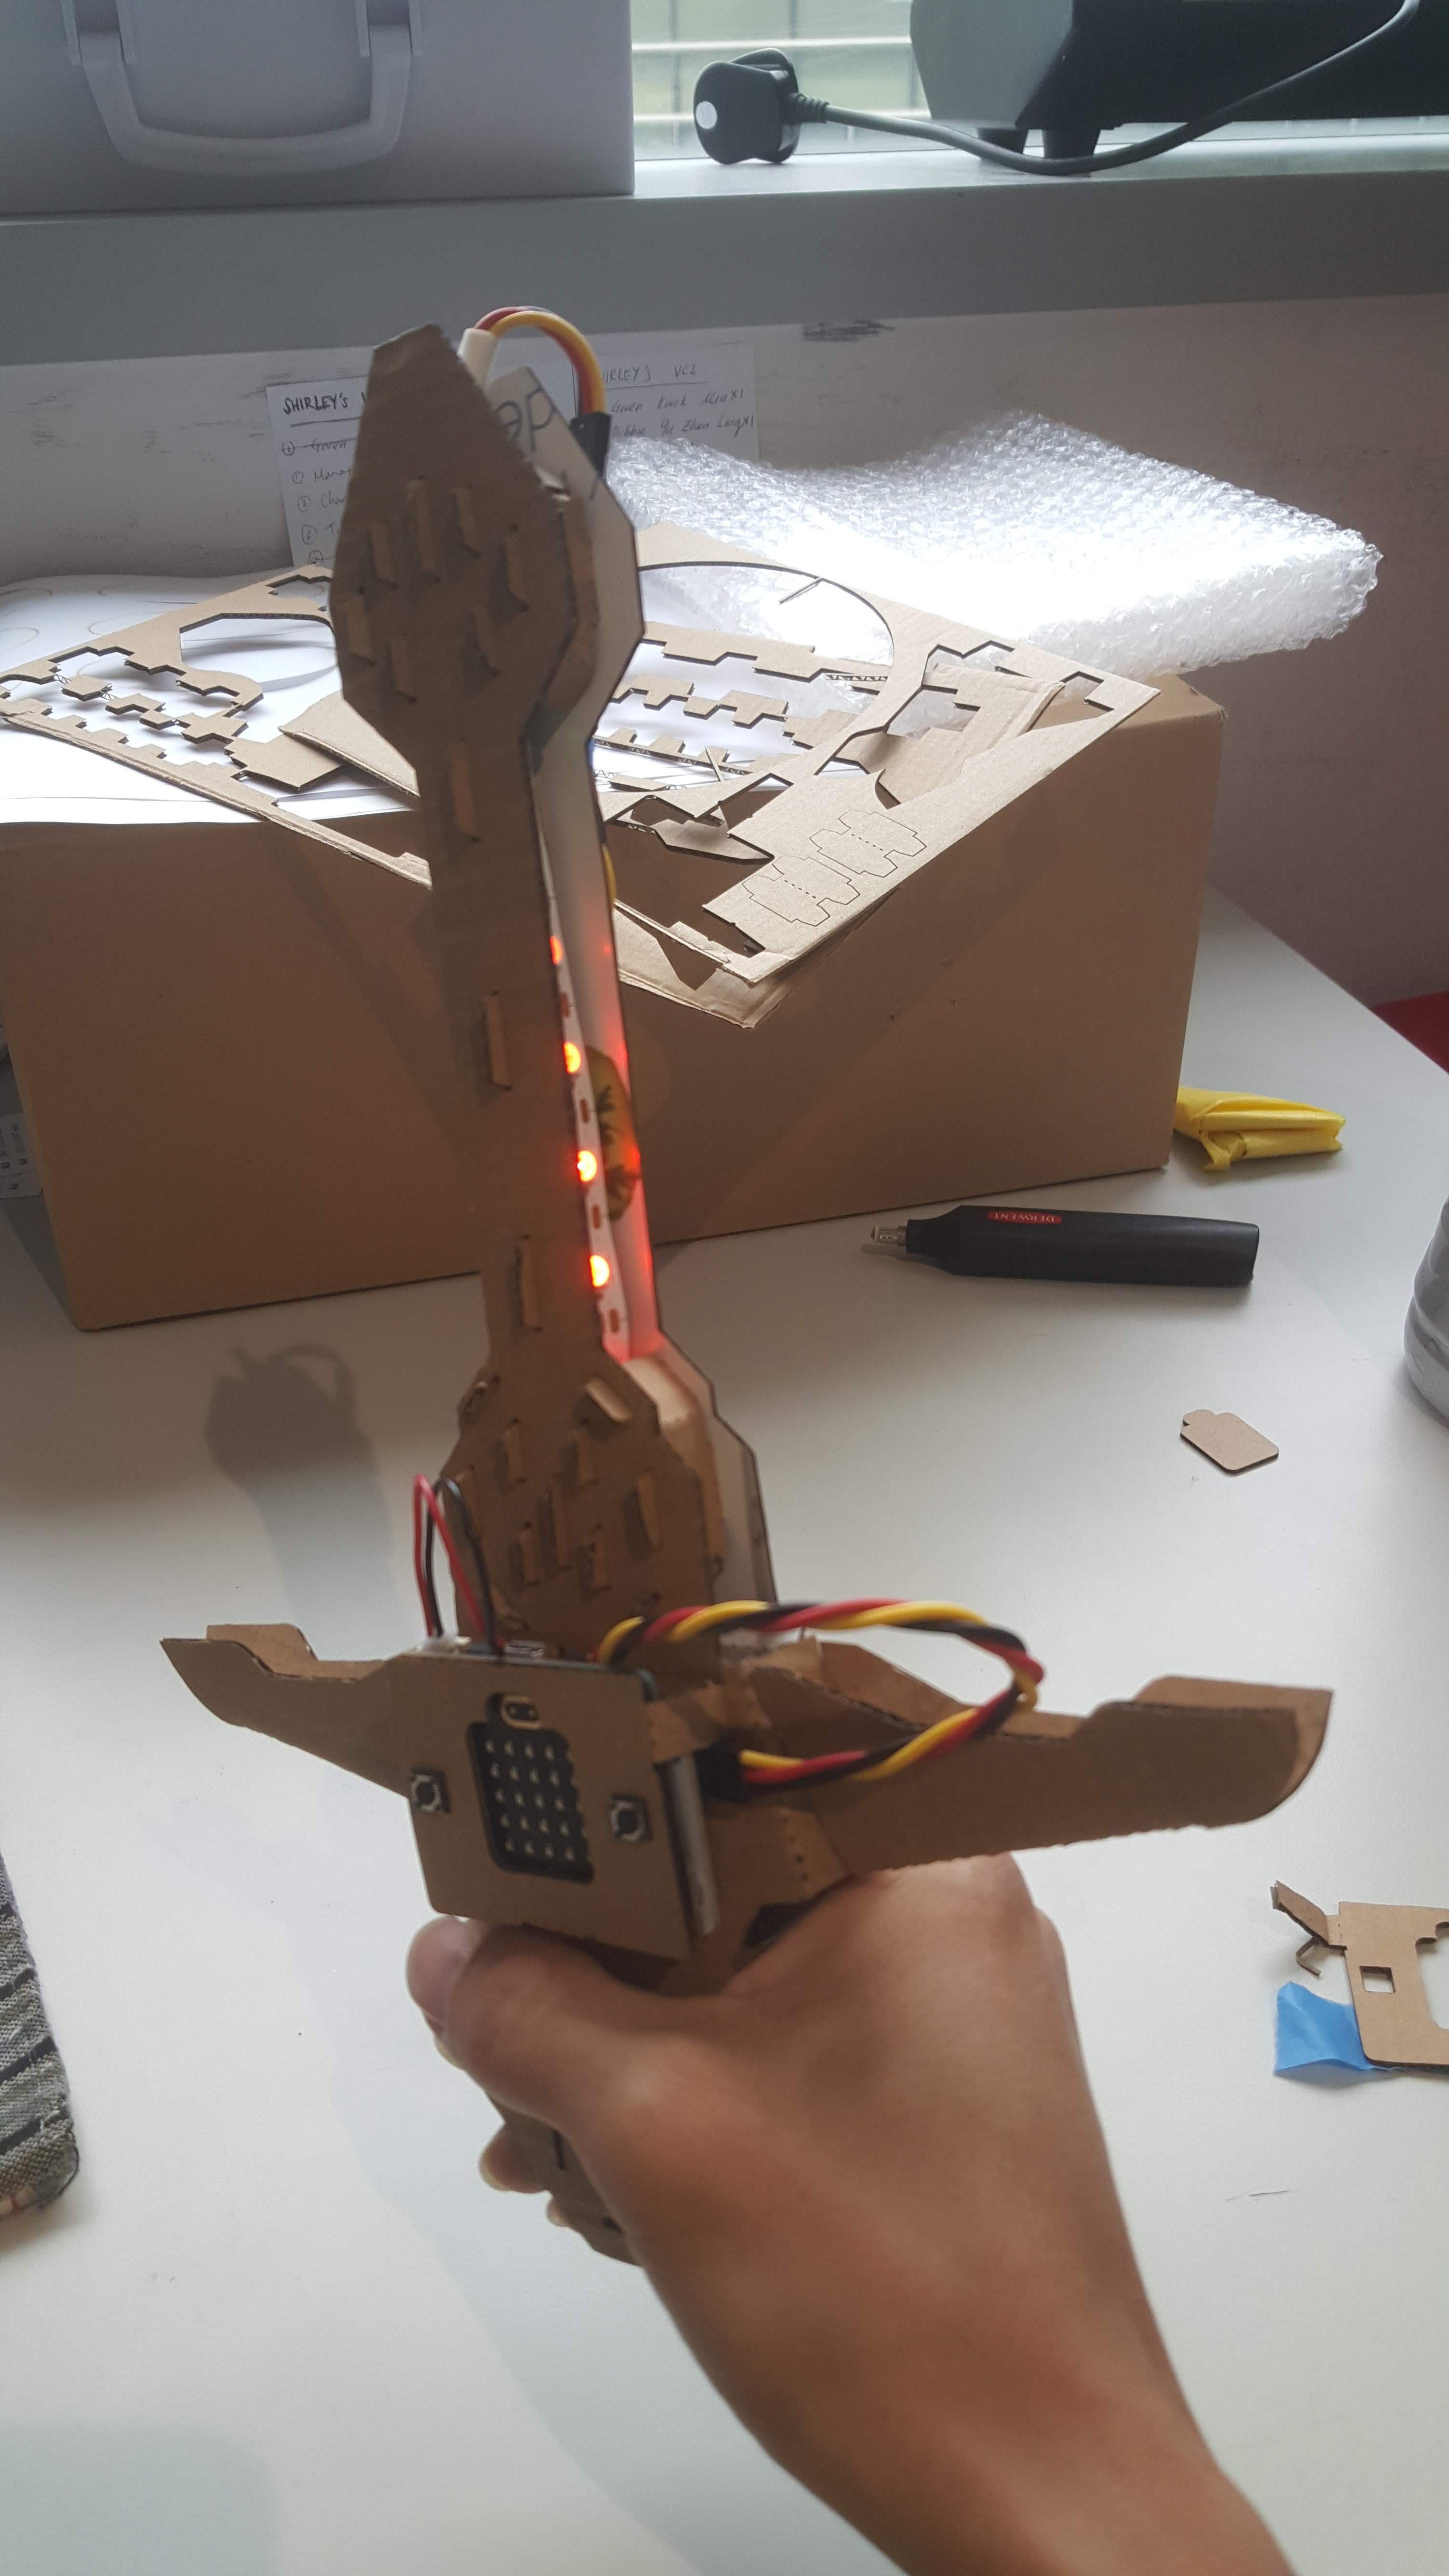
a second design that is robust enough for handling
A cardboard design wouldn’t be complete without decent instructions, and I produced two assembly videos to experiment and get used to the process of tutorial making.
Making these was quite an interesting experience, as I consume many online tutorials but haven’t really made any before. Stopping to reflect what difficulties a participant would face when assembling these was critical in determining what I need to show explicitly or slow down accordingly for clarity. And it was definitely an exercise in simplification as well.
As the last week drew close, I also started to prepare some instructional manuals. As a team, we have decided to adopt IKEA’s approach, using isometric and simplified illustrations. As I have constructed the models and components in 3d, it was quite a breeze(took considerable time still) using these to create the visual materials needed.
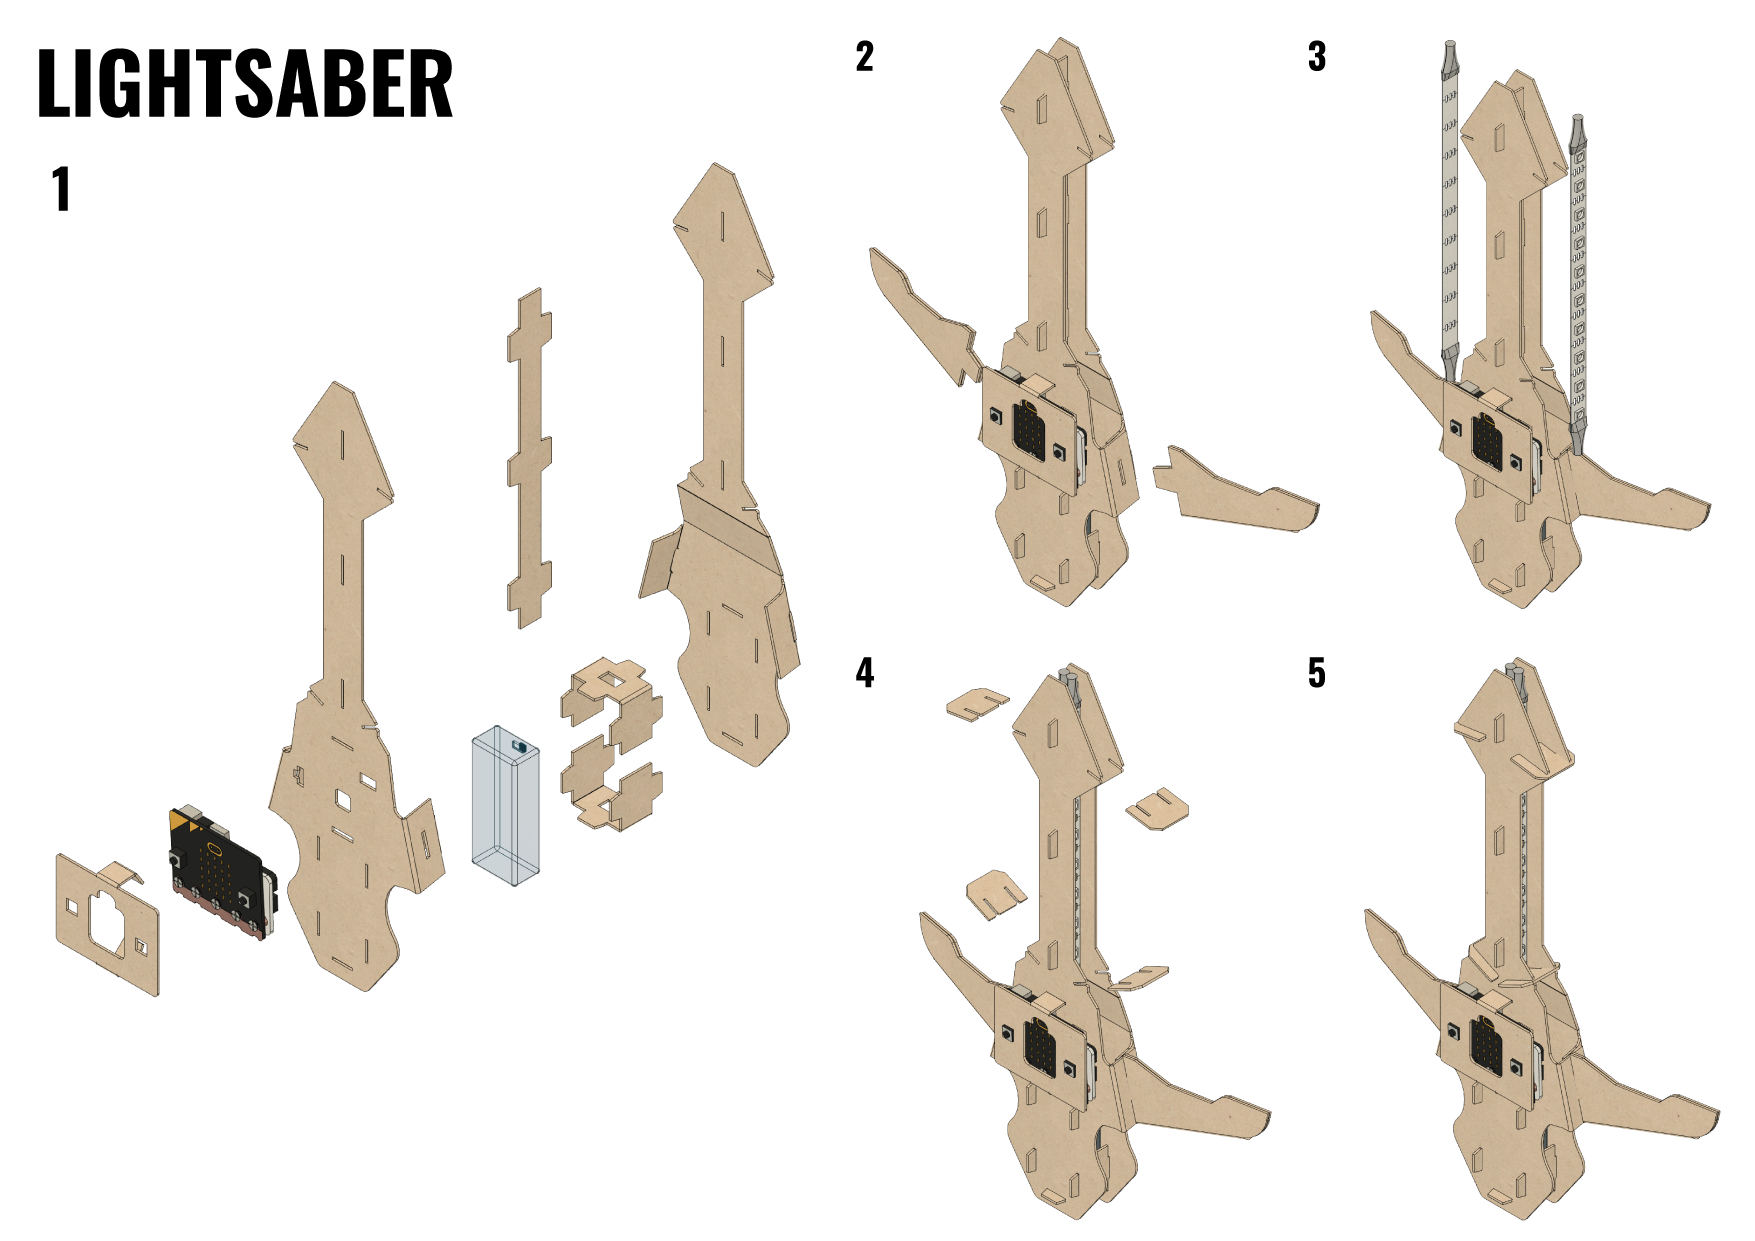
Lightsaber instruction manual
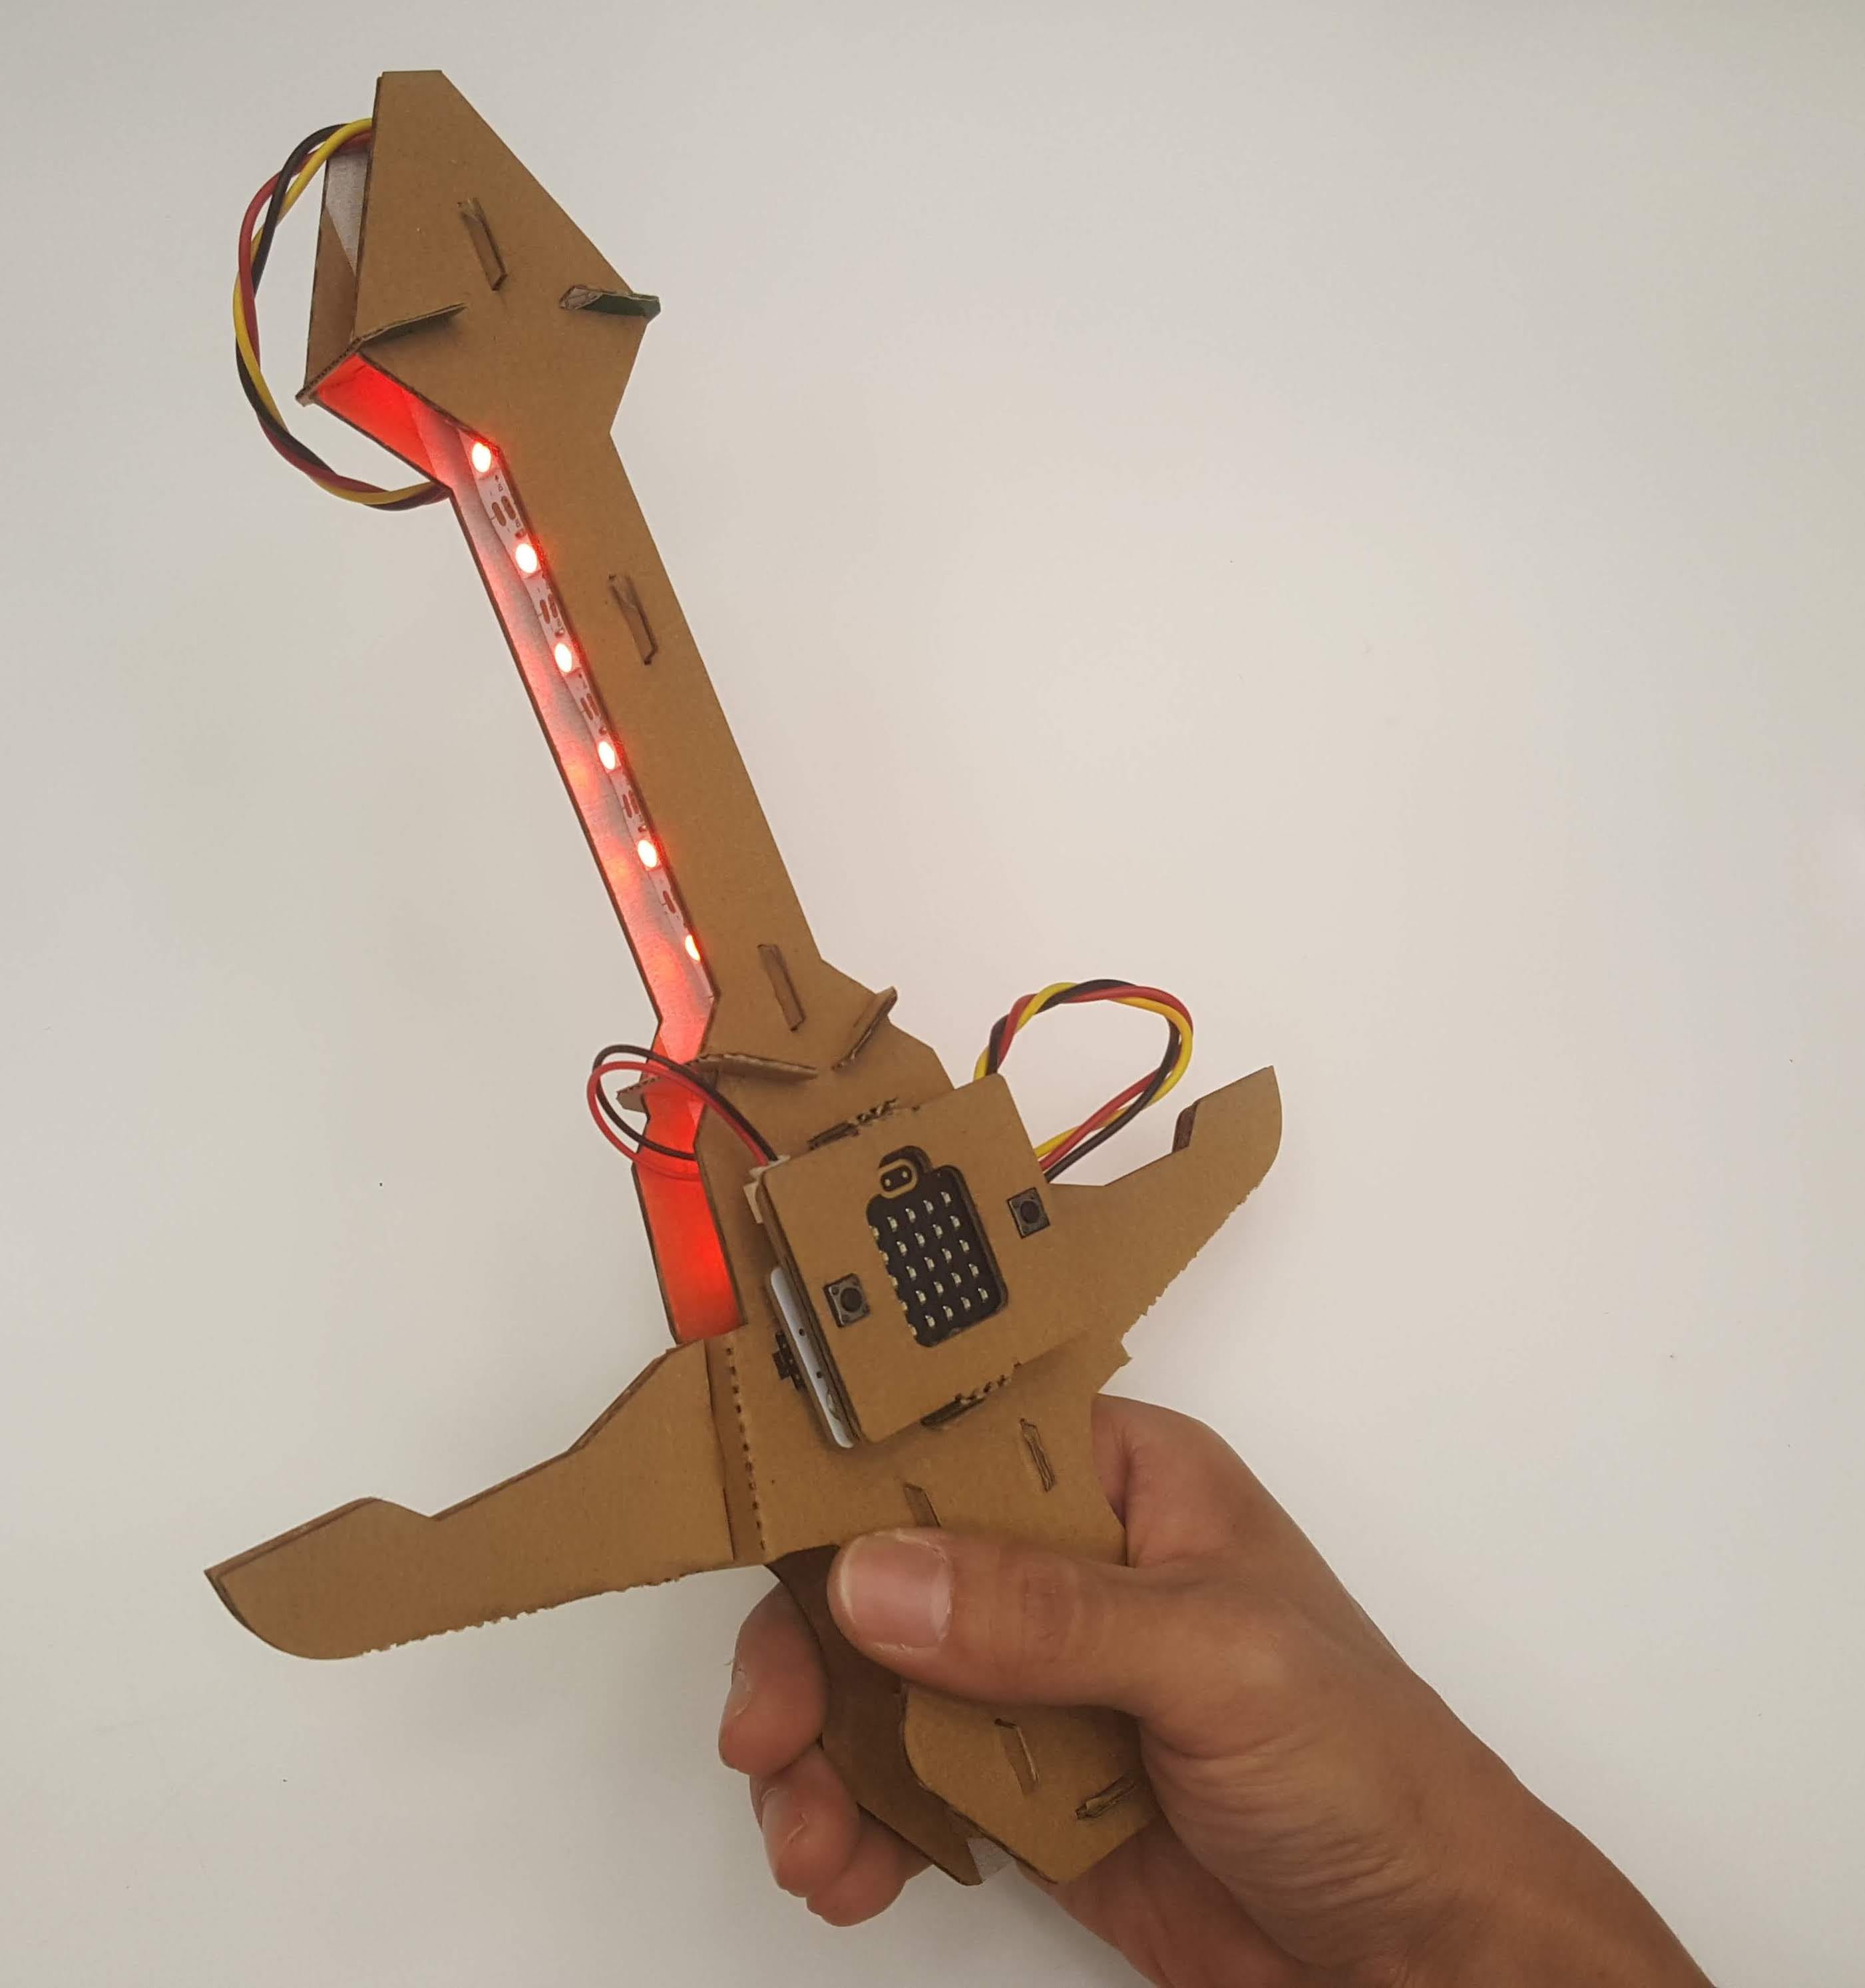
‘Final’ lightsaber design
At the end of week 10, most of the designs have been completed, but there is still some way to go before they can be mass produced. There is much play-testing to be done, and probably a couple of iterations before we can go ahead and have die cuts produced. Hopefully I will continue to work on these to bring them to the finish line in time to come.
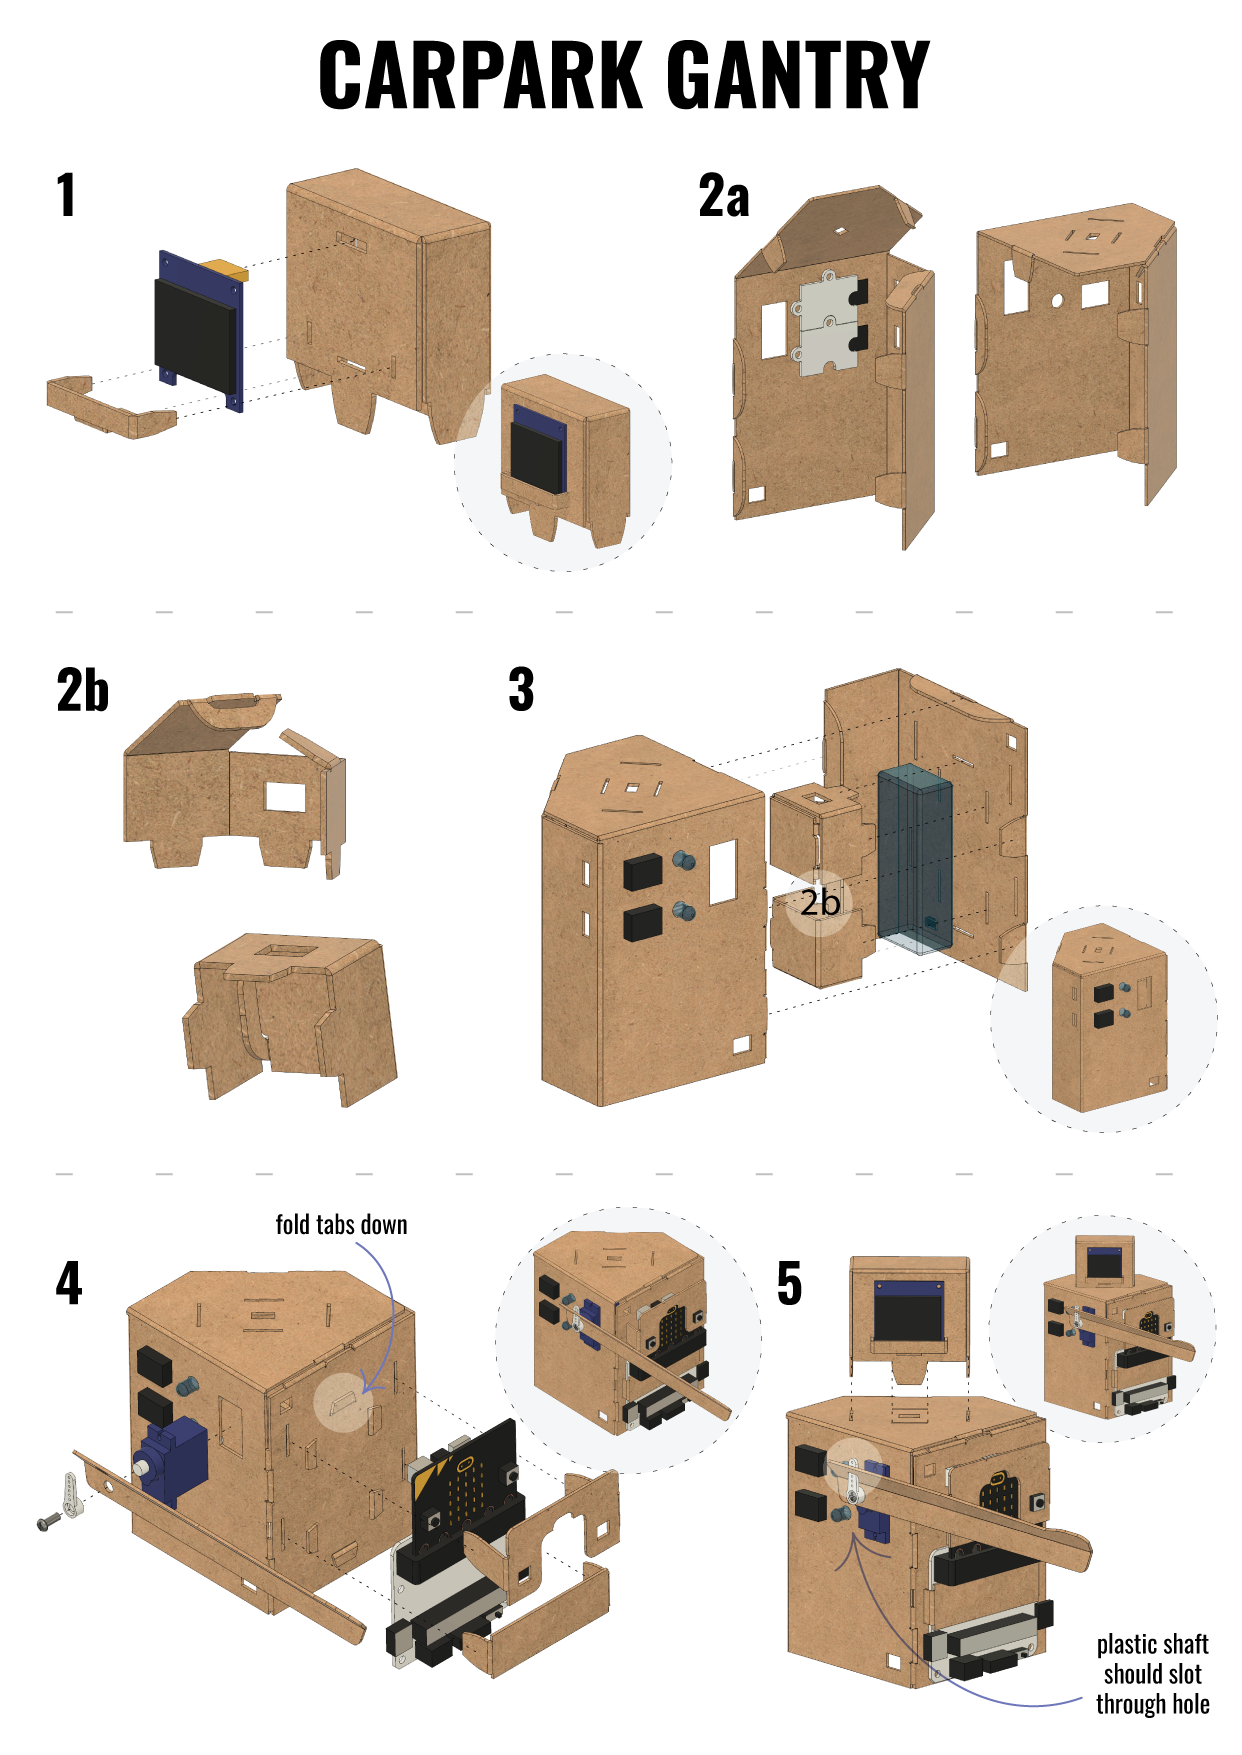
Carpark gantry project
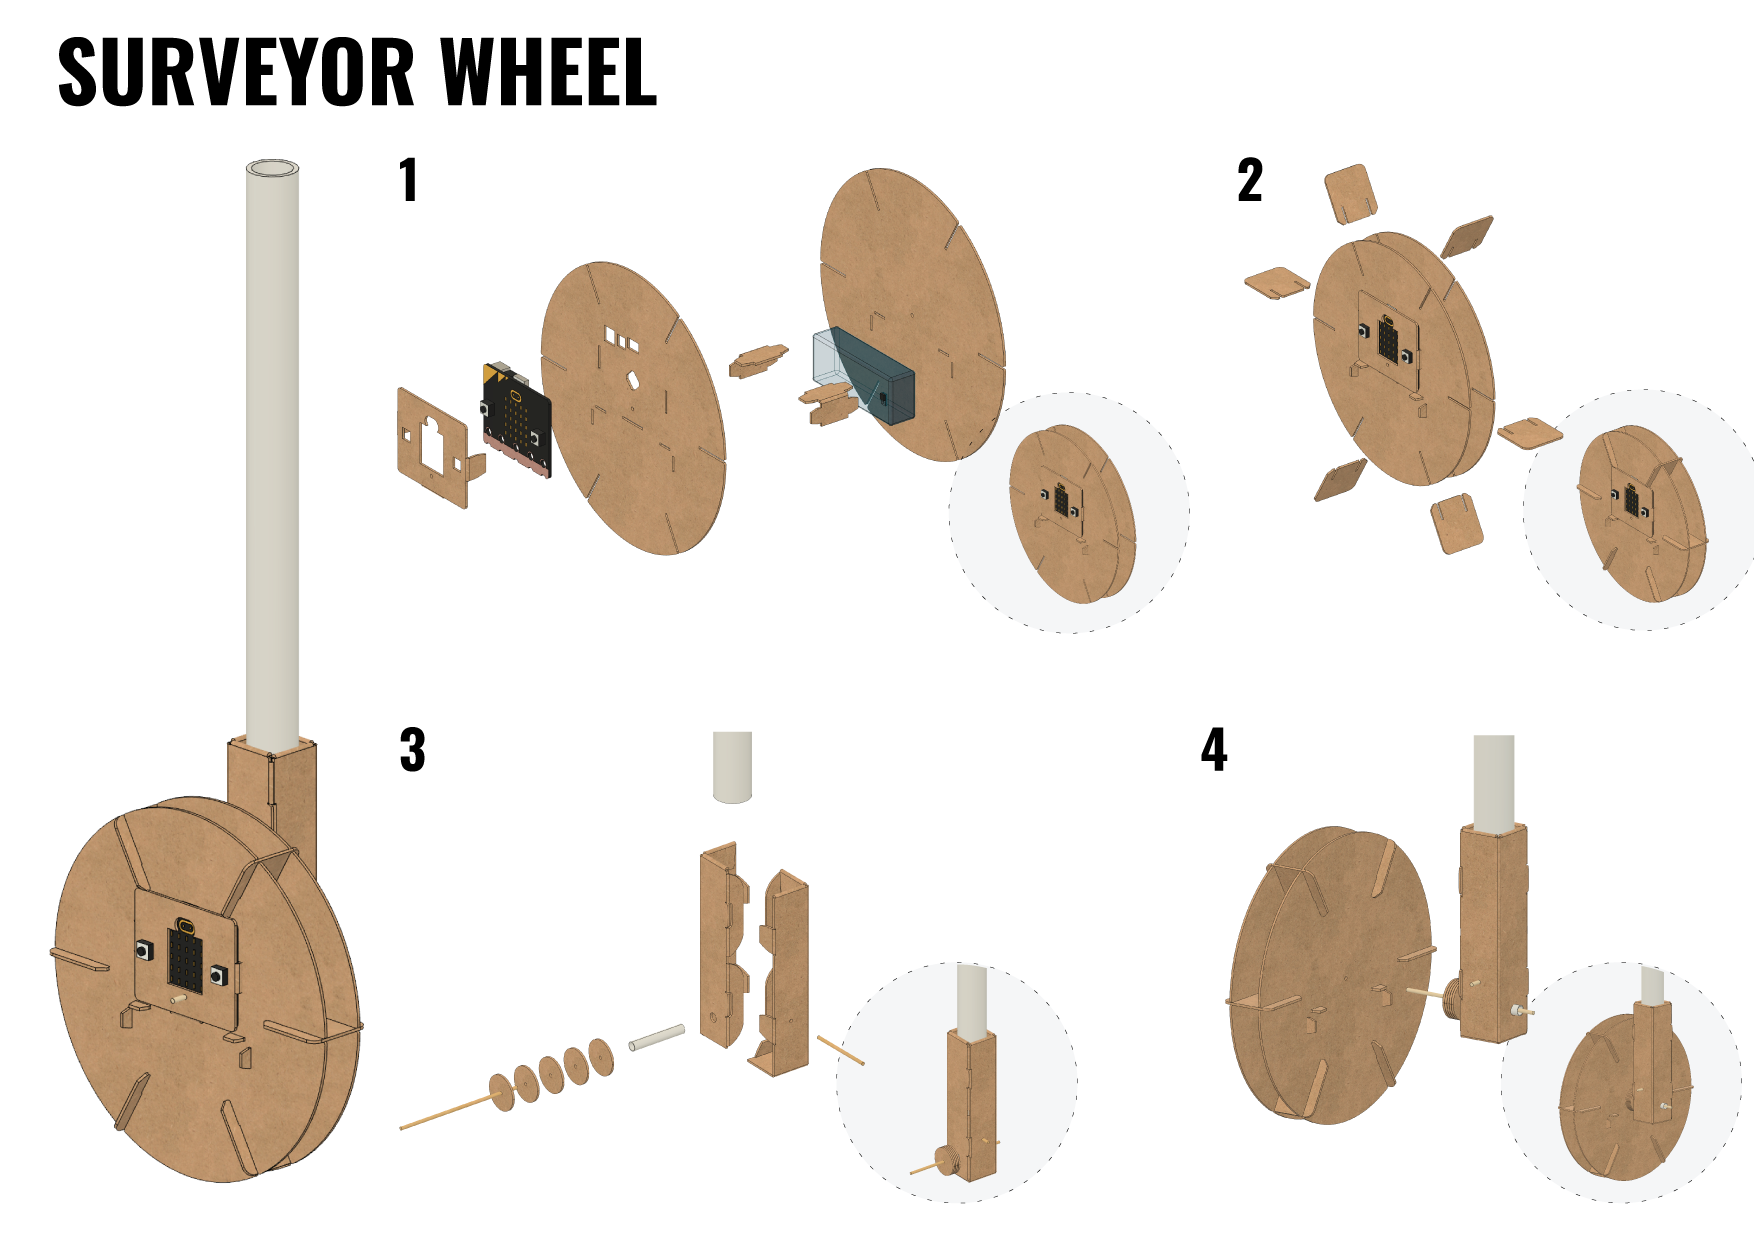
Surveyor wheel project