

Editor’s note: Kevin Steven is a Computer Science undergraduate at the Nanyang Technological University (NTU) who interned with us over the summer of 2018. We asked him to make a DonkeyCar, and catalogue his experience. In this post, he writes about his progress, challenges, and solutions.
DonkeyCar is a self-driving RC car that works on machine learning algorithms. It’s an open-source project, so any passionate enthusiasts can contribute. There’s a Slack channel where all the enthusiasts gather and discuss just about every inch of DonkeyCar.
When I was tasked to build a DonkeyCar, I was glad because it’s an intriguing project that fits my interests, but anxious because the tasks ahead seemed daunting, as I was not proficient in building RC cars, nor familiar with hardware or electrical components.
I quickly encountered my first hurdle: getting the compatible RC cars and the components. Most of the DonkeyCar community is located in the US, where they often hold gatherings or meet-ups… but not so much here in Singapore. As such, I had to do quite a bit of research to ensure that I didn’t purchase an incompatible model. I could not get hold of any reliable information on getting the stock models mentioned in the website. Then I started to scout RC car shops in Singapore—I went to 4 to 5 different shops, but none of them sold compatible versions. I faced two main problems: it was difficult to obtain brushed motor RC cars, and I was unable to examine the electronics of any car models I came across.
The website provided some important specifications:
- ESC (electronic servo controller) and RX(receiver) should be two separate components. Some RC cars have integrated both into one component, which could cause issues when connecting the Raspberry Pi later on.
- The car must be able to carry additional weight.
- The car must be smooth to control at slow speed.
I went to ask for advice on the DonkeyCar Slack group, and was advised to try ordering online from Robocar Store from Hong Kong, which is maintained by DonkeyCar community enthusiasts! They are the only one in Asia, so I had to try. They sell only the RC car (HSP 94186 Brushed RC Car), or you can choose to get the car + full kit to build your own DonkeyCar. If you know your hardware enough, you can order the car only and scour the rest of the parts on local stores and you also require a 3D printer. I did not want the additional hassle, so I ordered the full kit. The delivery was quick, and I got my delivery exactly one week after placing the order.
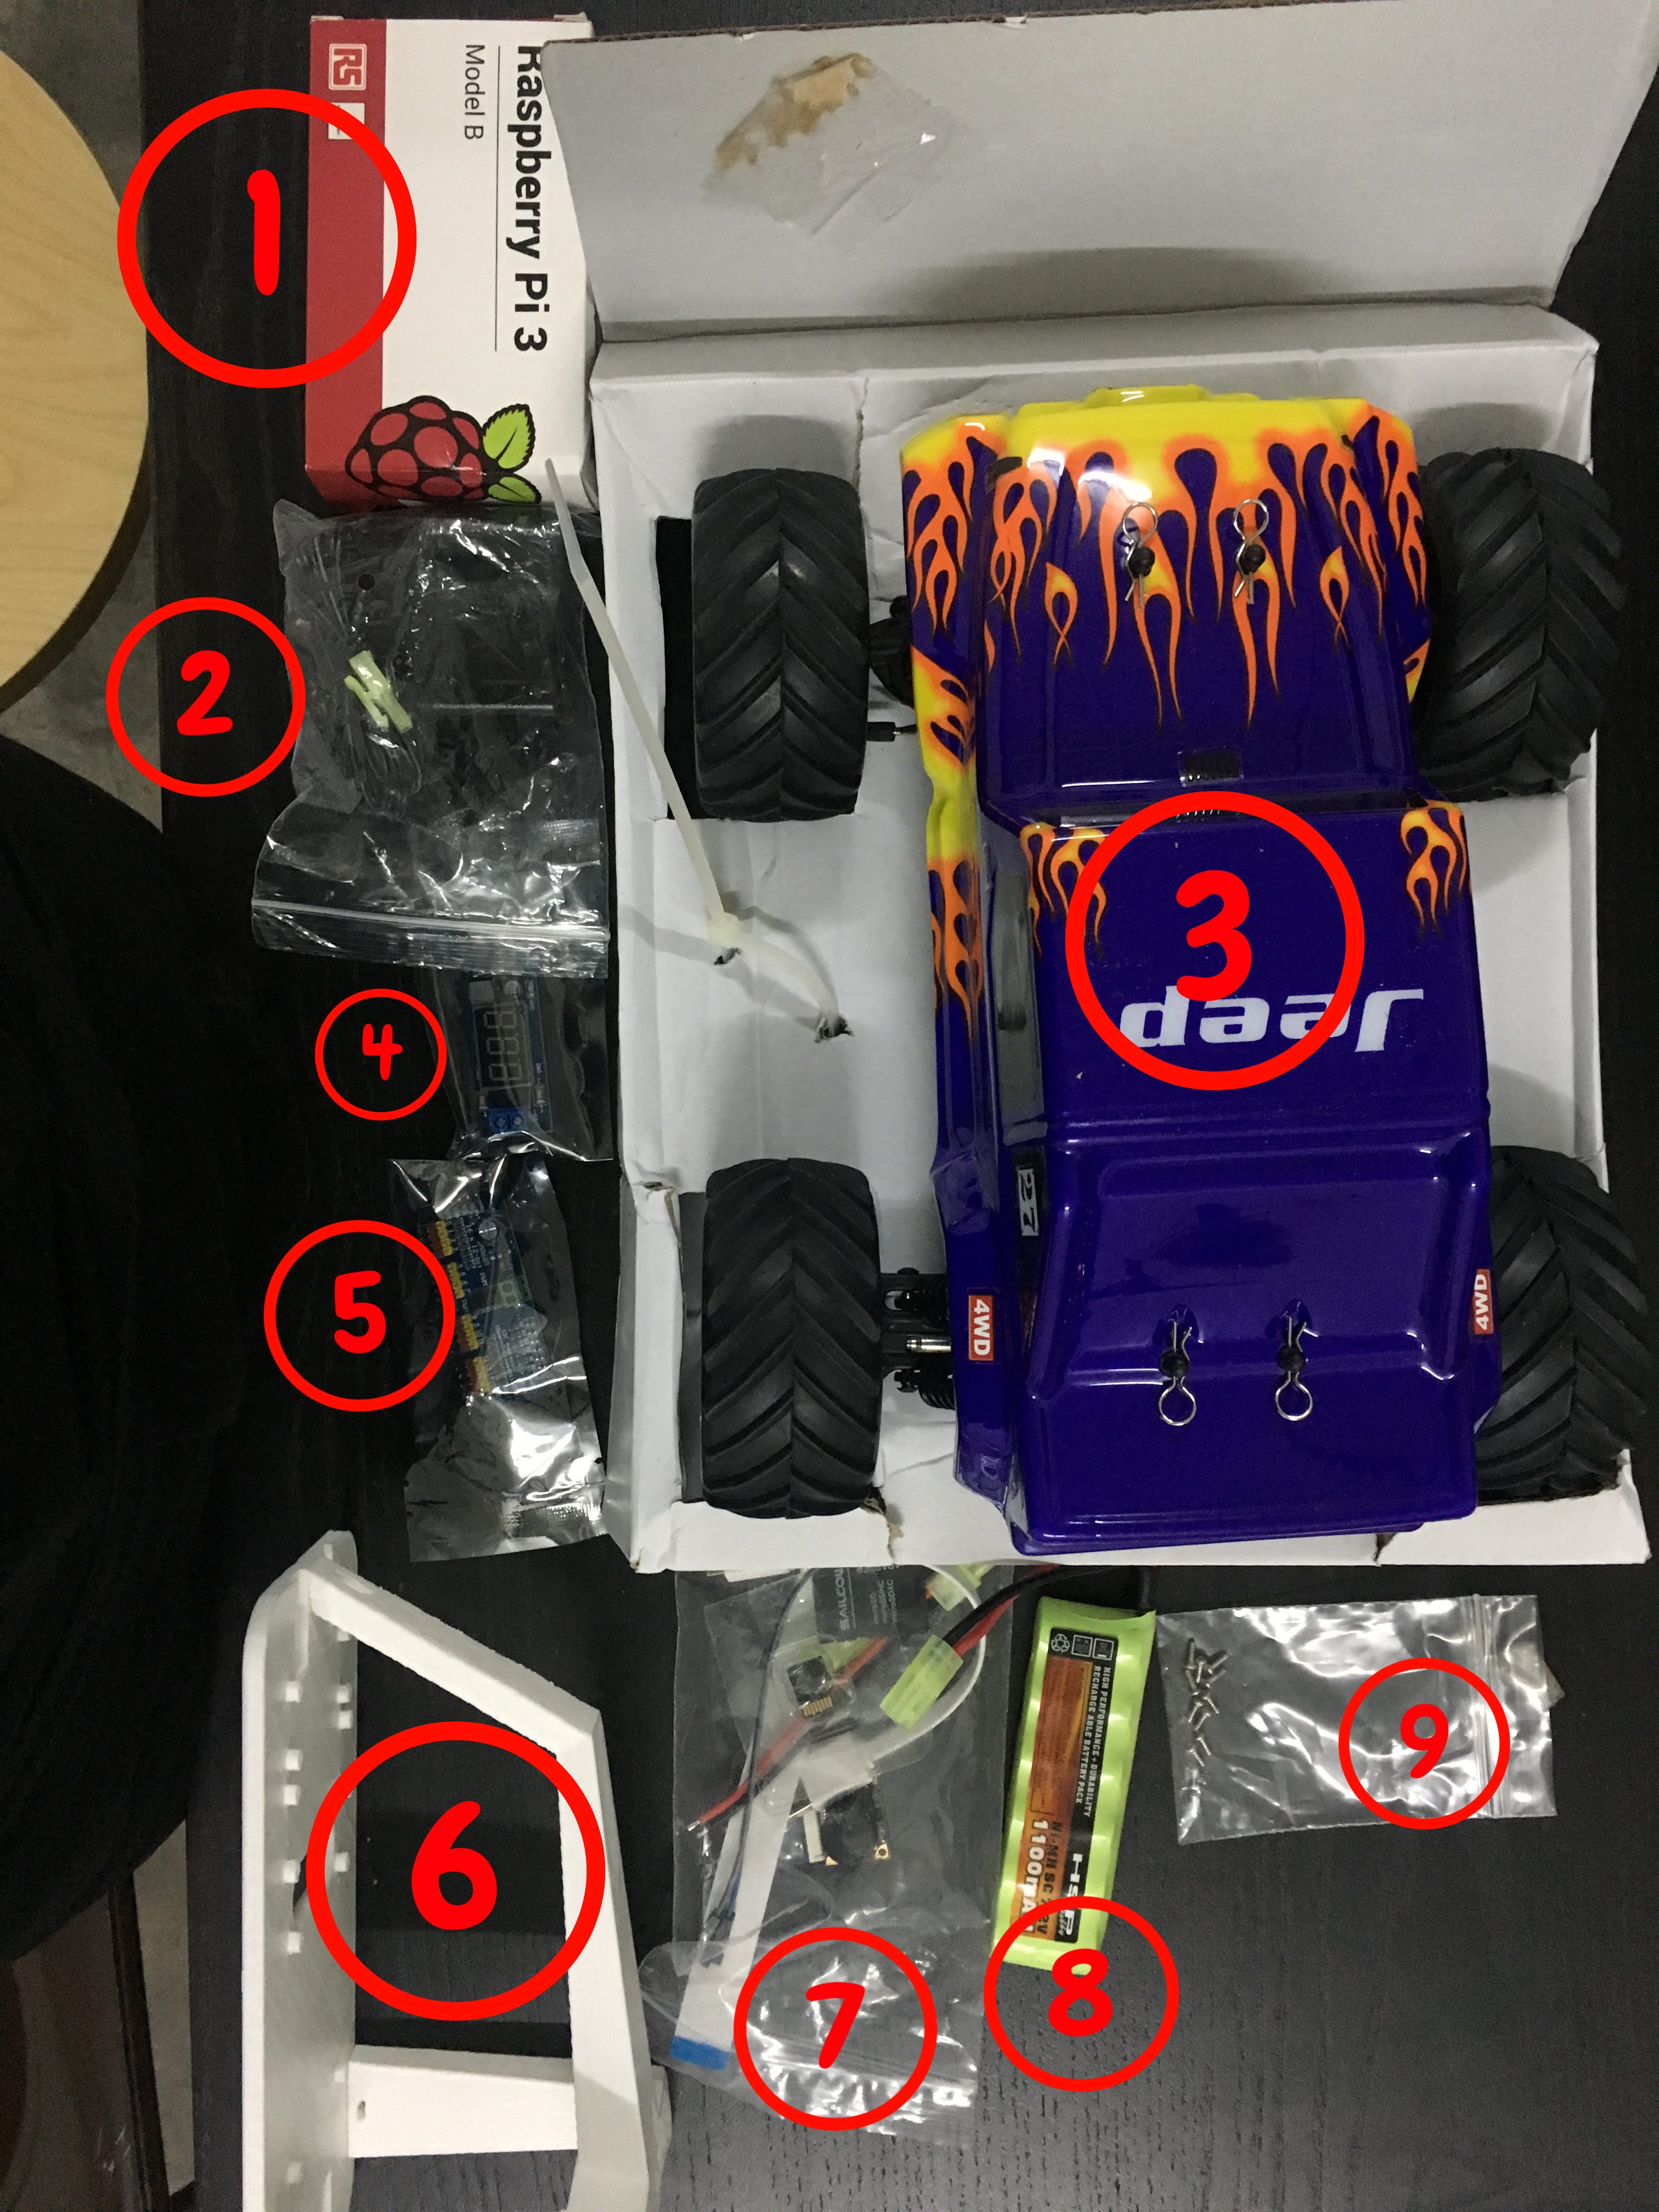
Items received from the full kit
Components
- Raspberry Pi 3 model B 2015 — a bit outdated but it’s not much of a difference from B+ newer models (sufficient for DonkeyCar)
- NiMH Battery Charger
- HSP 94186 Brushed RC Car
- DC-DC 5V/2A Voltage Converter — to power RaspberryPi from NiMH (RC car) batteries, so we don’t need a USB power bank
- Servo Driver PCA9685 — connects the RaspberryPi to ESC and servo for throttle and steering
- 3D printed chassis — mount the components
- Misc components — 16gb Micro SD, SD card adaptor, F-F jumper wire, Wide Angle Camera and power cable splitter
- NiMH battery — 7.2 V 1100mAH
- Screws — M3x12, M2.3x6, M2x6
Assembly
The first thing I did was to screw the 3D printed parts together (they come as two parts).
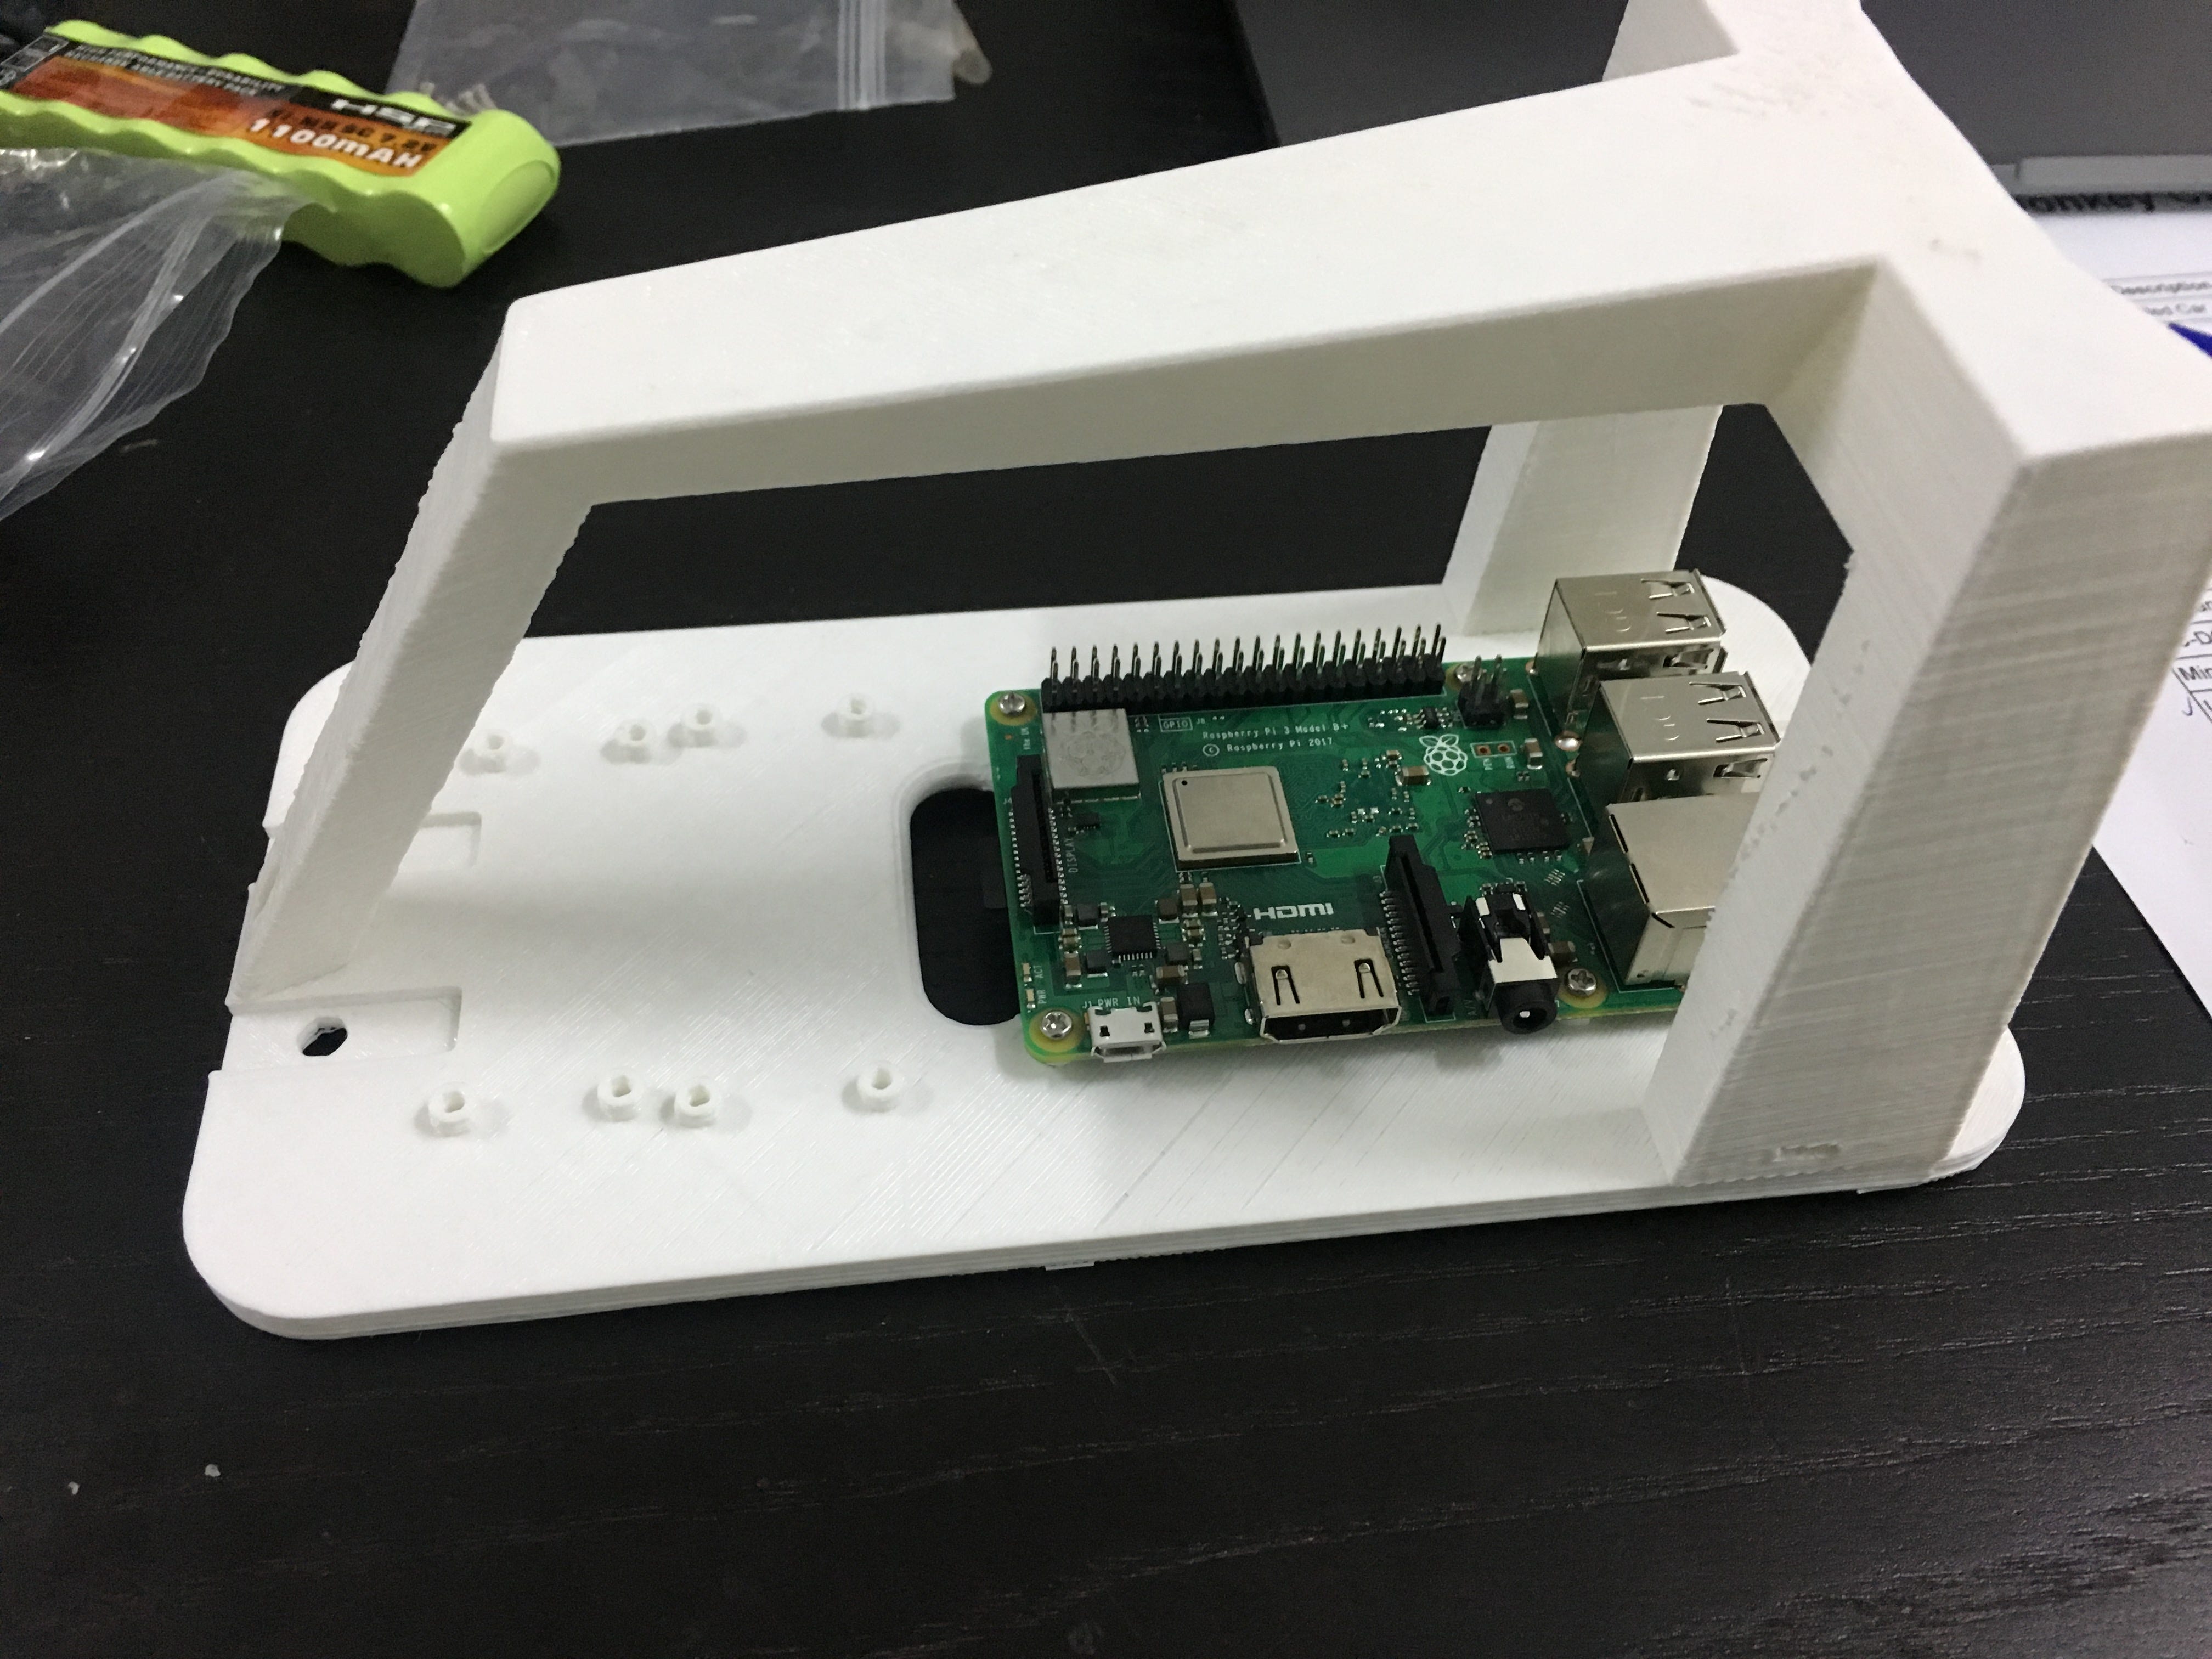
Next, I attached the Raspberry Pi to the chassis. Remember to prepare your micro SD card (it came with flashed DonkeyCar image, but you may need to prep for SSH and the like) and mount it before the next step, as it will be tricky to put in the micro SD card after the mounting the servo driver.
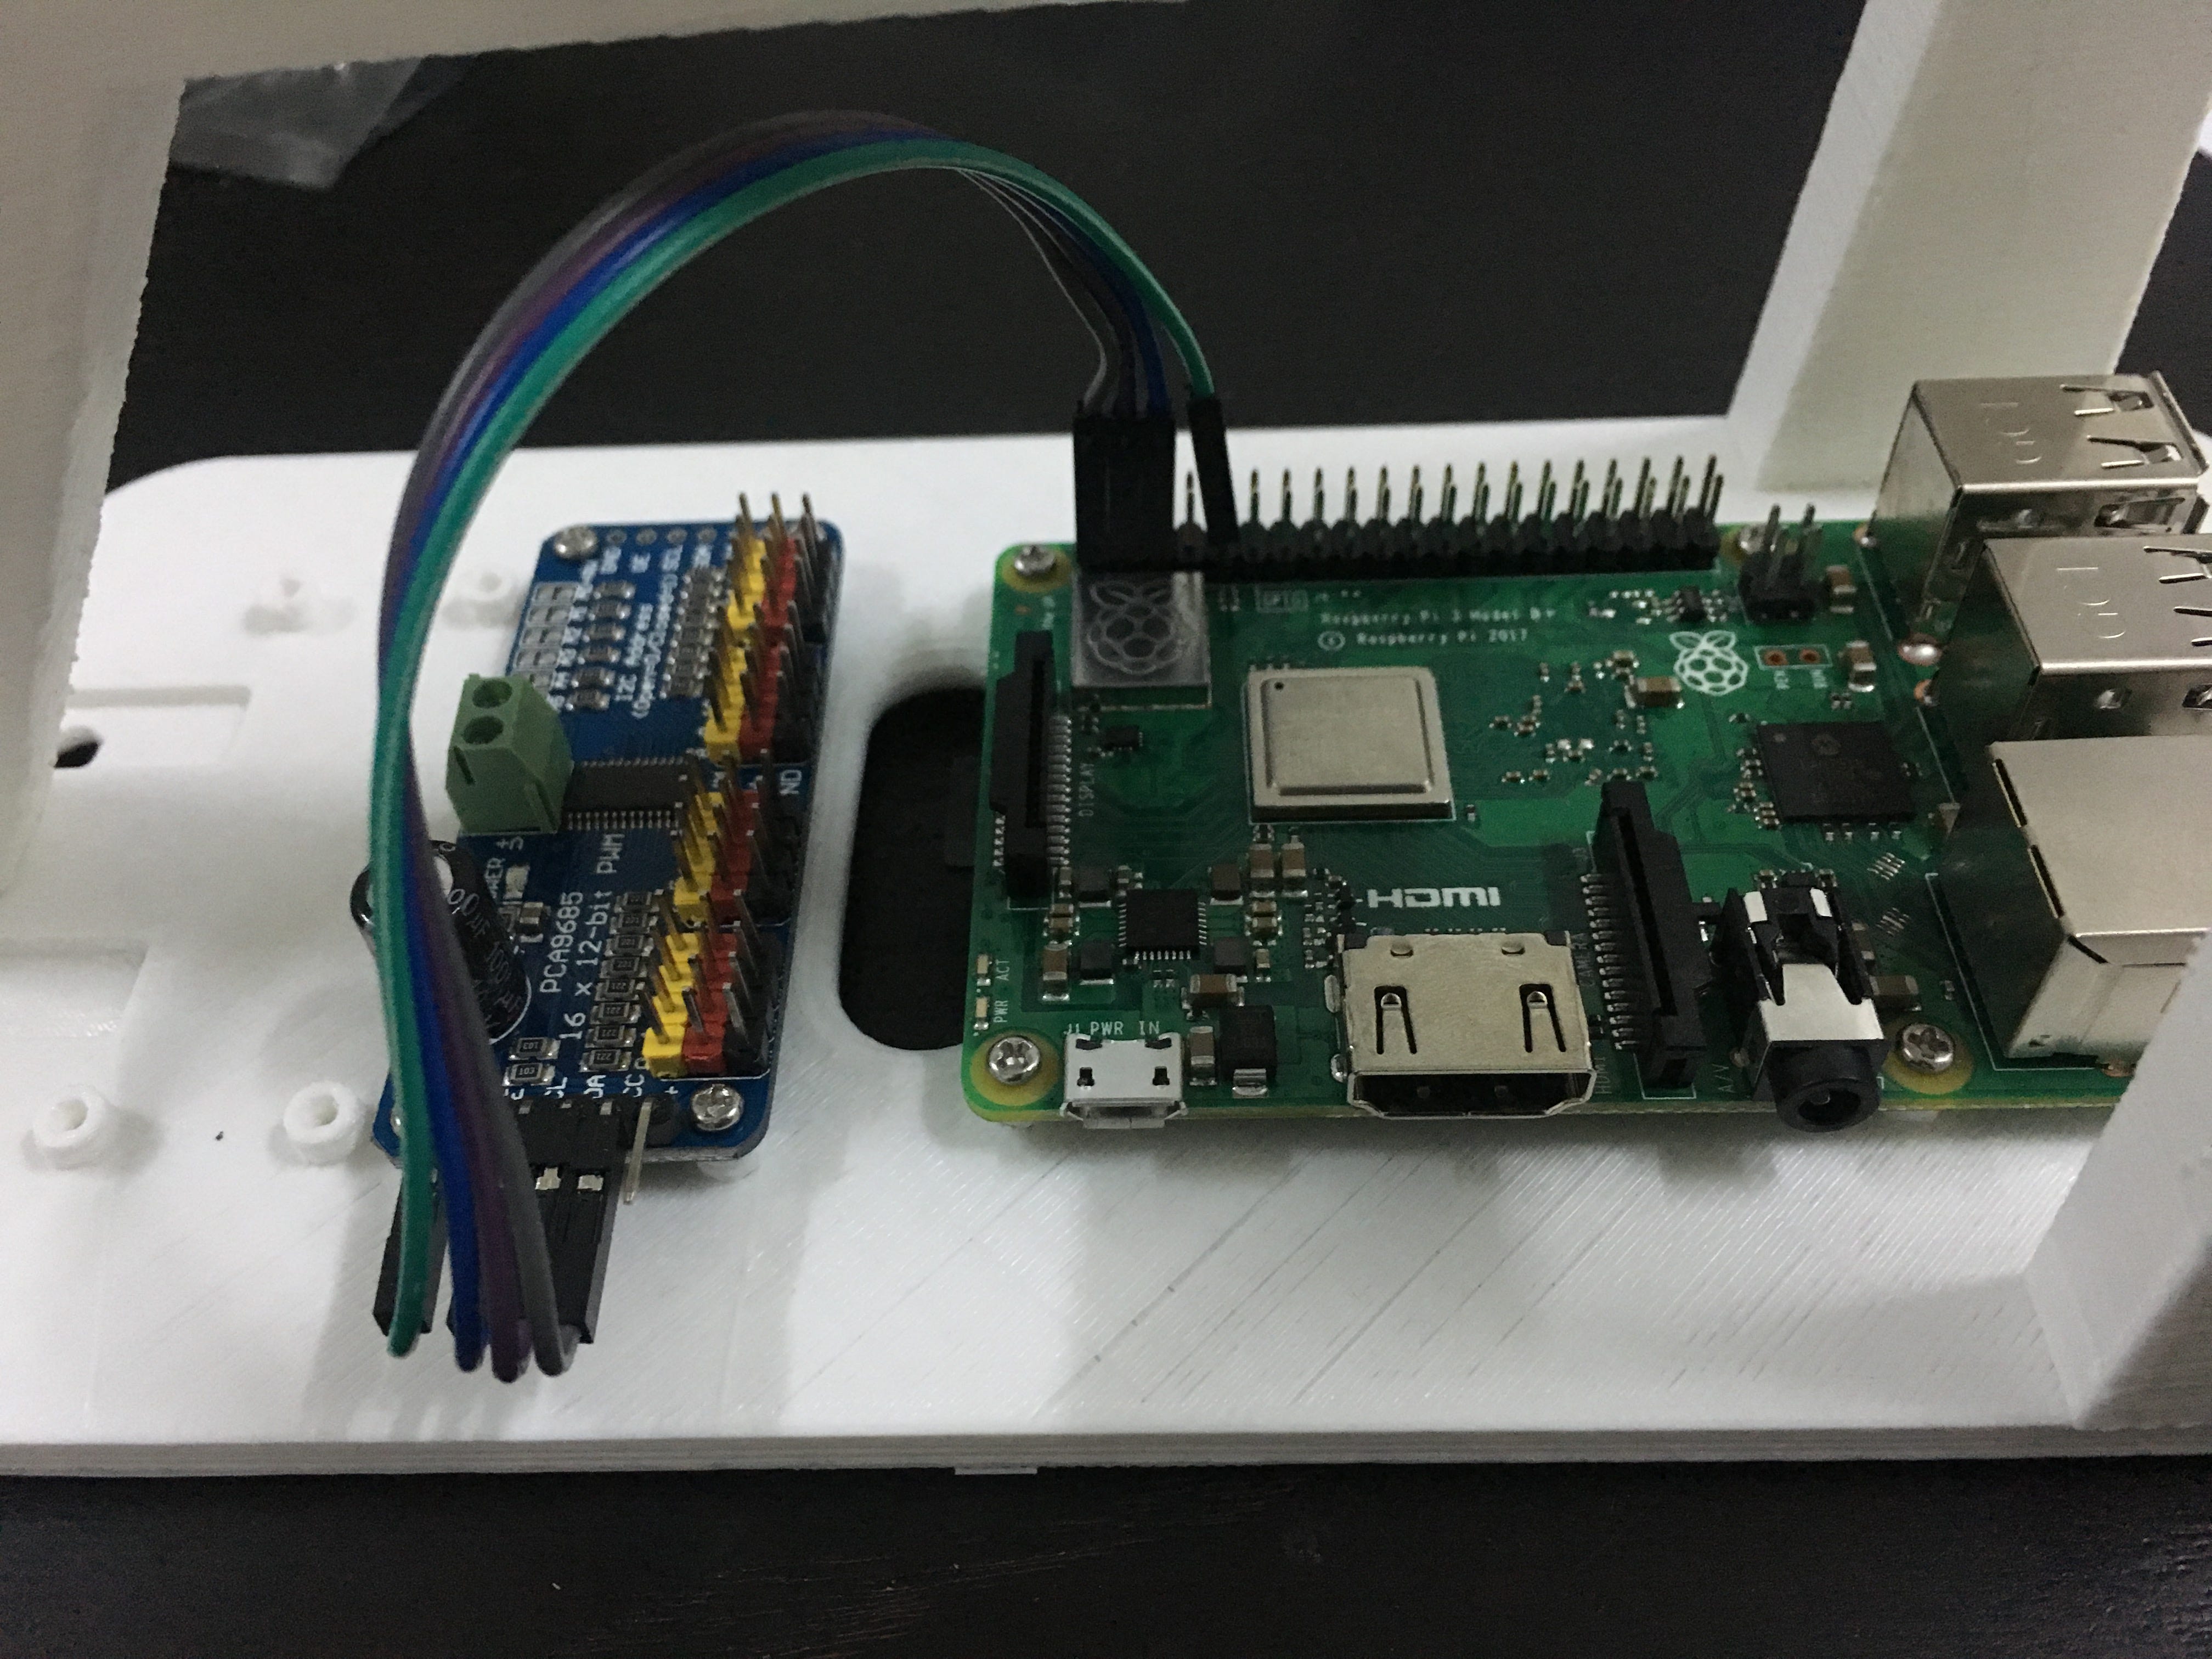
Next, I mounted the servo driver next to the Raspberry Pi. Ensure that the jumper wires are connected correctly (see the docs for in-depth assembly instructions).
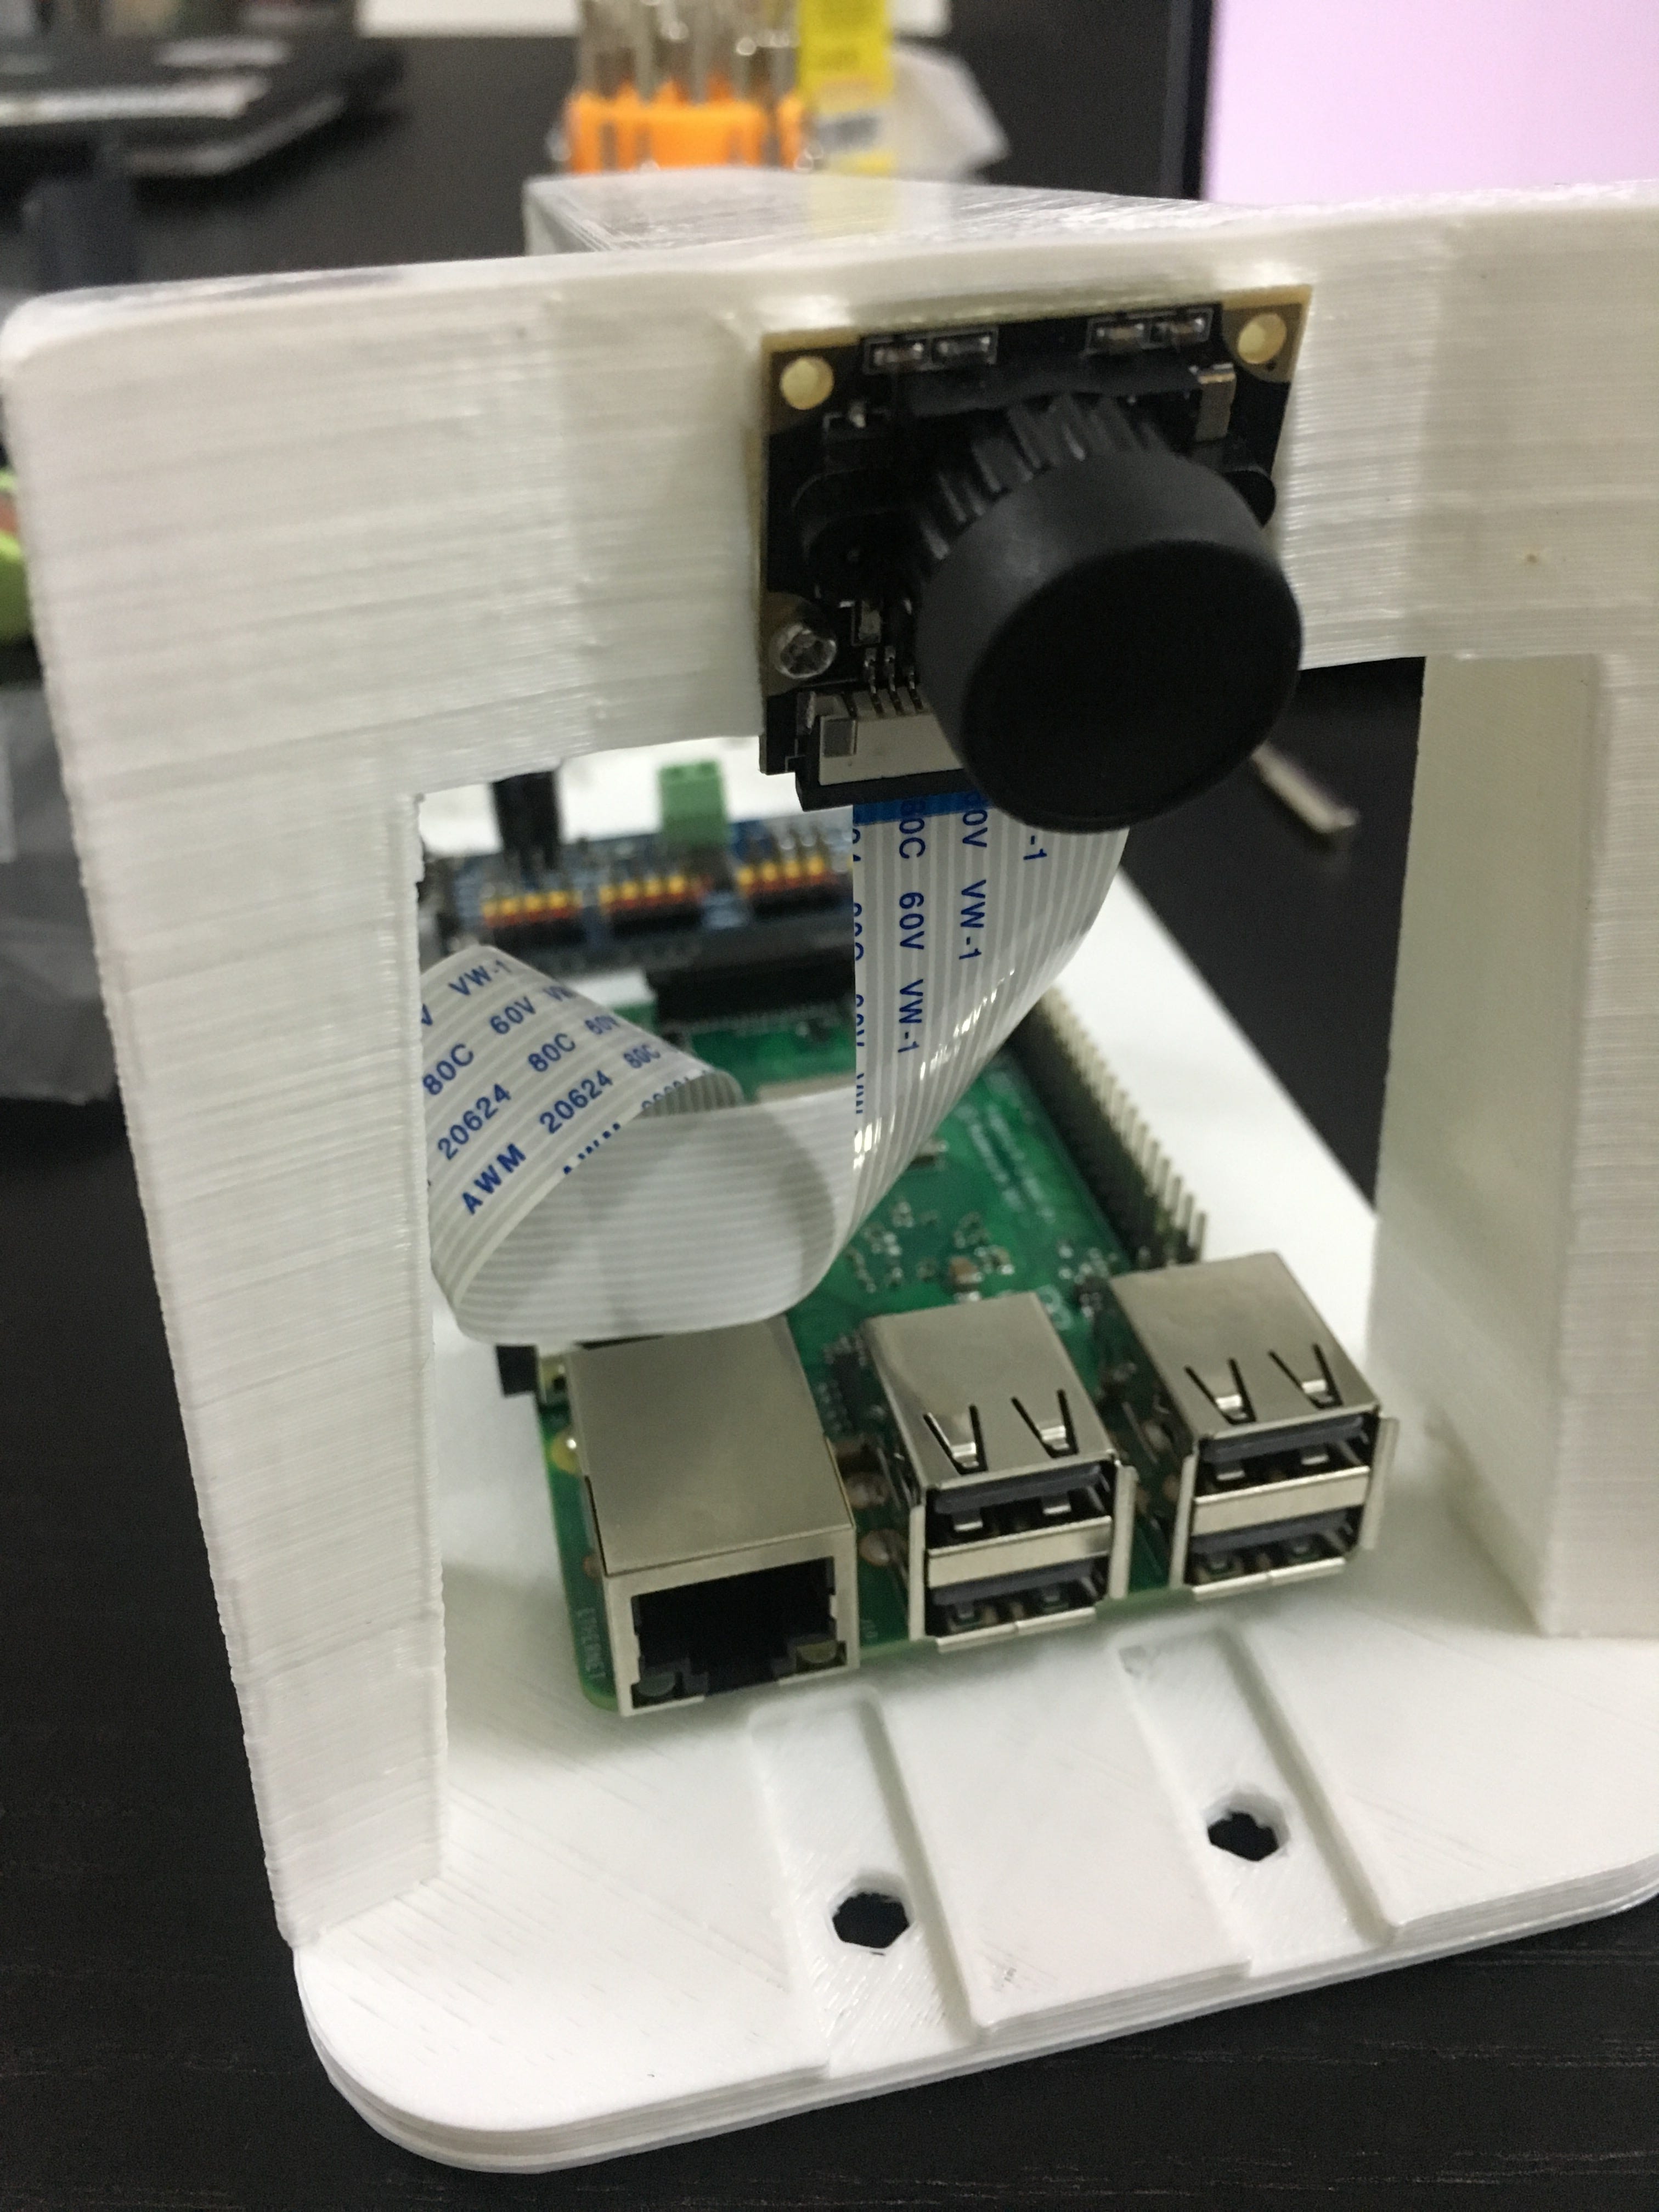
Next, I mounted the wide-angle camera. Note that the cable should be connected in the correct orientation. The camera has adjustable focal length which can be changed by rotating the lens. (Remember to take out the camera cover when in use!)
Next, I assembled the 3D chassis to the body of the car. Note that the shorter 3-pin wire is from the ESC which controls the throttle and connected to pin 0. While the longer 3-pin wire is from the servo which controls the steering and connected to pin 1.
Note: The pin number does not have to be followed strictly. If you decide to change the pins, you have to update the code in config.py.
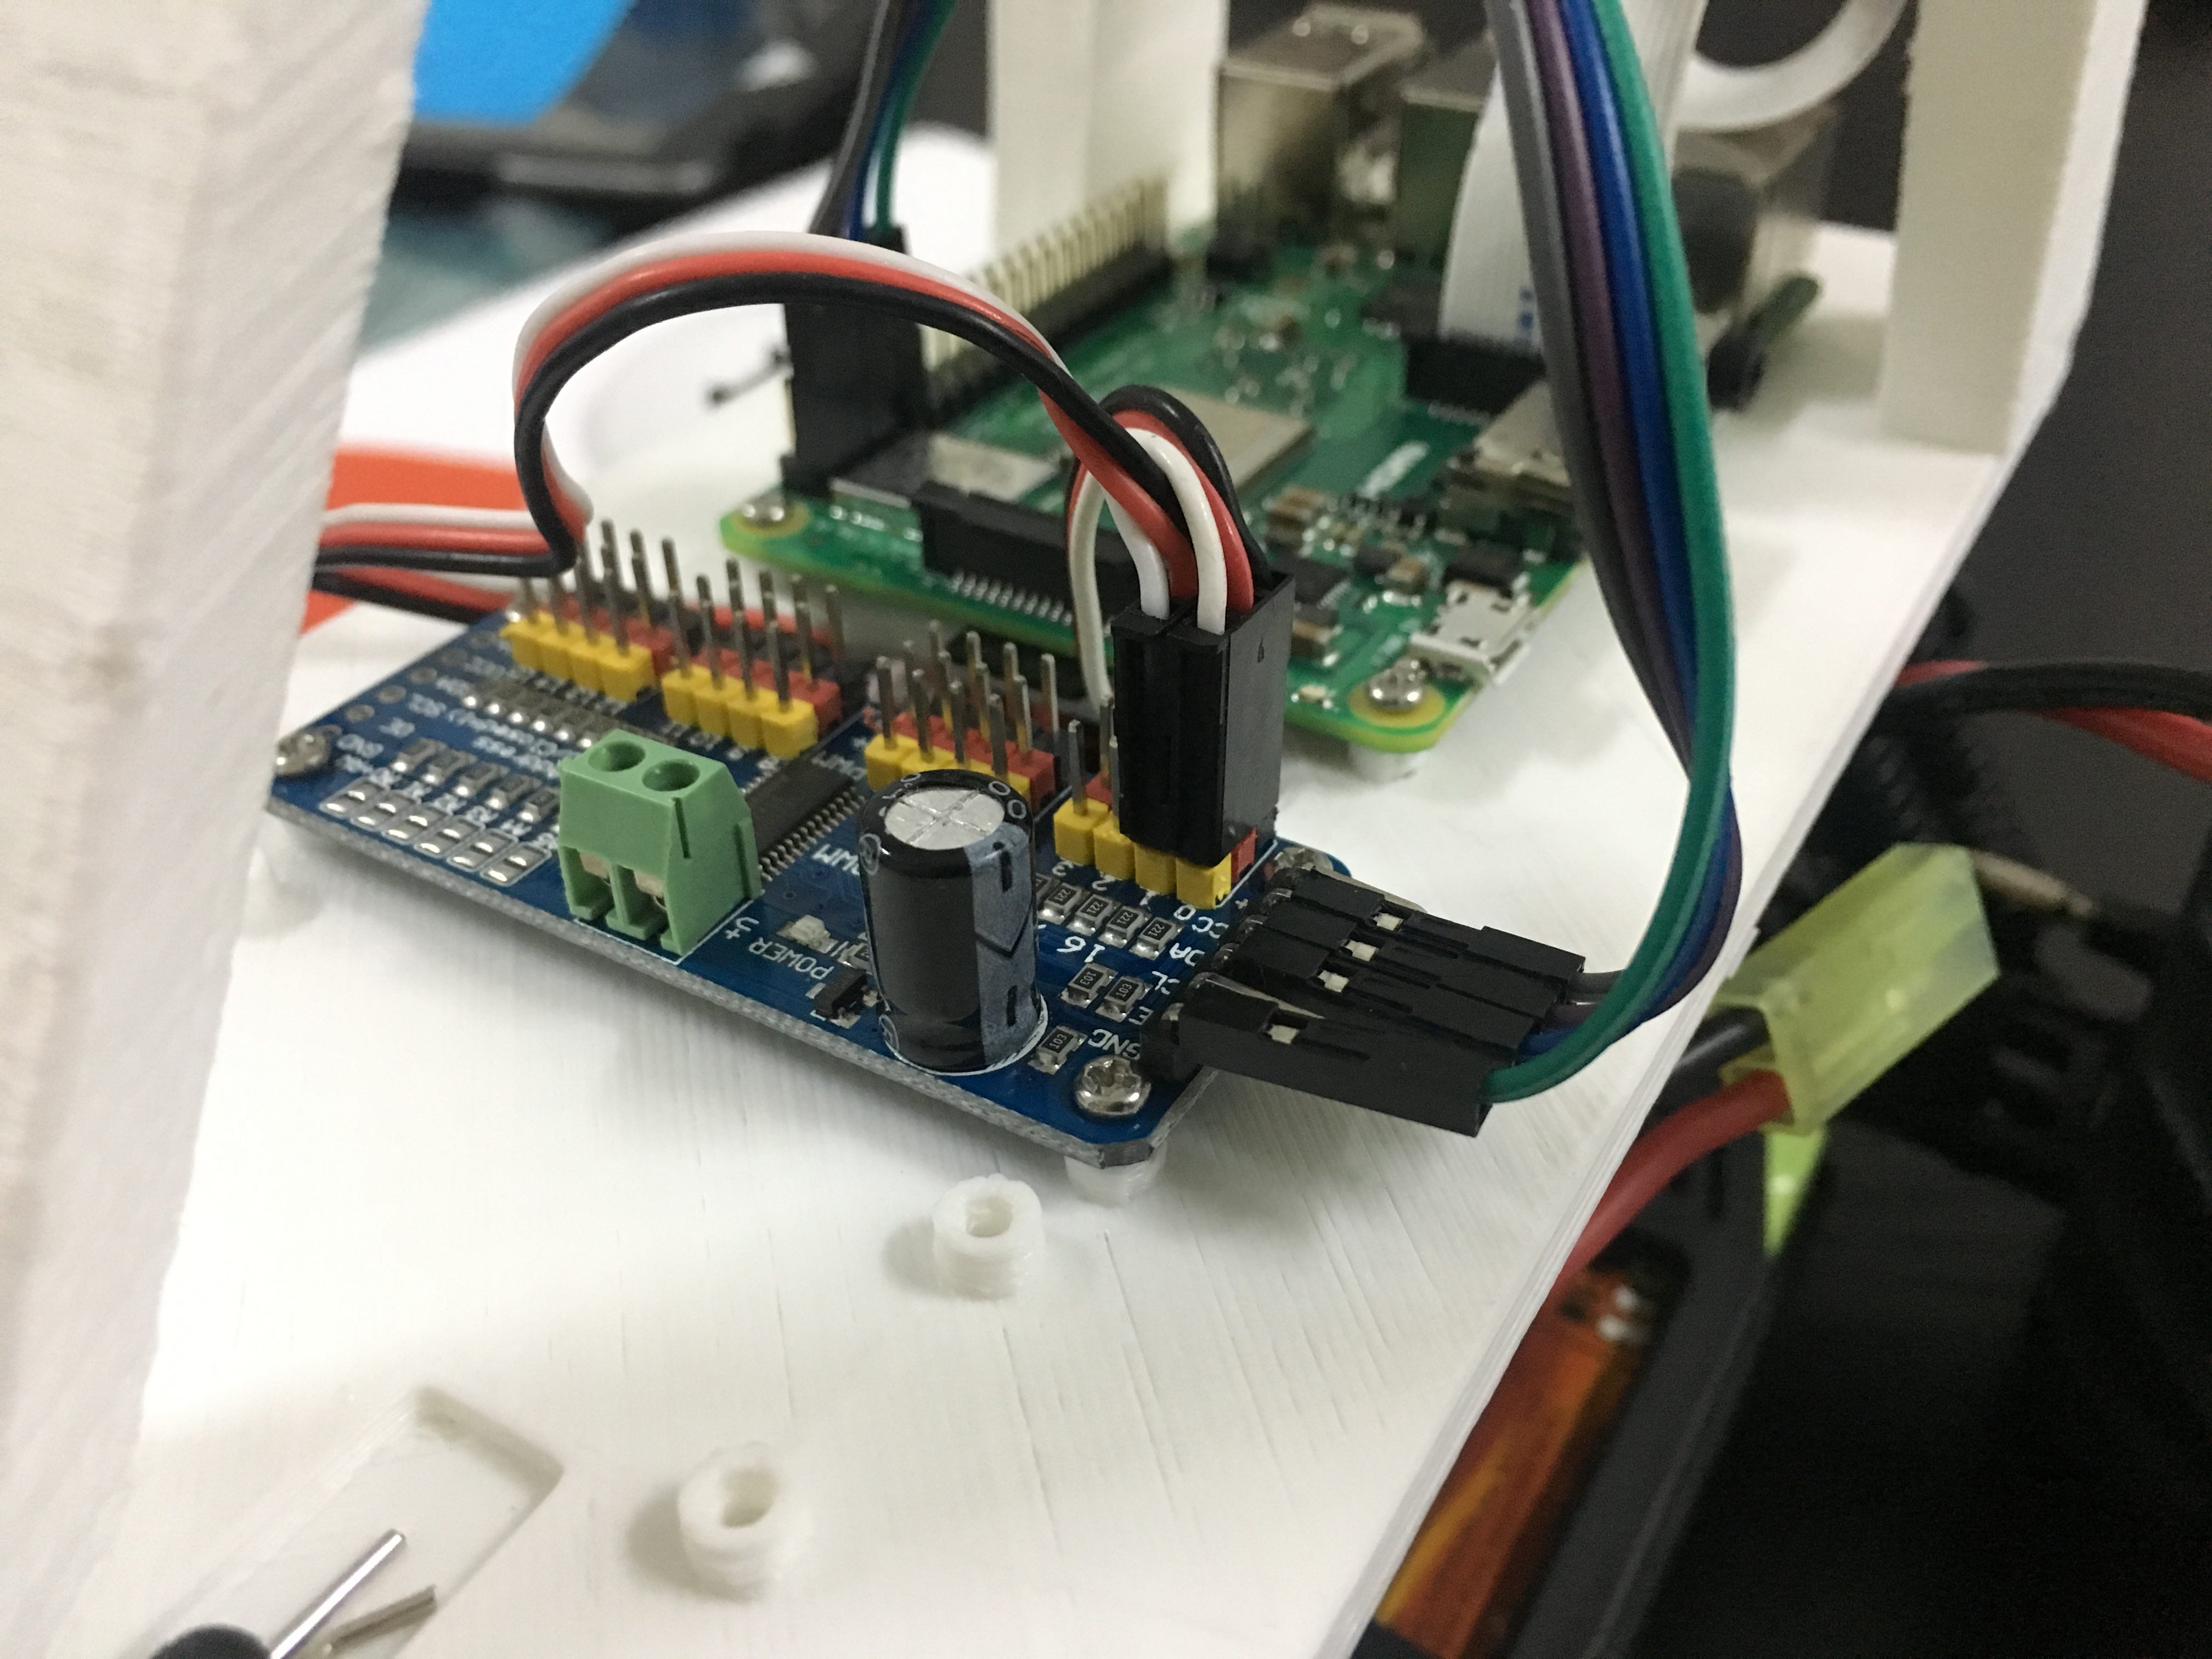
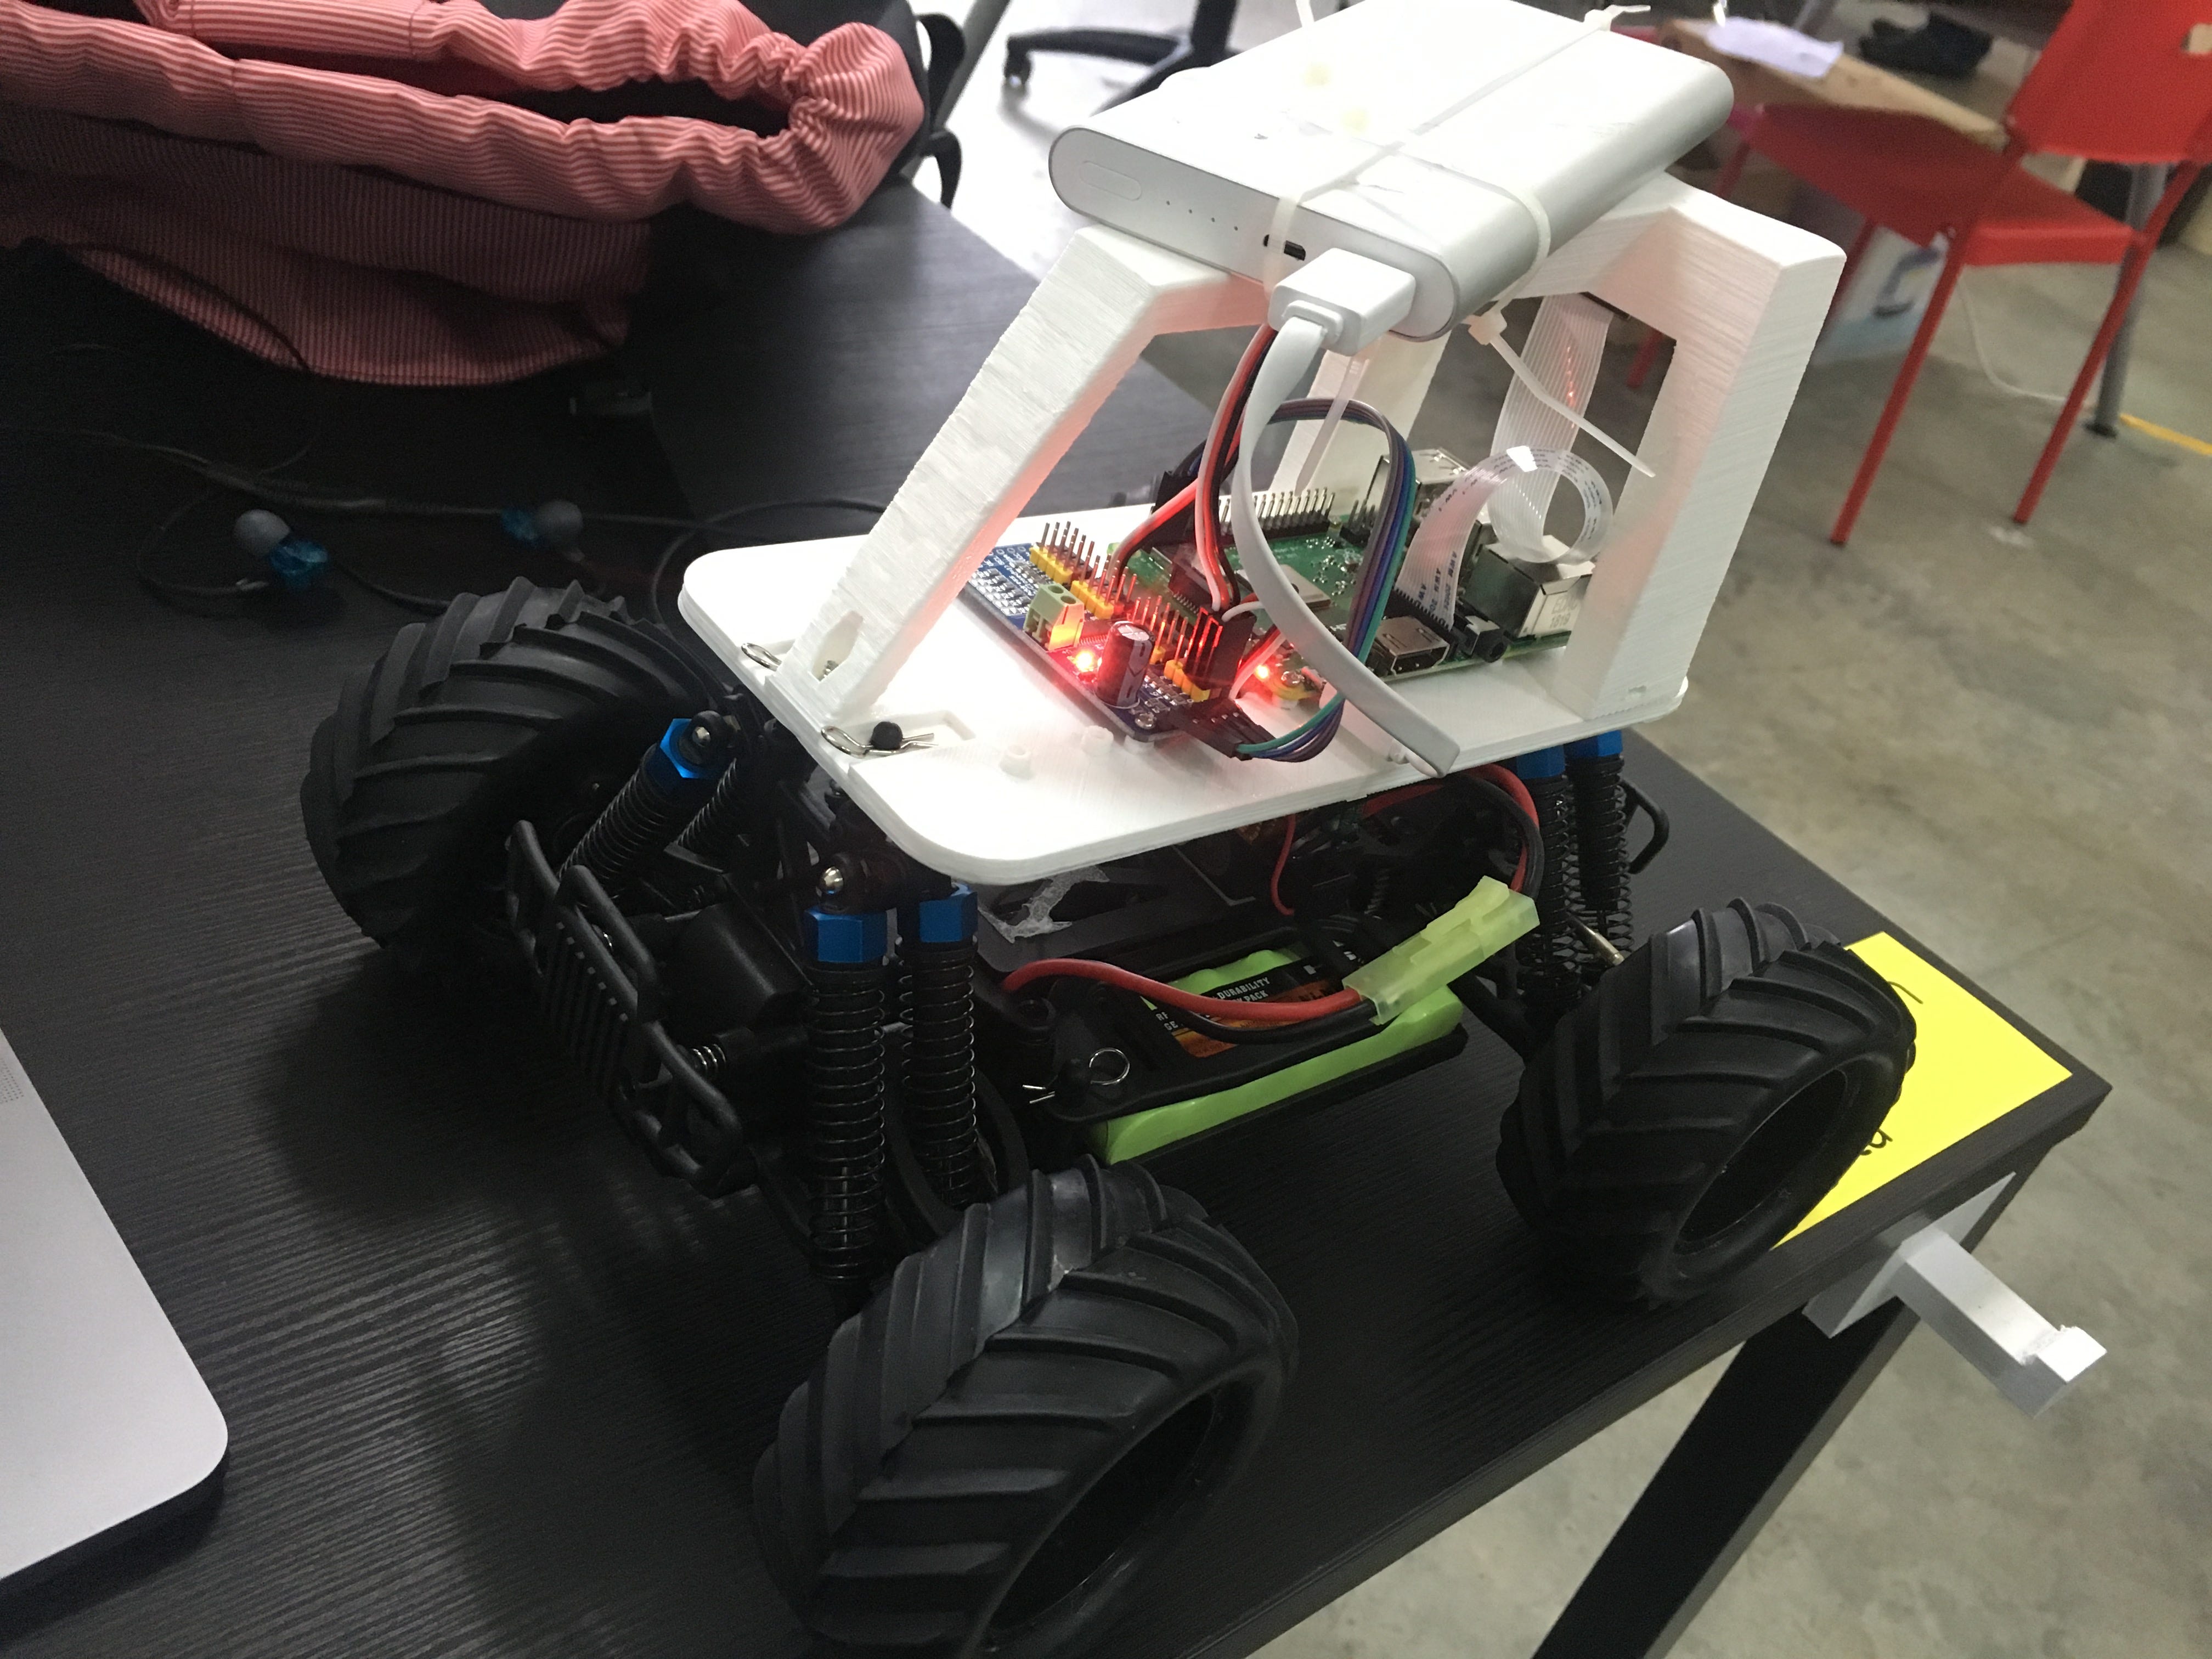
This is my final product. I did not assemble the 5V converter, as I faced some issues with it, and have to wait for a replacement from the seller. Hence, the temporary, not-so-glam zip-tied power bank to power the Raspberry Pi:
Driving the DonkeyCar
One of the problem at this stage was setting up SSH over WiFi, so I could control the Pi remotely from my Mac. I spent almost half a day figuring out the issue, but it turns out, the wpa_supplicant.conf file didn’t translate my quotation mark (“) correctly… manually changing it fixed the issue.
All was set until I reached the calibration stage: I found that the forward throttle was too fast to control, even at the lowest PWM setting of 380. At 379, the jerking motion was very pronounced. Anything lower than that cut off the throttle.
The reverse, however, I was able to get it to run smoothly at a much slower and easy to control speed. Brushed motor should be able to cruise at a much lower speed and I have seen other’s DonkeyCar and they did not behave like that.
The steering was perfect.
Currently, I have tried many suggestions and none of them worked. My guess is that the ESC is faulty or it applies acceleration curve to the forward throttle. I have contacted the seller to report this behaviour but they need time before they can get back to me. Meanwhile, I will try to look out for possible errors and solutions.